Integrating with Card Payment Providers
I already have a merchant account with XXX, can I use it?
It is only possible to use the providers we have integrated with: the payment integrations are complex, as the system must be notified when payments have been made (for example, to automatically deliver digital purchases). It is not possible to easily add new payment providers.
PayPal integration
Head over to My business / E-commerce / Payments, add a PayPal payment processor, and follow the instructions in the interface to retrieve and indicate the Client ID and Secret Key corresponding to your PayPal account.
Don’t forget to disable PayPal’s shipping and tax calculations if you have used them in the past and now prefer to use PhotoDeck’s!
To allow clients to pay without owning or creating a PayPal account, make sure that the PayPal account optional option is enabled in your PayPal account’ Website payment preferences.
Stripe integration
- Open an account with Stripe if you don’t already have one, and sign-in;
- Activate your Stripe account according to their instructions;
- Open the Developers / API keys panel;
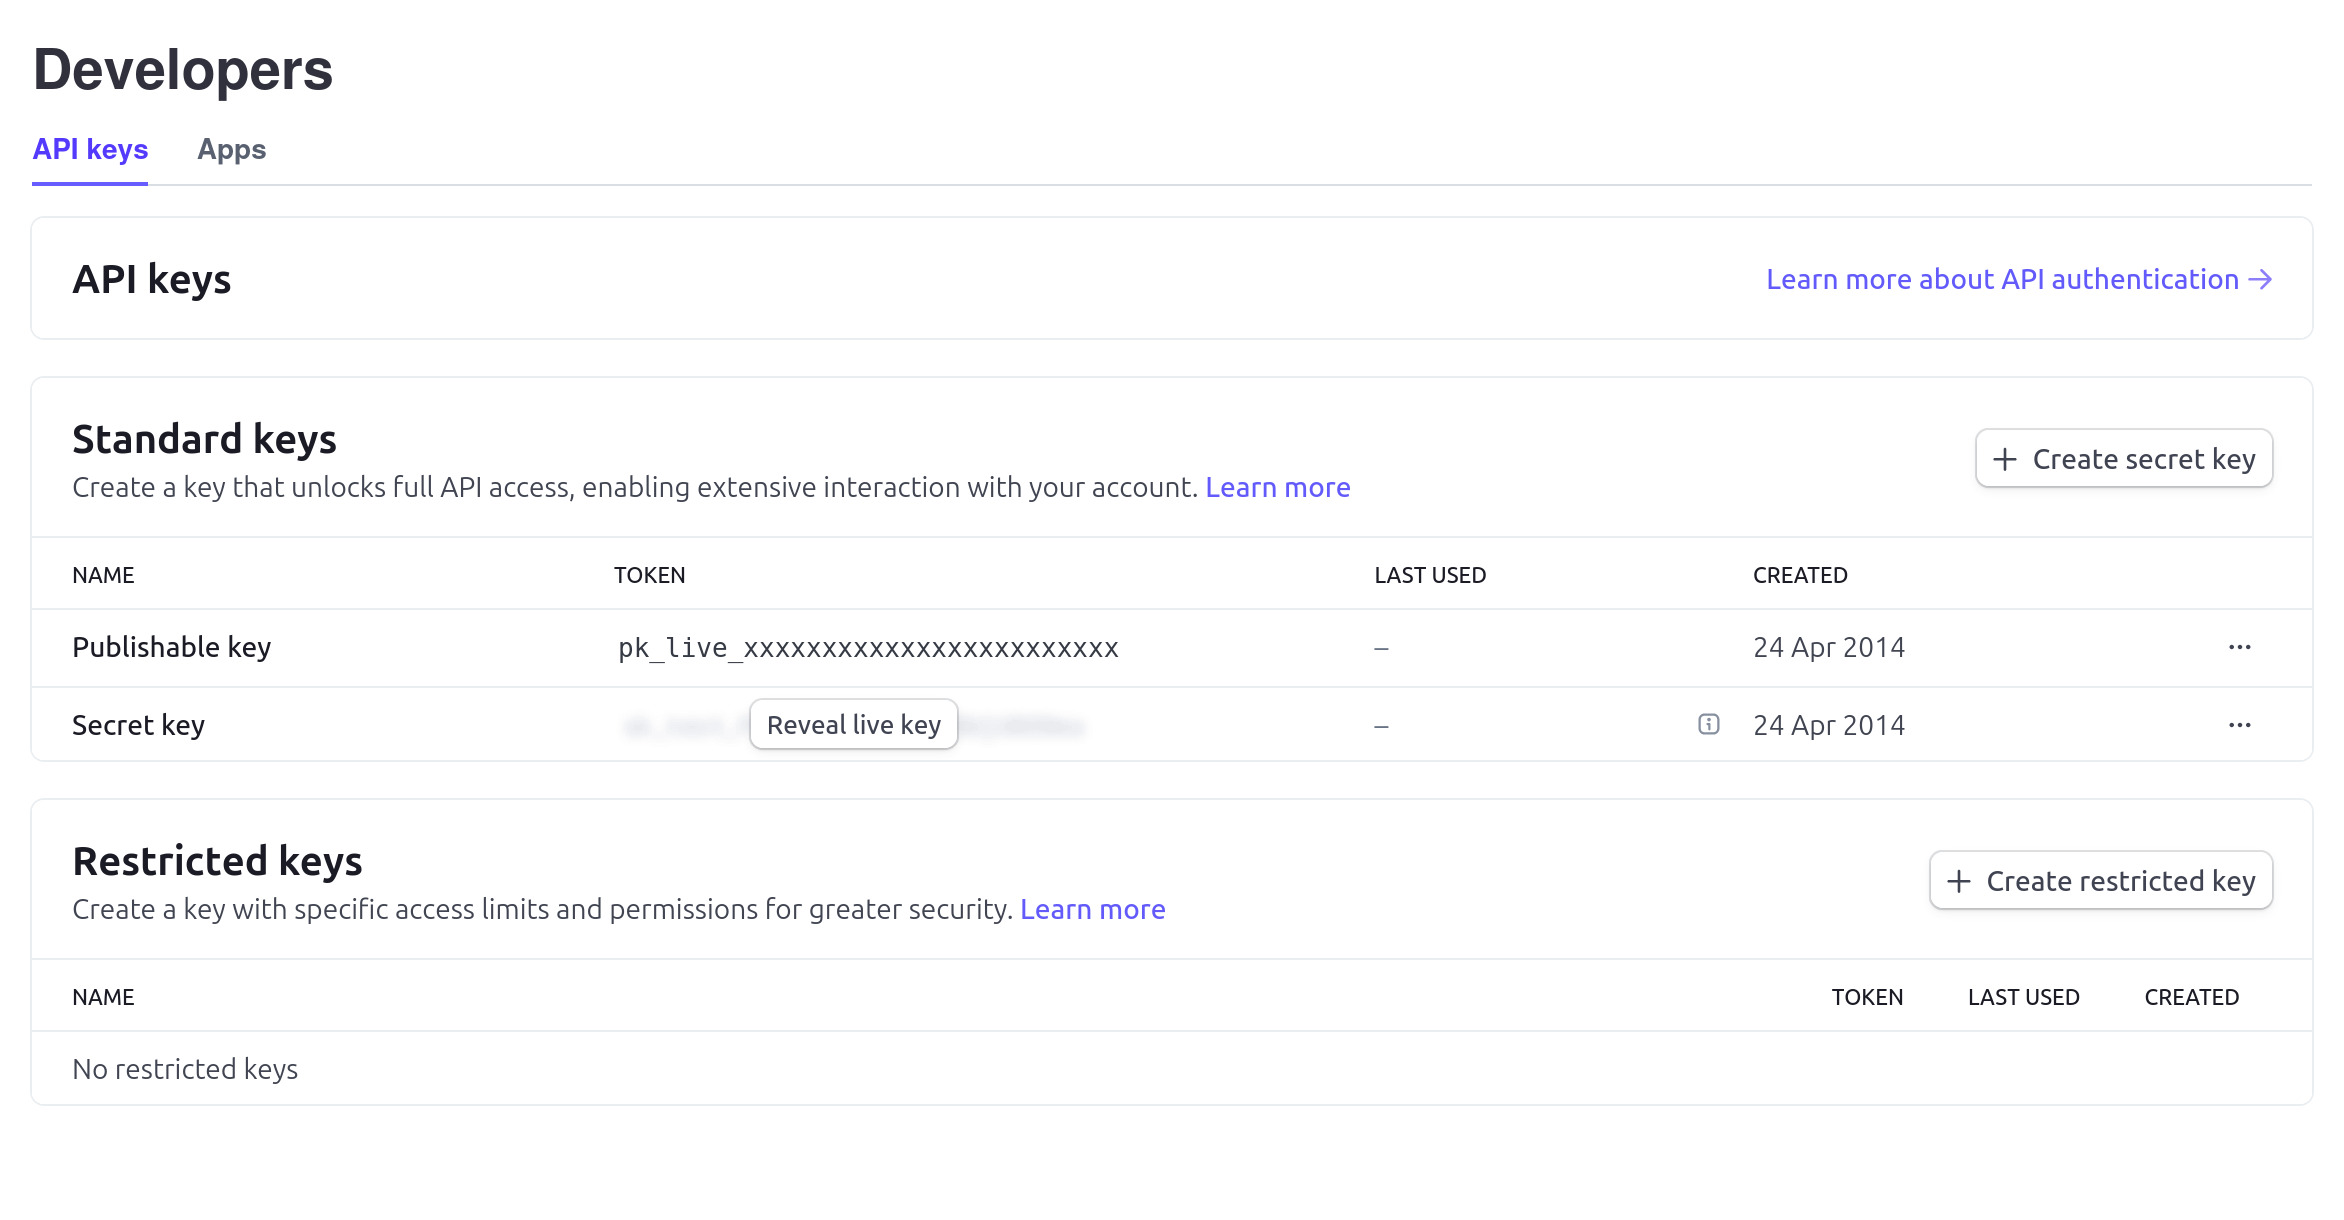
- In a new window, open your PhotoDeck admin space, and under My business / E-commerce / Payments, configure your Stripe integration by copy-pasting the 2 API keys provided by Stripe (secret and publishable);
- In your Stripe account configuration under Developers / Webhooks, create a new Webhook endpoint (a Webhook is what allows Stripe to notify your website when a payment has been made): copy-paste the Webhook URL shown in the PhotoDeck admin space and specify the event types to send (all
payment_intentevents). Click on the Add endpoint button to create the Webhook;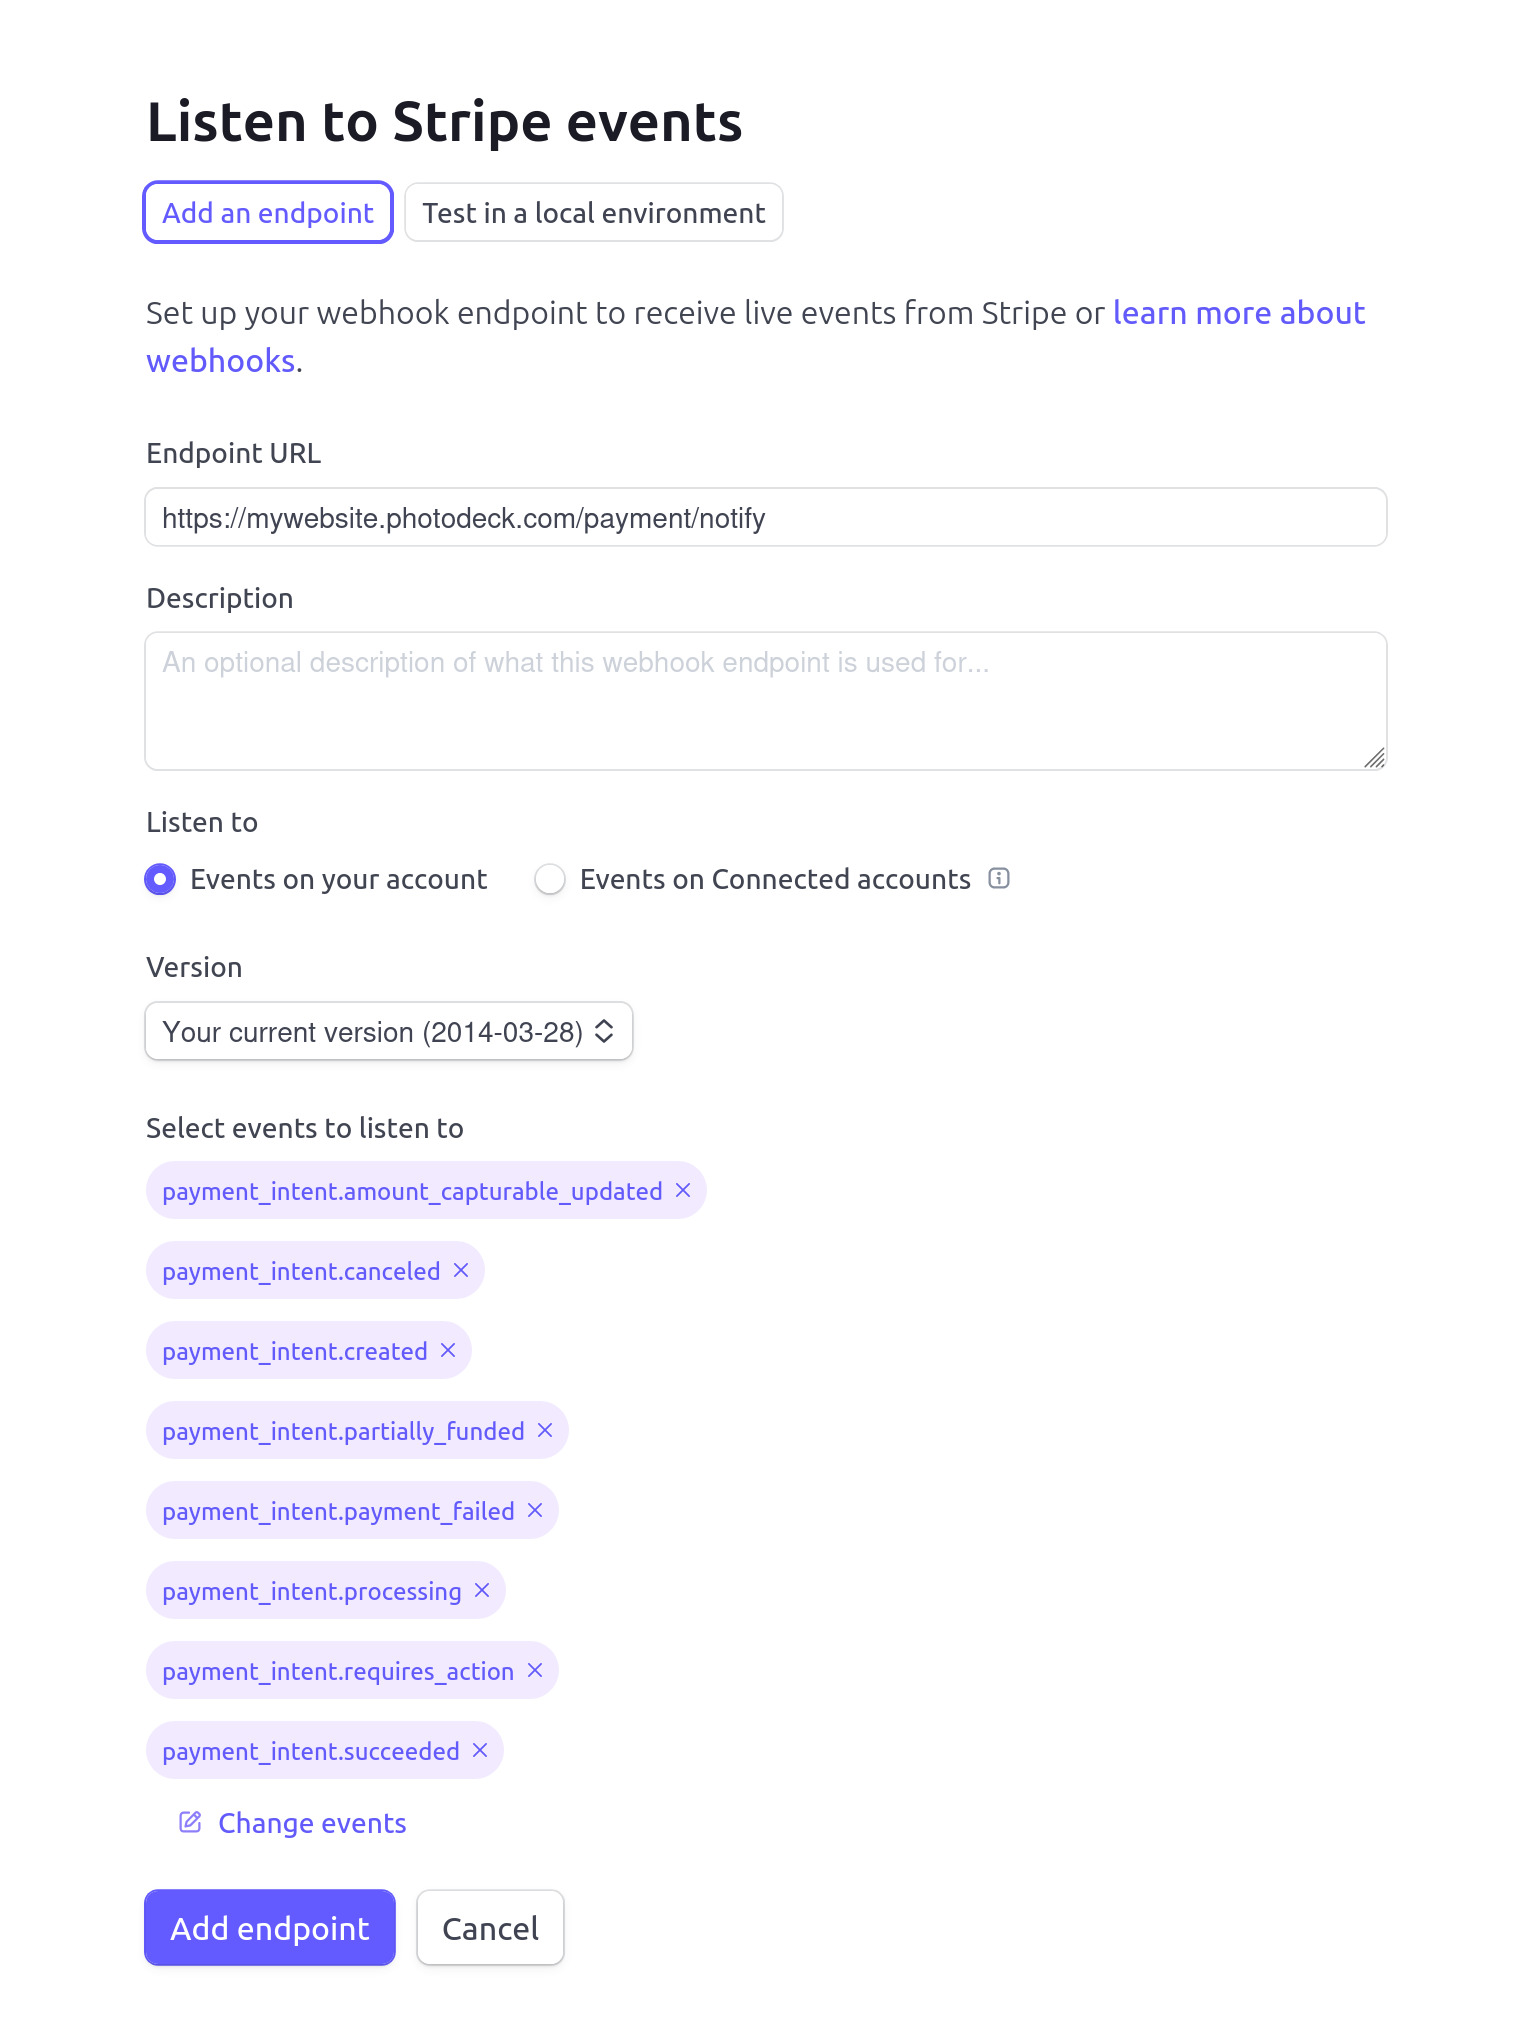
- Click on the Reveal button to retrieve the Webhook Signing secret;

- Copy-paste the Signing key from the previous step into your PhotoDeck configuration;
- Make a test order on your website and verify that you are properly directed to the Stripe payment page;
- When the first real order is placed on your website, if the payment doesn’t appear in your PhotoDeck admin space, check if it appears in Stripe. If it does, double-check your Webhook settings (steps 5 and 6 above).


If you operate in Europe, you may also activate additional payment methods, such as SEPA direct debits or iDEAL in the Netherlands.
Authorize.Net
You need an account with Authorize.Net to access their Server Integration Method (SIM) service. Note that Authorize.Net serves only US clients and only supports US dollars.
- Login to your Merchant Account with Authorize.Net
- Under Account / Transaction Format Settings / Response/Receipt URLs, add to the Default Relay Response URLs the following URLs:
http://[your website URL]/payment/notifyandhttp://[your website URL]/m/payment/notify, for example:http://alexsmith.photodeck.com/payment/notifyandhttp://alexsmith.photodeck.com/m/payment/notify - Under Account / Settings / Security Settings / General Security Settings / API Credential and Keys, note your API Login ID. You should have also received from Authorize.Net a Transaction Key.
- Still in the same Authorize.Net panel, generate a new Signature Key.
- Open your PhotoDeck admin panel in a new window, and configure your Authorize.Net payment integration by copying your API Login ID, your Transaction Key and your Signature Key.
- Activate the payment processor in your PhotoDeck admin panel
- Do a test purchase and verify that the purchase is automatically marked as Paid in your PhotoDeck panel
- Done!
Moneybookers (Skrill)
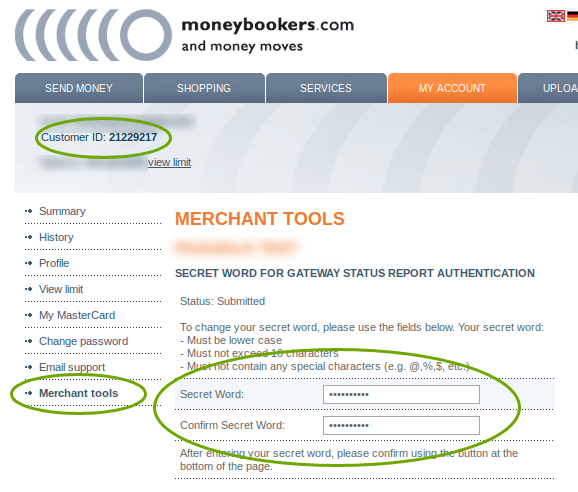
- Connect to your Moneybookers account. Under My Account / Merchant Tools, set your Secret Word to a random string of characters of your choice. This is necessary to make sure that payments are automatically marked as paid on your PhotoDeck website. (If you didn’t use the link above to register and don’t find the Secret Word option, e-mail merchantservices@moneybookers.com to request Merchant Tools to be enabled)
- Under My Account on the Moneybookers website, note your Customer ID.
- In your PhotoDeck admin panel, under My business / E-commerce / Payments, configure your Moneybookers payment integration by copying your Moneybookers login (email address), Customer ID and Secret Word.
- Activate the payment processor in your PhotoDeck admin panel
- Do a test purchase and verify that the purchase is automatically marked as Paid in your PhotoDeck panel
- Done!