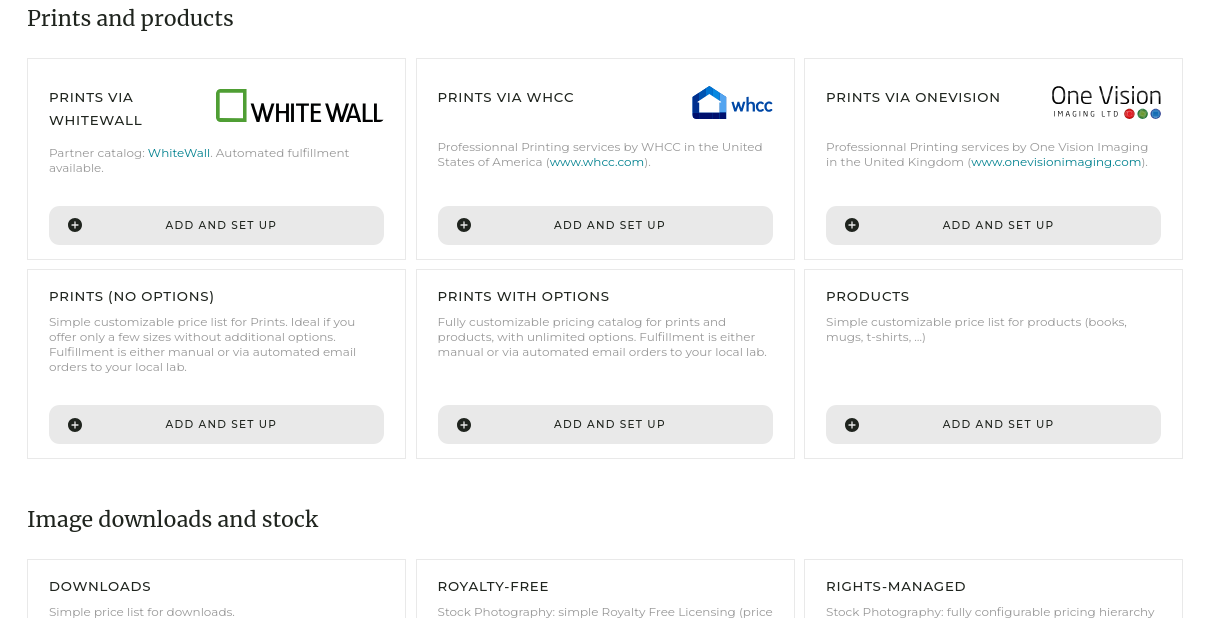
Creating a first pricing profile

Go to My Business / E-Commerce / Products & prices to create a new pricing profile: use one of our example templates, then adjust to taste the options and prices. Start with only a few options initially.

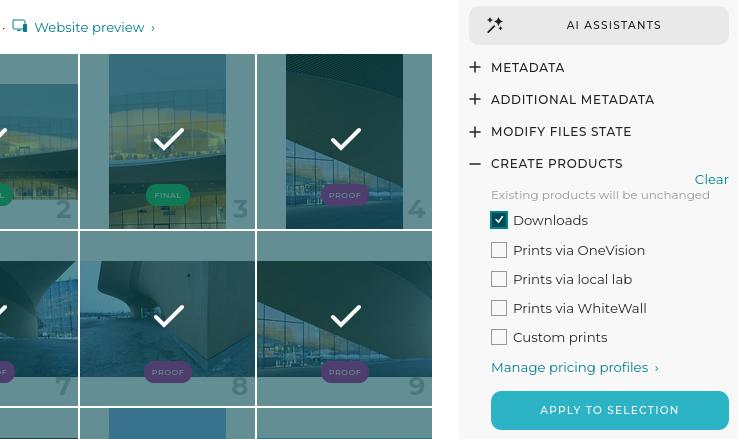
Once your pricing profile is defined, go to My Images & Videos, select the images you wish to sell under that pricing profile, and in the right-hand-side panel, attach the new pricing profile to these images.

On your website, pricing options will then appear for these images.

At this point, we strongly recommend you test the system, putting yourself in the role of a client, to better understand how it works. For clarity, remember to use a different email address for the test client than the one you use to access your PhotoDeck account!

See also

Discount coupons ›
What is a pricing profile? ›
Customizing Download / Royalty-Free price lists ›
Customizing Rights-Managed profiles ›
How do custom quotations work? ›
What is a cart? ›
What happens when a client orders digital images or video clips? ›
Integrating with Card Payment Providers ›
Accepting other forms of payment ›
How are digital images/videos delivered? ›
Defining delivery format of images and videos ›
Specifying delivered files’ names ›
Selling a gallery as individual images, or as a single product ›
Setting up a multi-photographer agency or a creative agency ›
Customizing a partner lab’s catalog ›
Showing products sizes that don’t match image ratios ›
What is a shipping profile? ›
How do custom shipping profiles work? ›
Step-by-step shipping setup ›
Prints fulfillment via your local lab ›
Automated print fulfillment via a partner lab ›
Shipping options for partner lab fulfillment ›
Galleries for private clients: events, portraits, weddings ›
Galleries for professional clients ›