Complete reference manual
Galleries
What is a Gallery?
Galleries are groups of images shown on your website. (Services and applications other than PhotoDeck might also call them “albums”, “folders” or “categories”).
Images must be published in galleries to be visible on the website. You can publish an image to multiple galleries.
Like folders on a hard disk, Galleries are hierarchical: you can create up to 10 levels of sub-galleries.
How should I organize my galleries?
With PhotoDeck, it is possible to create up to 1000 nested sub-galleries under any gallery, including the root gallery. Each gallery can contain up to 50000 media.
For maximum flexibility and ease of management, you should organize your galleries like you would organize folders on your computer, creating a “category” of galleries for each type of galleries you will create.
Even if you can change the structure later on, it is advisable to do it right initially, especially if search engines (Google) are important to you: changing the structure might affect individual galleries’ URLs.
If you plan to use PhotoDeck for a single purpose (for example, portfolio display or stock), you can skip this step. But if you feel you even might use PhotoDeck for multiple purposes in the future (e.g. public galleries AND protected client galleries), we recommend to create the proper structure upfront.
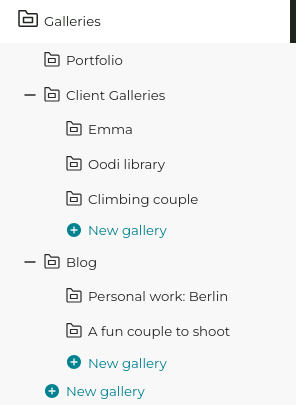
Create the first-level galleries on your site
Here are a few important examples - you don’t need to create them all at once:
- Portfolio (use the Portfolio gallery preset)
- Client galleries (use the Private gallery with general password preset. This section will be hidden on your website.)
- Archive / Stock / Fine-art prints… (use the Public gallery or gallery protected by a parent gallery preset)
- Blog (use the Blog preset)
Note that when a gallery is empty, it is not visible on your website.
Gallery Presets and default settings for new galleries
A key promise of PhotoDeck is that your website can be multipurpose. You can combine a portfolio, a client proofing area, ecommerce archives, and even a blog on the same website. Naturally, the presentation of the images and features vary depending on the purpose.
So when you create a new gallery, we present you with a few presets to speed up your workflow. Pick the preset closest to what you need, and if required, you can subsequently adjust the settings once the gallery is created. (You can change all settings at any time).
If you often create galleries with the same settings, we highly recommend you use the Same settings as: preset option. This will initialize the new gallery with the same settings as the chosen gallery and help you save time. You can even create empty “template galleries” to save default settings for new galleries.
| Preset | Display style | Access settings |
|---|---|---|
| Public gallery or gallery protected by a parent gallery For standard, public galleries that balance functionality with aesthetics (e.g. archive or ecommerce galleries) | “Standard” display style. | The gallery is NOT hidden, no free download allowed. The gallery inherites from authorizations and protections potentially set on parent galleries. |
| Portfolio gallery Public gallery with Portfolio display style. Ideal for portfolio displays. | “Portfolio” display style. | The gallery is NOT hidden, no free download allowed. |
| Private gallery with general password Same as archive/ecommerce gallery, but with a general password. Ideal for private ecommerce galleries. | “Standard” display style. | General password required. No free download allowed. |
| Protected gallery for professional clients Perfect to send high-res images to a client | “Client gallery” display style. | The gallery is hidden. You need to give individual clients access to the gallery via the gallery’s access settings or the Send by email panel. |
| Protected proof-retouch-deliver gallery Recommended when working with professional clients, and when the client must select images before their final versions can be prepared and delivered. | “Client gallery” display style. | The gallery is hidden. The client can order high-res images for free but not download them until you set the files in FINAL state and deliver the order. You need to give individual clients access to the gallery via the gallery’s access settings or the Send by email panel. |
Gallery Display Styles: controlling how images are displayed
Gallery styles allow you to display images and galleries in a different way, according to each gallery’s purpose.
A gallery style applies to all galleries using that style.
Gallery display styles make it easy to change the way galleries and invididual images/videos/documents are displayed on your website. They let you for example:
- Choose whether to display or remove / hide the image / video title and information under the preview, or behind an Info button ;
- Display or hide certain metadata information in the galleries: title, file name, shooting date, author, copyright, PROOF/FINAL state, etc…
- Change the size / quality / resolution of images and videos displayed on your website ;
- Change the size and positioning of thumbnails ;
- Let galleries open on thumbnails or on their first image ;
- Let galleries be viewed as slideshows ;
- Hide / remove certain components, like the Search ;
- Show or remove the share button in public galleries ;
- Set how many thumbnails are displayed per page ;
- …
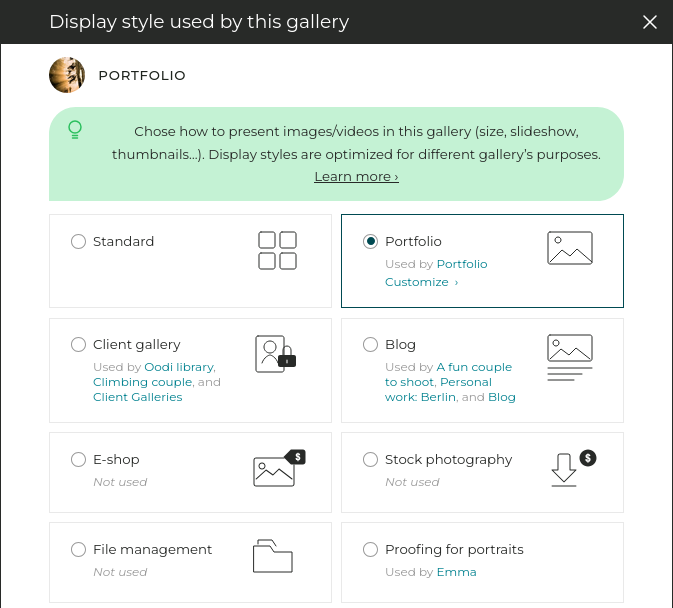
To change the Display Style used by a gallery, open that gallery under My images & videos, then click on the link displaying the current display style in use, located right below the gallery title.
Default gallery display styles
Each theme includes the following default display styles:
| Style | What for? | What it does |
|---|---|---|
| Standard | General-purpose style | Somewhere between the Portfolio and Client gallery styles, good compromise between usability and aesthetics. |
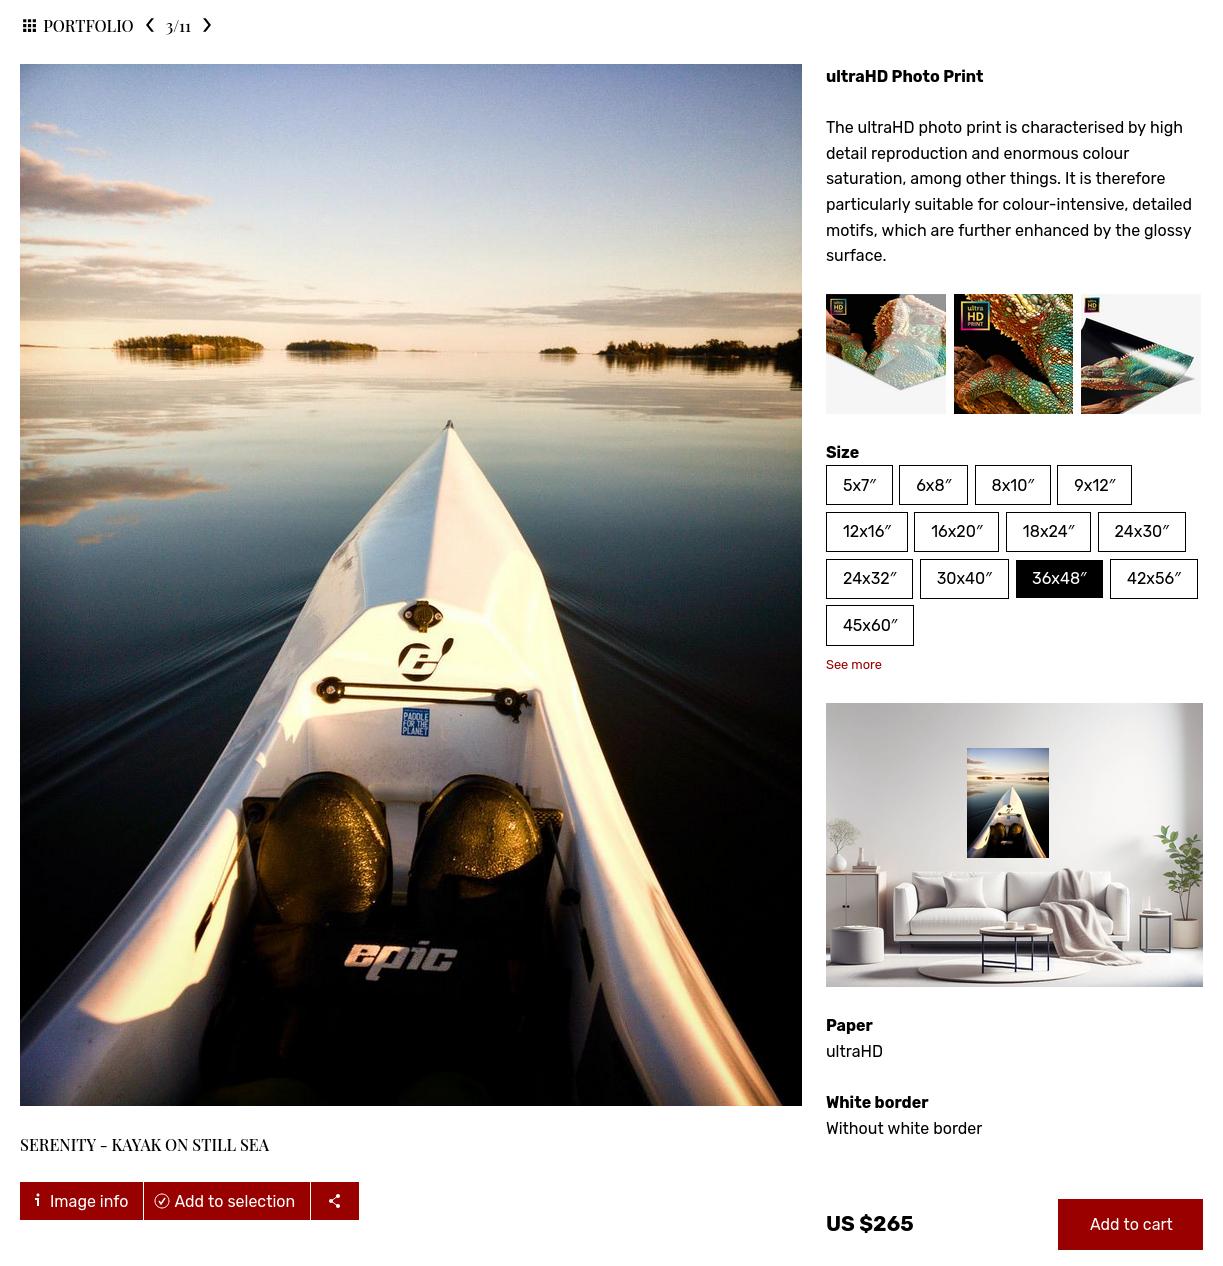
| Portfolio | To showcase your work with as little visual distraction as possible | Aesthetics first: large images, no distracting action buttons or metadata (so it’s not suitable for ecommerce or client galleries), automatic slideshow… |
| Client gallery | Client proofing and images selection | Easy access to proofing features and image information. |
| E-shop | To sell prints and downloads to private individuals | Focus on selling, pricing configurator integrated with enlarged image. |
| Stock photography | To sell/license files to professional buyers | Keywords and other metadata prominently displayed, obvious pricing buttons. |
| File management | For media libraries and Digital Asset Management | Easy to browse thumbnails, file information readily available, prominent download buttons. |
| Blog | Blog index and blog posts | Displays a gallery like a blog: big previews on the same page, image descriptions readily visible as text, … |
Customizing gallery display styles
Gallery display styles can be customized with the same powerful editor as custom pages, providing complete freedom on their layout, and dozens of settings to choose what to display and how and perfectly match the gallery style with its intended use.
To access this advanced tool, go to My website / Design. Navigate to a gallery using the style you wish to edit and click on the button to customize the gallery style. This tool is also accessible from the display style selection popup for any gallery under My images & videos.
Thumbnails pages
This panels controls the thumbnails pages that list subgalleries and/or files in a gallery. You can edit the layout for those pages, for example to add a prominent search box to all galleries using that display style.
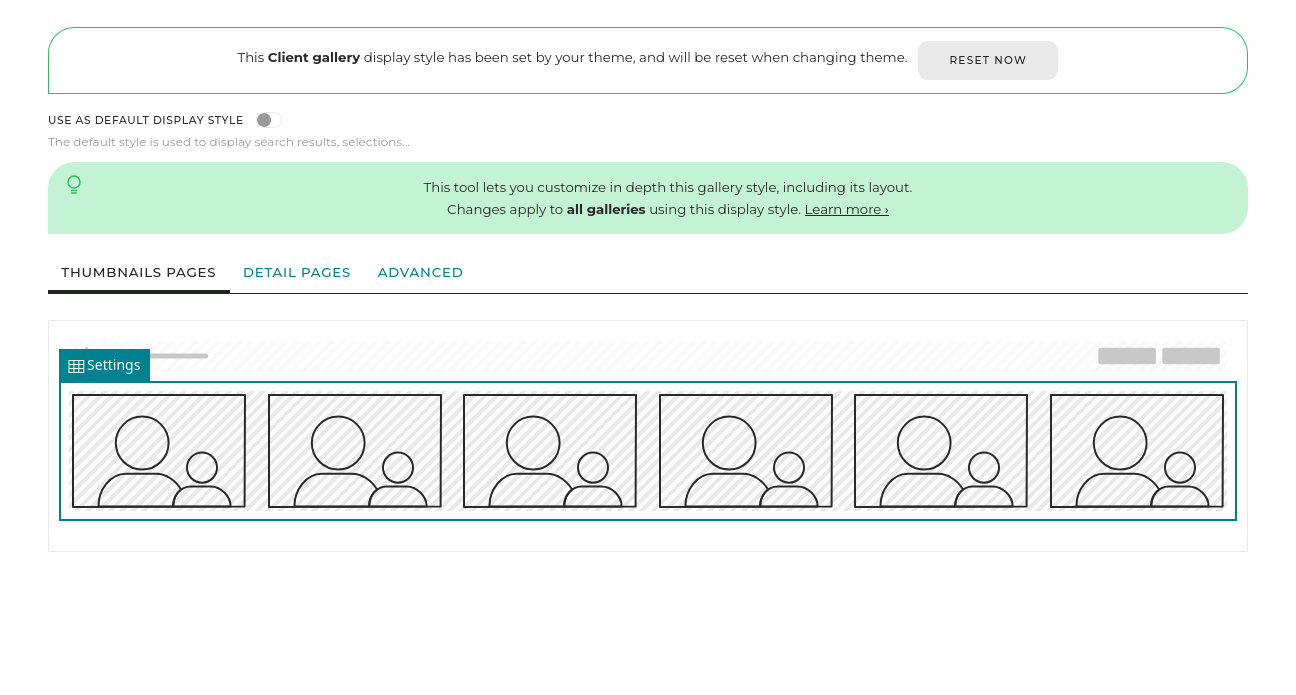
In particular, the main Gallery content element has many settings that let you change the way the thumbnails are displayed:
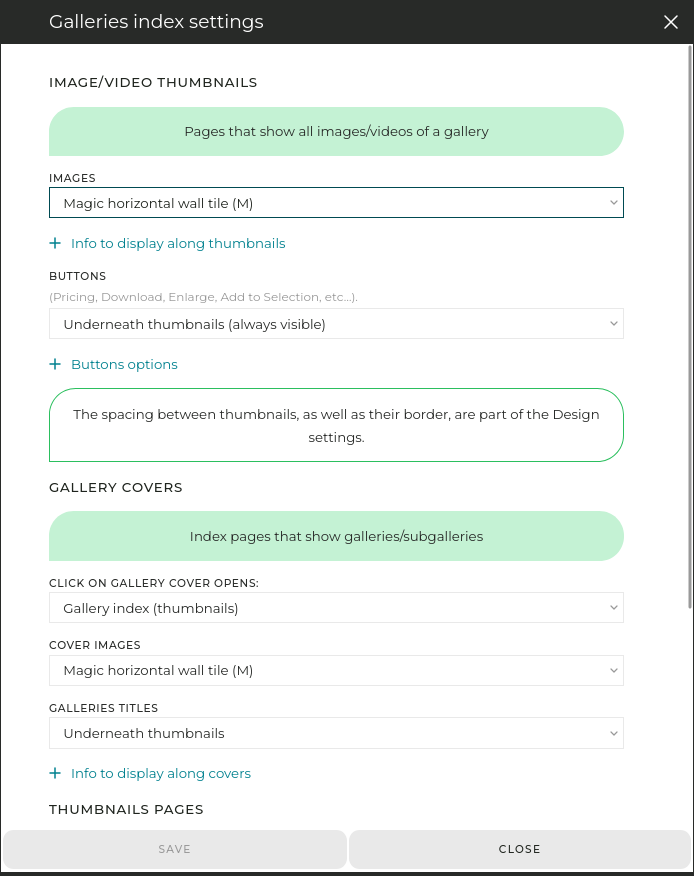
- Image/video thumbnails: Choose from great presets such as the magic mosaic wall tile, or edit small details like whether or not to display download icons on the thumbnails.
- Gallery covers: This section controls the cover thumbnails that open sub-galleries, like the main “Galleries” gallery. For example, you can try here different ways to display the gallery titles on or under their thumbnails. A notable option here is the Click on gallery cover opens: parameter. This will dictate if visitors see a large image / slideshow or thumbnails when they first enter a gallery.
- Thumbnails pages: You will find here options that apply to pages of both gallery covers and image/video thumbnails.
Detail pages
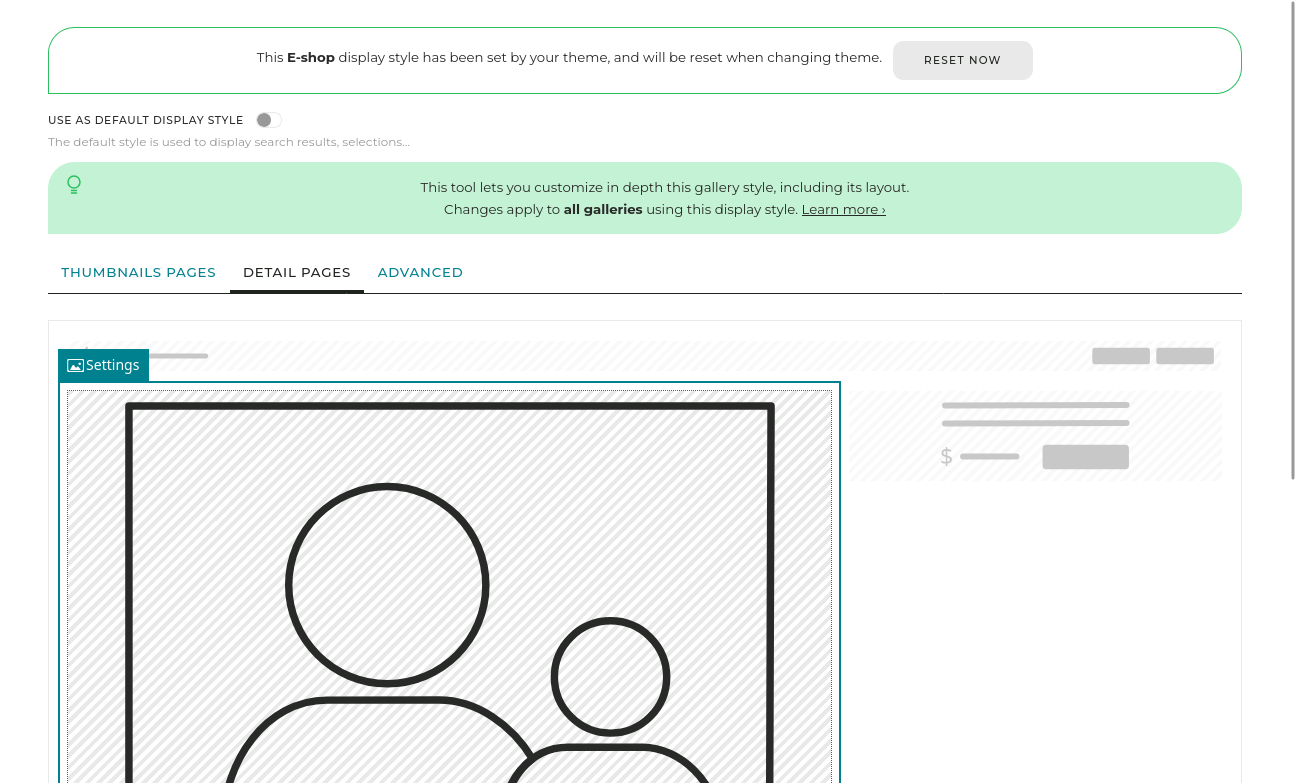
The Title, navigation and / or buttons element allows you to display the title and buttons. You can have several elements of this type for example to display title and buttons separately, or to display different buttons in different locations in the layout.
The main Enlarged media element has many settings that let you change the way the images/videos are displayed. This is also the place to adjust the auto-advance behavior activated for example in the default Portfolio style.
Buttons and metadata can be displayed both over the main image as overlays and in separate elements in the layout. Therefore, to remove/add a button or piece of metadata, make sure to open the relevant element’s settings.
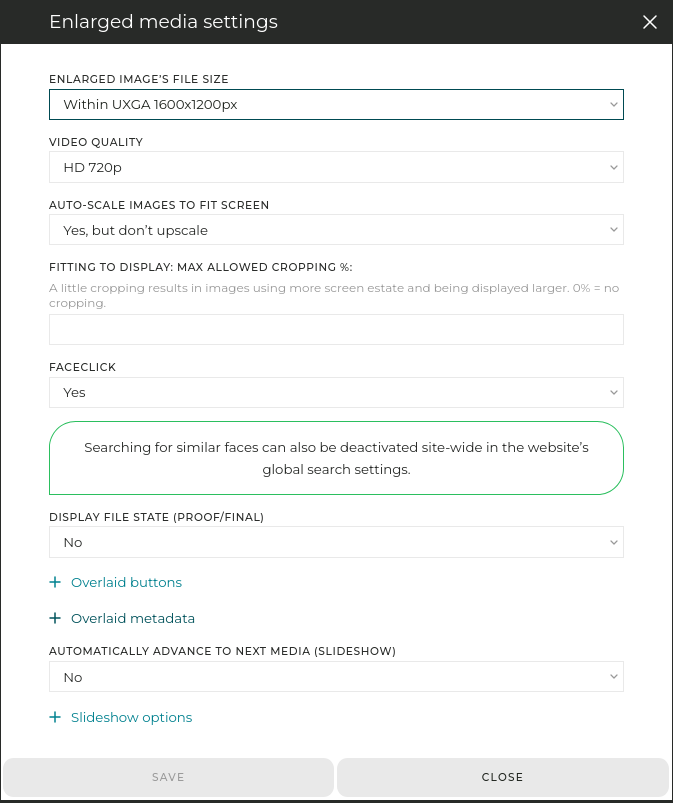
Adjusting image quality
Among the settings for the Gallery content element is the Enlarged image’s file size setting, which lets you adjust the size / quality /resolution of the images and videos displayed on your website.
Note that image quality on a website is always a compromise between:
- displayed size on screen
- quality
- loading time (its importance is too often overlooked)
You can adjust various settings in the gallery display styles to maximize quality:
- use a higher size - this will result in longer loading times
- keep upsizing off in the auto-scale settings
- don’t allow any crop
- also make sure that you upload files that are at least 3000px wide.
Duplicating a gallery style and creating your own
You can duplicate an existing display style from its customization panel under the Advanced tab / Create a new style based on this one.
This allows you to create new styles for specific galleries, and your own styles are not reset when changing theme.
FAQ
How do I change the Display Style used by a specific gallery?
Open the gallery in your PhotoDeck admin space. Click on the link displaying the current display style, which is located just below the gallery title, and select a new style from the options.
Where can I customize the appearance and settings of a Gallery Display Style?
You can customize styles by going to My website / Design. Navigate to a gallery using the style you wish to edit and click the button to customize the gallery style. This opens the advanced editor for the thumbnail and the enlarged image pages.
Can I create my own unique gallery style?
Yes. You can duplicate an existing default display style from its customization panel under the Advanced tab. Duplicating a style allows you to create a custom version that won’t be reset if you change your theme.
Can I remove the Share buttons?
Yes, the Share button can easily be removed. On the thumbnails pages, you will find the setting in the element that displays the buttons. In the detail/enlarged page, the buttons can be displayed either in a Buttons element or as an overlay on the Image, and in both cases they can be adjusted via the respective element’s settings.
Moving a gallery
Galleries can be automatically ordered by different options, as set in the content order settings for the “mother” gallery that contains them.
To manually reorder galleries, drag-and-drop their cover thumbnails to their new position (My images & videos panel).
Galleries can be nested within each-other without limitation. To move a gallery under a new “parent gallery”, drag-drop its cover thumbnail to their new parent in the left-hand side column.
Alternatively, open the Name and main settings dialog for that gallery, and type the name of the new “parent gallery” under the This gallery goes under section.
Duplicating / copying a gallery
To duplicate a gallery:
- Create the new gallery, selecting the option to copy the settings from the initial gallery;
- If the original gallery is protected or allows free downloads, open the new gallery’s Authorizations panel and use Copy authorizations from another gallery to recreate the same authorizations in the new gallery;
- Select all images from the initial gallery, and publish them into the new gallery, for example by drag-dropping them into the new gallery in the left-hand side gallery tree;
Images order within a gallery
To reorder / rearrange images within a gallery, simply drag-and-drop the thumbnails to their new position. You might need to change the number of thumbnails displayed per page, via the Settings icon displayed in the thumbnails panel top-right corner.
Alternatively, you will find a series of automatic sort / order options by clicking on the link showing the current order under the gallery title, for example for sorting images by shooting time.
Private galleries and free downloads authorizations
The Access and Free Downloads table
To open the authorization panel for a gallery, click on the Authorizations link above the thumbnails.
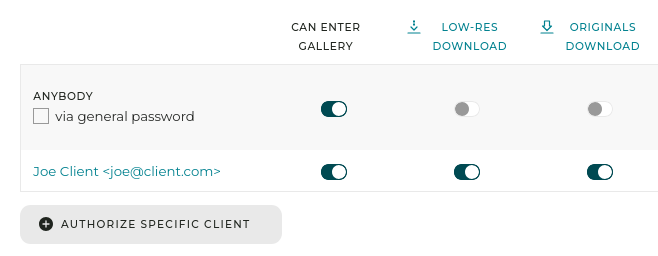
The first row (Anybody) applies to anyone who is not specifically listed on another row. When you add authorizations for a specific client, the Anybody row applies to everybody except that client (and others previously listed). You can optionally set and require a General password: anyone knowing the password, logged in or not, will then gain access to the gallery.
You can also add authorizations for specific clients. They will need to login to be identified. You can also give access to all members of a clients group (defined under My business / Clients) at once.
We recommend you don’t use on the same gallery both a general password and client-specific login access. While it is possible, it can be confusing.
Can enter gallery indicates whether access to the gallery (seeing its content) it allowed.
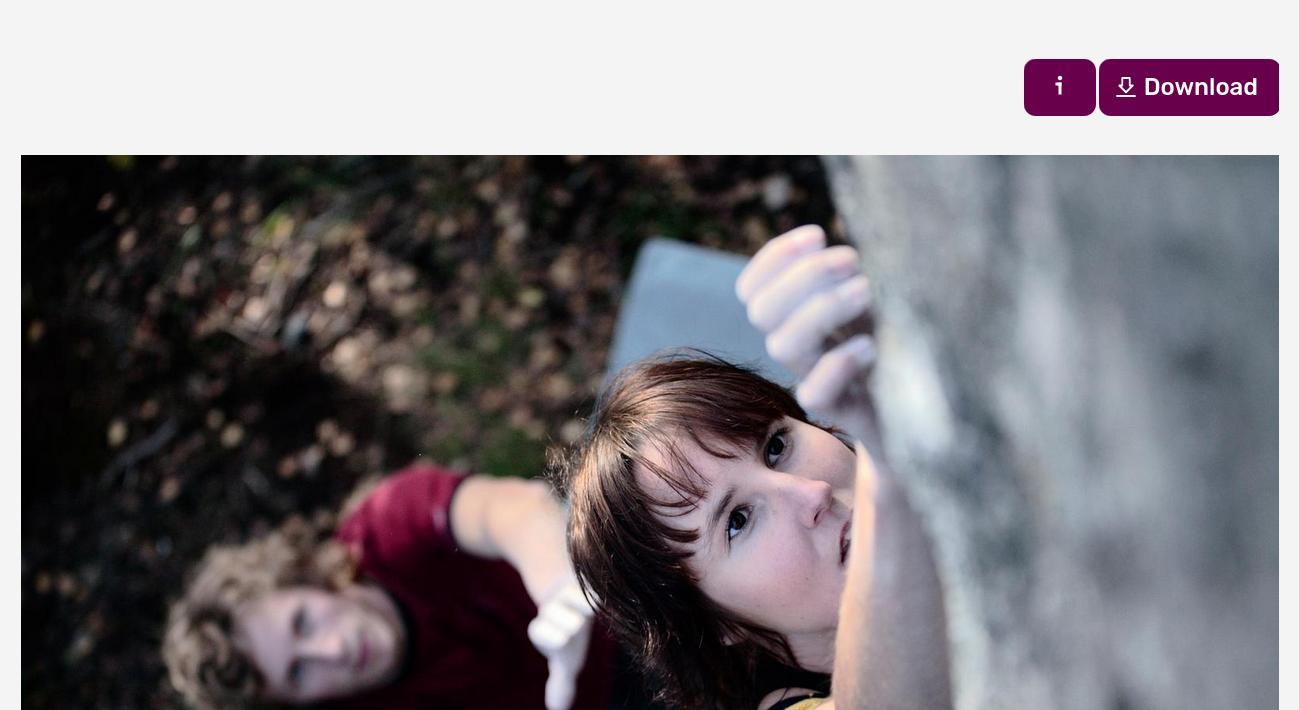
Low-res download indicates whether a button is displayed to easily download preview images. The preview images are watermarked if you used a watermark upon initial upload.
Note that savvy users will always be able to extract the preview images displayed on your site, whether you enable this or not, via a screen capture or other means. So this feature is really for your clients convenience, and you must make sure that you have a proper watermark in place if preview theft is a concern.
Originals download indicates whether FREE download of the originals is allowed. The originals are the very same files you have initially uploaded, without any modification, and are available for download in a single click.
Optionally, this can be limited to files in FINAL state. A Download all button is displayed if the gallery contains less than 2000 images.
Custom downloads let you reprocess the files to your own specifications.
Custom downloads
Custom downloads allows you to specify your own FREE download formats and sizes, rename downloaded files and automatically adjust their metadata.
Since the files must be reprocessed before delivery, they are ordered through the cart - direct 1-click download isn’t possible, but all files in the gallery can be downloaded at once.
Using the Immediately deliver only files in FINAL state option makes it easy to deliver jobs where the client must select files for retouching before delivery (to learn more, please refer to the help topic on “Galleries for professional clients”).

Giving personal authorizations to a new client
To give access to the gallery and/or to download capabilities to a specific client, click Authorize specific client and enter the client’s email address. Tick the boxes corresponding to the access rights you wish to provide him.
You can add a client’s email address even if they are not registered on your website yet : they will gain access once they register with the same email address you have specified.
Alternatively, you can also open the Send by email panel to send the gallery to a client by email and give him the proper access rights in a single step!
Sub-galleries automatically inherit from their parent…
… except if they define authorizations of their own.
For clarity and to avoid errors, if you set new authorizations for a sub-gallery, it will NOT inherit authorizations from its parents anymore, so you need to define all authorizations for that sub-gallery.
If you want a gallery to inherit from the same authorizations as its parent gallery, simply make sure you remove all its authorizations.
FAQ
How do I add a client to a gallery if they don’t have an account yet?
You can simply use the gallery sharing feature and enter their email address. They will gain the specified access rights as soon as they register on your site using that exact email address.
How do parent gallery authorizations apply to sub-galleries?
Sub-galleries automatically inherit all authorizations from their parent gallery. However, if you add any new, specific authorization (even a general password) to the sub-gallery, it will stop inheriting from the parent, and you must define all desired authorizations on the sub-gallery itself.
What is the “Anybody” row for in the authorization panel?
This row defines the default access for anyone who is not specifically listed below it. It applies to all visitors: those who are not logged in, and those who are logged in but have not been granted explicit, personalized access to the gallery.
What is the difference between “Originals download” and “Custom downloads”?
“Originals download” provides the client with the exact, unmodified file you initially uploaded, typically with a single click. “Custom downloads” reprocesses the original file to meet custom specifications (size, format, renaming, etc.) before delivery. Because of this reprocessing, Custom downloads are ordered through the cart and cannot be downloaded with a single click.
Is there a limit on how many images can be downloaded at once for free?
The system will display a “Download all” button (if authorized) for Originals download only if the gallery contains less than 2000 files.
Hiding a gallery
The Hide gallery option in a gallery’s Authorizations panel removes the gallery from the thumbnail navigation. A hidden gallery is therefore not be visible anymore in the gallery index (or as a sub-gallery of its parent).
Note that if you include a hidden gallery to the navigation menu, it will in effect become visible to casual visitors, regardless of this setting.
The Include images in public search option lets you control whether to include a gallery’s content in the public search on your website and on search engines (e.g. Google). (Search within the hidden gallery will always be possible).
Comments and star ratings
Comments and star ratings can be enabled for every gallery from its page in your admin space under More / Comments and star rating. They are a great way to interact with clients on a private gallery. Comments can also be activated on custom pages via their settings.
Comments
To prevent Spam comments if you allow commenting on a public gallery, it is highly recommended you do not allow anonymous commenting, and preferably you require commentators to have an account.
To delete a comment / message from a gallery or page on your website, open the gallery / page in your admin space and click on the Comment icon. You can also log onto your website with the same credentials you use to access your PhotoDeck admin space and open the page with the comment to remove - you will then notice a Delete button next to the comments.
Star ratings
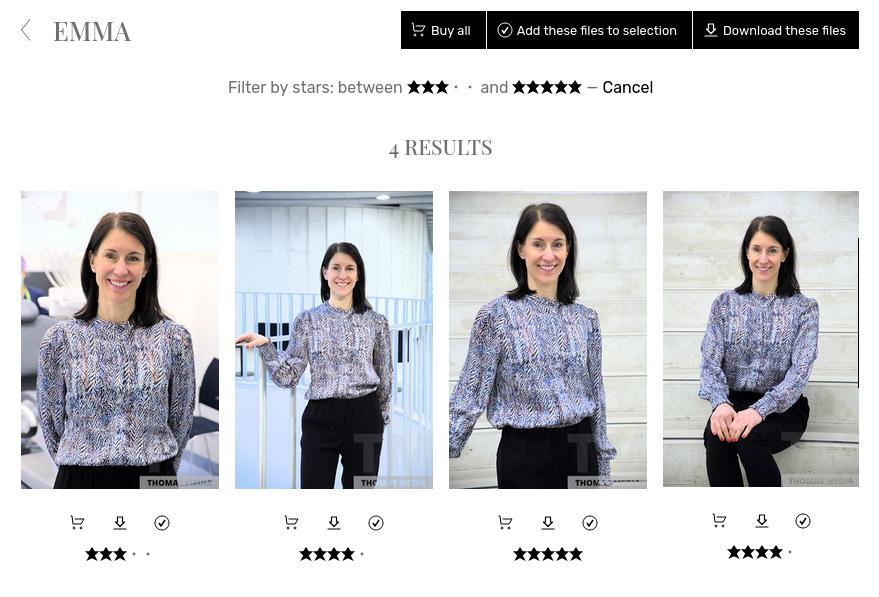
For a full proofing experience on your website: client ratings are useful to help a client make a selection in multiple passes.
They also allow the client to filter a gallery on your website, and then to add filtered files to a selection, to download them, and even to add them at once to the purchase cart (if that feature is also activated for the gallery).
Client ratings are independent from your own file ratings, defined in your PhotoDeck administration space or as part of your workflow prior to upload, for example in Lightroom.
In your PhotoDeck admin space, you can also view the client ratings and filter the galleries’ view based on client ratings.
The last rating on an image or video overrides the previous one, so it is usually not a good idea to allow ratings on public galleries.
FAQ
How do I enable ratings and comments for a gallery?
You can enable comments and star ratings for any gallery by going to its page in your admin space and accessing the section More / Comments and star rating.
Are my clients’ star ratings mixed with my own file ratings?
No, client ratings are entirely independent from your own ratings defined in your PhotoDeck administration space or within your workflow prior to upload (like in Lightroom). Client ratings only appear on the website gallery and in your admin view for filtering.
How do I delete a comment?
To remove a comment, open the gallery or page in your admin space and click the Comment icon. Alternatively, you can log into your website with your admin credentials, navigate to the page with the comment, and click the visible “Delete” button next to the comment.
Sharing galleries or images/videos on your social networks from your administration space
To can share files (images, videos,…) or full galleries on your social networks (LinkedIn, X (Twitter), Facebook…) directly from your PhotoDeck administration space under My images & videos:
- For single images/videos, select the file and click on the Share button in the right-hand side column ;
- For galleries, click on More / Social share.
This will open a popup where you can select a network to share to, and you will be redirected to the network to finalize sharing.
If you have connected your personal PhotoDeck account to your social networks accounts (Avatar / Social networks), the sharing’s popup Quick share option will let you share to those networks without leaving PhotoDeck. Note that this integration is only available for LinkedIn and X (Twitter).
Files are never uploaded to your social networks: instead, this feature shares a link to the page on your website, from which the social network usually fetches an image preview. In the case of galleries, the cover image is what is normally shown by social networks.
Social networks often cache the preview images for several days, during which the same (potentially old) preview is used when resharing the same page.
QR codes
You can view and download a QR code for any gallery under My images & videos, via More / QR code.
This allows you to quickly check the gallery on your smartphone, or to print the QR code to share the gallery on a physical support like flyers and cards.
Note that QR codes can only be generated for galleries, so you can create a QR code for your frontpage only if it is a gallery. For custom pages, please use an external online QR code generator.
Adding text and other contents to a gallery’s page
PhotoDeck makes it easy to turn a gallery into a rich page with text and other content. While it is not possible to integrate a gallery into a custom page, the gallery itself can be customized just like custom pages.
To add text and other content next to a gallery’s thumbnailsy, open the gallery under My images & videos, then click on Add text and more. You will then be able to add text and other elements via the same free content editor as on custom pages, for example at the top of the page above the thumbnails, at the bottom of the page under the thumbnails, or even to their side.
Please note that this only relates to the gallery’s thumbnails view, the individual image/video detail pages will not be modified, for the best viewing experience.
Creating a blog on PhotoDeck
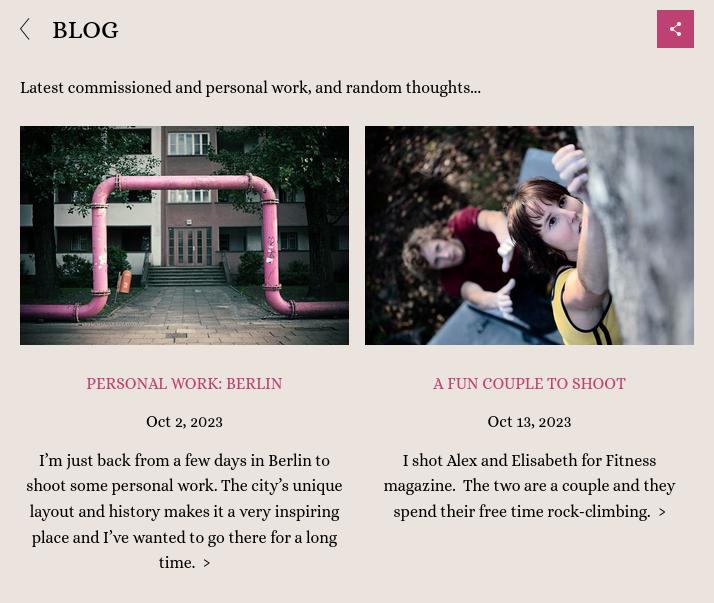
PhotoDeck’s blog facility is meant for photographers who want a simple way to promote new work, under the same roof as their website.

How does it work?
A PhotoDeck blog is simply a gallery, with sub-galleries as individual posts, all styled like on a standard blog.

This way, a PhotoDeck blog integrates perfectly with your normal workflow and with the rest of the website. All gallery features can also be used: images can be priced, downloadable, comment-able, etc…
The gallery text/additional content for a post/gallery is the main piece of text for the post. The title and description of included images or videos are also displayed and integrate with the post.

And naturally, videos can be included in the very same way as images.
Limitations
The blog facility is not meant to be as full-featured as a dedicated blogging platform (see our WordPress integration if you really need a full blogging platform).
It is designed for busy members who favor simplicity, and prefer not to maintain multiple platforms.
With this in mind, it is for example not possible to:
- Display a full blog post on the blog index page (only the cover image is displayed with an excerpt of the text) ;
- Add calendars, track-back pings and other blog-specific features ;
Creating the blog
- Create a new private gallery called “Blog”. Creating it as a private gallery means it won’t show as a thumbnail in your gallery navigation ;
- Click on the link indicating that the gallery is Hide gallery, and under Include images in public search, set the search indexing to Always (as the gallery is hidden, its images are otherwise not included in the search results).
- Enable the comments if you wish that your visitors can comment on individual images (More / Comments and star rating) ;
- Set the display style to Blog ;
- Edit your website’s navigation menu to add a link to the Blog gallery. If you wish, you can perform this step only once you have content in your blog ;
- Ready for your first post!
Creating your first post

- Under My images & videos, select the Blog gallery, then click on New post ;
- Enter a title for your post, select the Blog preset, then click on Create ;
- Optionally, edit the date of the post, and add a text via the Edit text and more link ;
- Publish images to your post in the same way as for any other gallery. Add titles and descriptions to the images and videos as appropriate ;
- Optional: share your new post on X (Twitter), Facebook or other services via the Social share link in the gallery options ;
- Done! To create new posts, simply use the preset that copies your first post settings.
RSS Feed
Like any gallery on your website, your blog has its own RSS feed, e.g. www.mysite.com/-/galleries/blog.rss
Tips
- You can edit the Blog style like any other Gallery Style, to customize the way posts are displayed.
Reduced gallery thumbnail size = blog index displayed as a grid - All gallery features are applicable to blog posts: password/login protection, download, etc…
- You can create multiple blogs on your website.
- The blog style can be applied to any gallery. In fact, it is trendy for portfolio galleries too.

Galleries for private customers
Here is a recommended way of setting up private and protected galleries when working with private individuals (events, portraits, weddings…), where privacy and simplicity are key.
Once you have set up a first gallery, it will be easy to reuse the same settings for other clients.
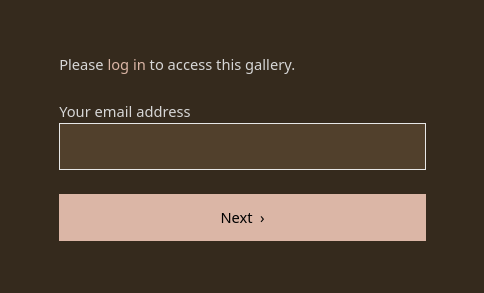
- Create a new gallery, ideally nested under a common “Client Area” gallery. Use the Private gallery with general password preset. The gallery will use the Standard Display Style, which is a good balance between aesthetics and proofing functionality. The gallery will be hidden, i.e. not visible in the thumbnail navigation for maximum privacy.
- Click on the Authorizations link to open the access settings. Set a password to access the gallery. Setting a general password will not provide you with as much detail as to who exactly accesses the gallery, but it will be very simple for your clients. Save.
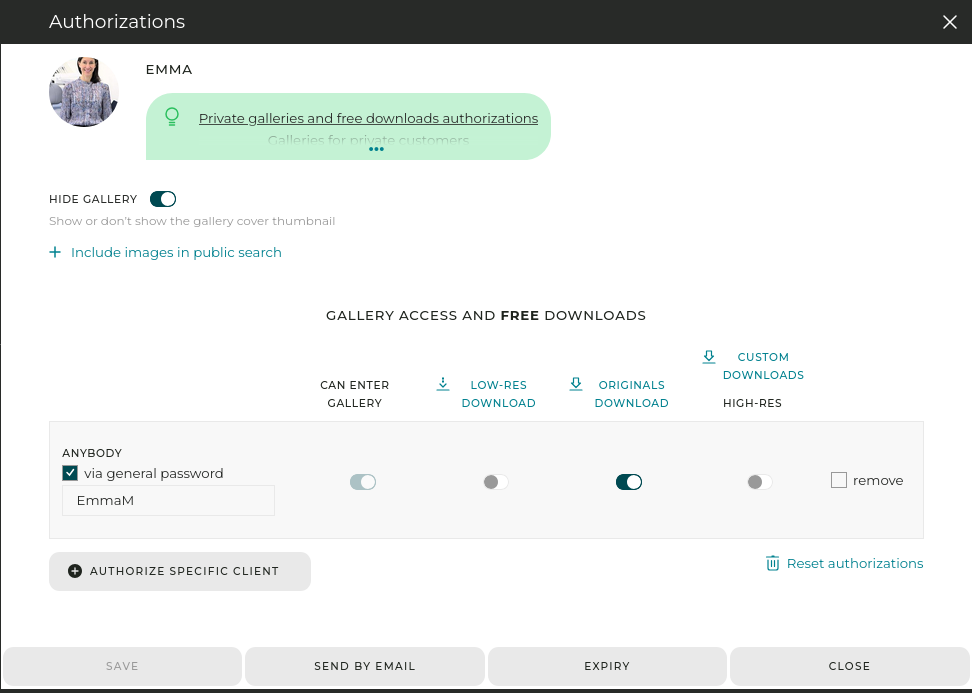
In this example, a general password is required to enter the gallery, and free high-res download is enabled. - Optionally, you can allow commenting on images and/or star-rating (More / Comments and star rating). Star-rating is useful in large galleries to help the customer filter and find the best images in several passes.
- Upload the images into the gallery.
- If the images are for sale, attach the proper pricing profile(s) to all images in the gallery. You can also do it from the Prices link above the gallery thumbnails.
- Done! All you now have to do is send the link to your clients, with the password. You can do that under the Send by email panel. Don’t forget to indicate the gallery password in the message!

Allowing free high-res downloads to consumers
You can easily sell downloads by attaching pricing profiles to the files. But in some cases, you might want to allow your clients to download high-res files freely. This can be done by adding new authorizations to the access options.
Note that instead of allowing free download to anyone who can access the gallery, you can also allow only specific clients, based on their email, to download the images. This has two benefits: you get a better control and view over who downloads what, and you can allow a wide group of people to purchase from the gallery (say wedding guests) while allowing a subset (e.g. groom and bride) to download high-res files for free. The drawback is that it requires your clients to create a login on your website in order to access the free downloads.
Alternatively, you can allow anybody with access to the gallery to download for free. This of course, will override any download pricing profile set for the individual images and won’t provide you information on who downloads images.
Please refer to the help on authorizations for further help!
Ordering files to edit/retouch and delivery
This section will show you how to let a client order (without payment) for retouching a selection of images or videos out of an unprocessed shoot, so you can process/retouch ordered images and deliver them, in a professional and integrated way.

- Create a new gallery, ideally nested under a common “Client Area” gallery. Use the Protected proof-retouch-deliver gallery preset. The gallery will use the Client gallery Display Style, which focuses on proofing functionality over aesthetics. The gallery will be hidden, i.e. not visible in the thumbnail navigation for maximum privacy. In addition, this preset allows immediate delivery only for files in Final state.
- Upload the “proof” images/videos into the gallery.
- Open the Authorizations panel and add your client(s) email addresses, without changing the download authorizations. Hit Send.
- Done! Your clients are now able to order a selection of images as downloads.

When your client has made a selection and placed an order, you will be notified by email. When you receive the order:
- If needed, reprocess/retouch the images/videos on your computer. Upload them into the gallery making sure you use the same filenames as for the proof images, and using the Replace existing files with same file name option. This will replace the proof images with the final ones. In the upload form, also set the status of the new uploads as Final, which indicates to the system that the files are ready for delivery.
You can also replace individual files via their Replace button, and change their state in their File state panel.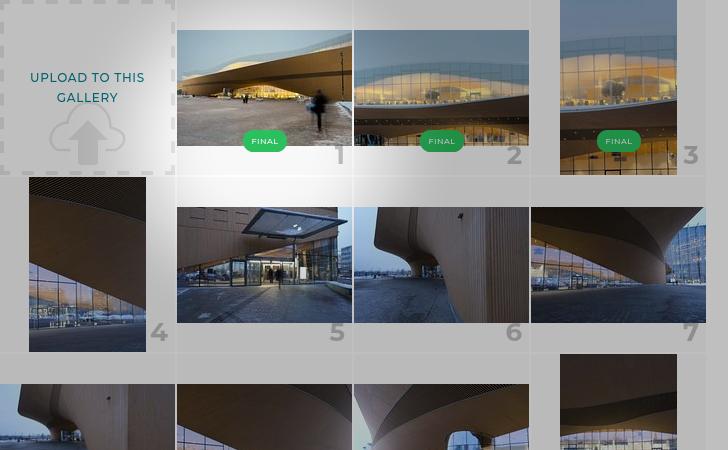
Replaced images in Final state in the administration space - When all (or part of) the images have been replaced with their final version, open the order, and click on Recalc items shipping methods, then Ship PENDING downloadable items now. This will trigger the delivery of the Final images to the client.
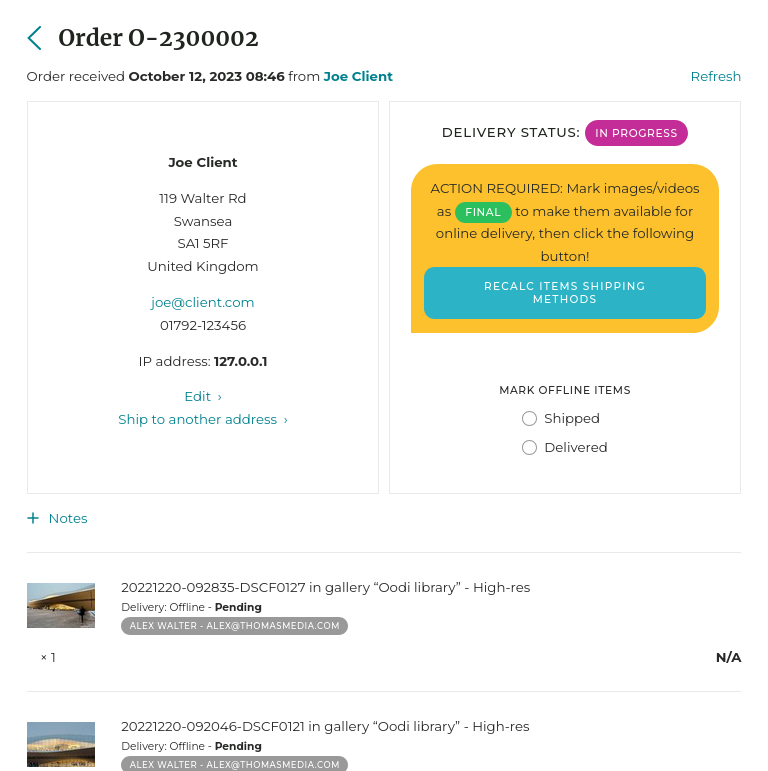
Image delivery on the order page.


To go further:
- You can explicitly indicate on the gallery what files are not retouched/edited: put the files in question in Proof state, and make sure that the gallery style used by the gallery is set to display the file states on their thumbnails. The retouched (final) files will also be clearly indicated.
- This method makes edited files orderable again and directly downloadable. It is also possible (in the download options) to only offer ordering for files in state Proof or Undefined.
- To sell files to edit/retouch, use a pricing profile attached to the files instead of free downloads - the same options for processing and delivery are available. Similarly, it is also possible to sell whole galleries to retouch/edit, via the Prices option for the gallery in question.
- To collect retouching instructions or order notes from clients, use a pricing profile attached to the files instead of free downloads, and make sure that the Let clients add a comment to each item in the cart option is enabled in the pricing profile settings.
Galleries for professional clients
PhotoDeck is designed to let you work with professional clients in multiple ways. Here are some examples of what you can do:
- Send in a few clicks a link to download multiple files;
- Quickly create a secure gallery for proofing and 1-click download;
- Let the client choose and order images to edit/retouch, and then deliver them easily;
- Let the client save a selection and collaborate with others on it;
- Host client photos archives;
- …
Once you have set up a first gallery, it is easy to reuse the same settings for other clients.
Proofing gallery with immediate download
In this example, we create a hidden and protected gallery that lets the client view the images/videos and download them in a click, one by one or all at once.
- Create a new gallery, ideally nested under a common “Client Area” gallery. Use the Protected gallery for professional clients preset. The gallery will use the Client gallery Display Style, which focuses on proofing functionality. The gallery will be hidden, i.e. not visible in the thumbnail navigation for privacy.
- Upload images into the gallery.
- Open the Send by email panel and add your client(s) email addresses as well as the download authorizations. Hit Send.
- Done! You can always check/edit the client permissions under the authorization panel accessible via the Protected access link above the thumbnails.

To go further:
- For improved security, or if you wish to track who downloads, you can add authorizations based on individual emails, either to access the gallery or to download. It is then compulsory for the client to authenticate on your website. If you choose this option, don’t forget to deactivate the accesses for the line Anybody in the authorization table - please refer to the help on private galleries and authorizations for more details!
- You can create custom download products to automatically reprocess files before delivery to the client: resizing, renaming, metadata update, etc…
- You can show the download options for files in Final state only (e.g. retouched files).
To get familiar with the process from a client’s perspective, try it yourself with a “test client” email address! For clarity, make sure it is different from your PhotoDeck login, and test with a different browser (or in a private/anonymous window in your browser).
Review and collaborative tools
Depending on the cases, some additional features can be enabled to help your client and your workflows:
- Selections / lightboxes allow clients to save a selection, to share it and collaborate with others, to download (or purchase) at once a series of selected files, etc…
- Star rating helps clients filter and identify the best images/videos in several steps;
- Comments allow clients to comment on individual files, which is especially useful in a collaborative scenario.
Star rating and comments can be enabled via the gallery settings. The Selection feature is enabled site-wise. Please refer to the help page on each feature for more details!
Ordering files to edit/retouch and delivery
This section will show you how to let a client order (without payment) for retouching a selection of images or videos out of an unprocessed shoot, so you can process/retouch ordered images and deliver them, in a professional and integrated way.
- Create a new gallery, ideally nested under a common “Client Area” gallery. Use the Protected proof-retouch-deliver gallery preset. The gallery will use the Client gallery Display Style, which focuses on proofing functionality over aesthetics. The gallery will be hidden, i.e. not visible in the thumbnail navigation for maximum privacy. In addition, this preset allows immediate delivery only for files in Final state.
- Upload the “proof” images/videos into the gallery.
- Open the Authorizations panel and add your client(s) email addresses, without changing the download authorizations. Hit Send.
- Done! Your clients are now able to order a selection of images as downloads.
When your client has made a selection and placed an order, you will be notified by email. When you receive the order:
- If needed, reprocess/retouch the images/videos on your computer. Upload them into the gallery making sure you use the same filenames as for the proof images, and using the Replace existing files with same file name option. This will replace the proof images with the final ones. In the upload form, also set the status of the new uploads as Final, which indicates to the system that the files are ready for delivery.
You can also replace individual files via their Replace button, and change their state in their File state panel.Replaced images in Final state in the administration space - When all (or part of) the images have been replaced with their final version, open the order, and click on Recalc items shipping methods, then Ship PENDING downloadable items now. This will trigger the delivery of the Final images to the client.
Image delivery on the order page.
To go further:
- You can explicitly indicate on the gallery what files are not retouched/edited: put the files in question in Proof state, and make sure that the gallery style used by the gallery is set to display the file states on their thumbnails. The retouched (final) files will also be clearly indicated.
- This method makes edited files orderable again and directly downloadable. It is also possible (in the download options) to only offer ordering for files in state Proof or Undefined.
- To sell files to edit/retouch, use a pricing profile attached to the files instead of free downloads - the same options for processing and delivery are available. Similarly, it is also possible to sell whole galleries to retouch/edit, via the Prices option for the gallery in question.
- To collect retouching instructions or order notes from clients, use a pricing profile attached to the files instead of free downloads, and make sure that the Let clients add a comment to each item in the cart option is enabled in the pricing profile settings.
Hosting an image/video archive for a client
You can use subgalleries for a client and host a small archive, for example mixing both already retouched/paid downloadable images as well as files to order.

To allow a client to download immediately certain images (or video clips) and purchase editing for others, you can mix the use of free downloads and pricing profiles:
- Assign files the state Proof or Final based on whether they are edited/retouched or not;
- Activate free downloads, offering them (via the download options) only for files in state Final;
- Attach to all images a download pricing profile, offering it (via the profile’s options) only for images in state Proof.
The “Latest work” page
The “Latest work” page automatically displays the files that you have recently added to your galleries.
It includes all public galleries, i.e. galleries that are neither hidden not protected.
This page is automatically generated and cannot be customized. If you wish to present a curated selection of recent additions, you can create a new gallery for that purpose, and publish selected images/videos to it (files can be published in multiple galleries without needing to be re-uploaded).
Images and Videos
What kind of files should I upload?
We recommend you upload full-resolution images/videos to benefit most from what PhotoDeck has to offer, as the system automatically generates the preview images on your website and is able to resize images for digital deliveries. If you are not planning to deliver the images digitally (e.g. if only for portfolio display), and if you don’t wish to upload high-res files, uploading 3000px-wide images will you the best long-term flexibility.
If you sell prints fulfilled by an integrated lab like WhiteWall, please make sure to upload full-resolution files, left unsharpened.
Supported formats
- Images: JPG, TIFF, PNG, HEIC/HEIF and GIF (including animated GIFs) ;
- Raw Images: most common RAW formats including DNG, CR2, CR3, CRW, NEF, NRW, ARW, RAF, 3FR, IIQ…
- Videos: all common video encodings ;
- PDF documents;
- Photoshop files*;
- Graphic design documents: AI (Adobe Illustrator), EPS (Encapsulated PostScript)*;
- Office documents: DOCX (Microsoft Word), XLSX (Microsoft Excel), PPTX (Microsoft PowerPoint)*.
(*) Your plan might restrict what formats are permitted.
The max file sizes allowed with your plan is indicated in the upload window.
Images
Images are best left not sharpened (or only very slightly sharpened as part of e.g. the RAW conversion process), so that your clients keep full flexibility in the printing process.
To save on disk space and upload times, we find that high-quality JPGs (rather than TIFF images) are suitable for most applications.
What image size do you provide to my clients?
In most cases, images are resized automatically. For license purchases that specify a size in pixels or a file size (e.g. Royalty-Free, Rights Managed Web uses), the buyer gets an image exactly the size purchased. For free low-res downloads, we deliver an 800x600 pixel image that has your watermark applied, if it was applied upon upload.
In all other cases where a digital file has to be delivered, we deliver the high-resolution image you have uploaded, without modification.
Image color profiles
All preview images are converted to the sRGB color space, so you can safely upload high-resolution images in the space of your choice (e.g. AdobeRGB), as long as you embed the profile.
Note that for performance reasons (page display speed), the sRGB profile is not embedded in the thumbnails, so the color will be accurate only on the larger previews (assuming the viewer’s browser is properly color-managed).
Uploading video
You can upload video clips in the same way as still images. We support all common video formats.
For display on your website, your clip will be converted into various formats that browsers can display.
E-commerce: You are able to define what format(s) the clips are to be delivered in, both in the pricing profiles settings or when answering a quotation request.
Proofing galleries: as for stills, for “high-res delivery” via proofing galleries, we deliver the original file.
Setting the cover image
By default, the cover image is a frame automatically taken out of the video. You can also use your own cover image (in the same ratio) for MPEG-4 formats (.mov, .mp4…) by embedding it into the video file. Tools that allow it include for example mp3tag (Windows), MetaZ (Mac), VLC (multi-platform).
IMPORTANT: MPEG-LA license requirements for H264-encoded formats
H.264 is currently the leading video encoding format. It is unfortunately a proprietary format for which multiple companies hold patents, jointly licensed by MPEG LA.
It is our understanding that when delivering video clips encoded with H.264 technology, MPEG LA requires content providers (you) to hold a license for both:
- the “Internet broadcast” of images for free (i.e. showing video clips on your website)
- the sale and/or delivery of content
PhotoDeck uses H.264 technology to display videos on your website.
H.264 technology is also used in the delivery of downloaded clips, depending on the format chosen.
Since PhotoDeck provides only the technology and is not a party in your content distribution, it is your responsibility to clear possible licensing issues.
The license should be free of royalty payments in most cases.
Our attempt to obtain from MPEG-LA clearer and more concrete guidance for video producers have unfortunately not been successful.
Please contact directly MPEG-LA if in doubt!
This article on Betanews.com is also informative.
Uploading and synchronizing a folder
- uploading a full folder structure, with sub-folder, all at once,
- upload only the new or updated files in a single gallery while skipping what has already been uploaded,
- or to recover from a botched upload.

Accessible from the upload window in your admin space, it lets you synchronize a folder on your computer (or your network) with a gallery on your account, so that:
- a sub-gallery is created for each new subfolder,
- files not yet on PhotoDeck are uploaded,
- files updated on your computer are replaced on PhotoDeck,
- and the rest is left alone.
Note that new sub-galleries will use the same display style as their parent. Please make sure PRIOR to launching the synchronization that the gallery you’re synchronizing into uses the desired display style!
We recommend you don’t synchronize folders containing more than a few thousands of files. For larger collections, it is best to proceed in several steps.
Uploading and synchronizing via Lightroom
The PhotoDeck-Lightroom Publish plugin allows you to:
- Publish your images directly from Lightroom into galleries on your PhotoDeck site
- Create/delete/rename/move PhotoDeck galleries directly from Lightroom
- Update images metadata in Lightroom and republish to update them in PhotoDeck
- Redevelop photos in Lightroom and re-upload to PhotoDeck
- Synchronize your PhotoDeck site’s gallery structure in Lightroom (without existing images)
- Update your galleries’ additional texts and display styles directly from Lightroom
Installing the plugin into Lightroom
- Download the plugin
- If the downloaded files wasn’t automatically unzipped, do it now. You should end up with a file named PhotoDeck.lrplugin.
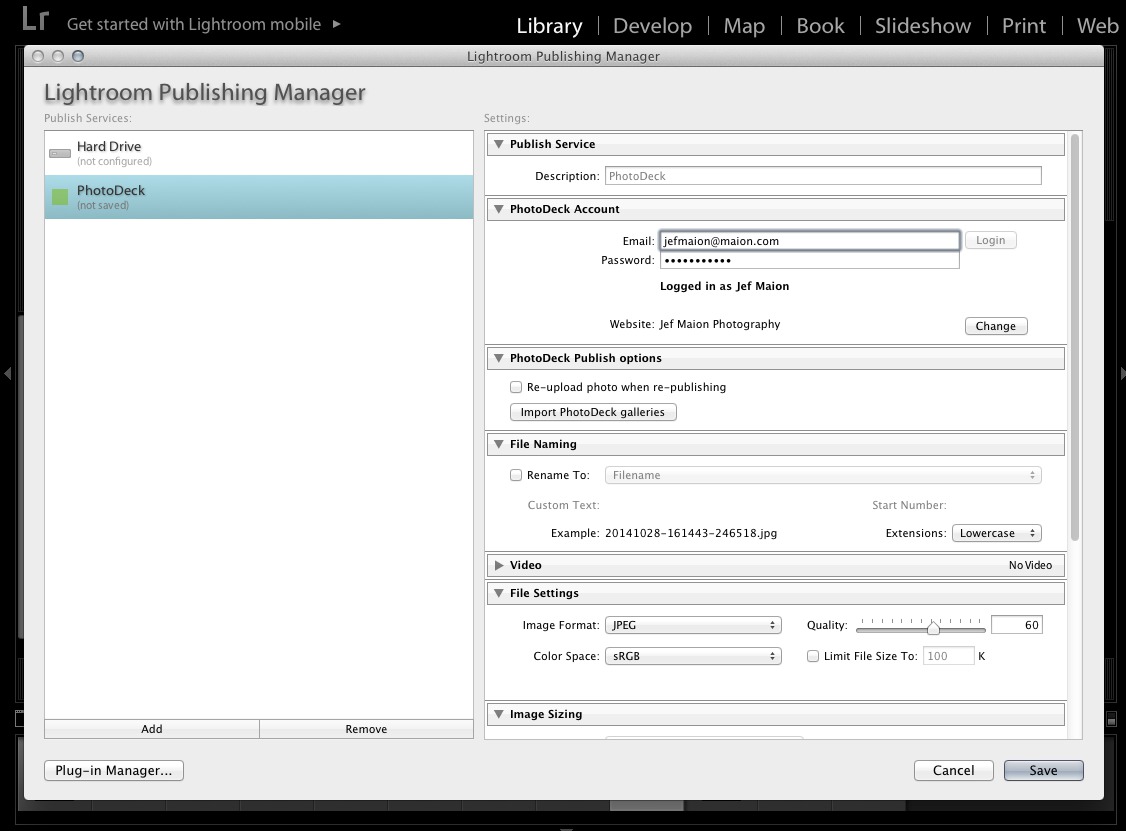
- In Lightroom, open the Publishing manager (see the + button next to the Publish Services dialog in the left-hand-side column):

- From there, open the Plugin Manager, and click on Add:
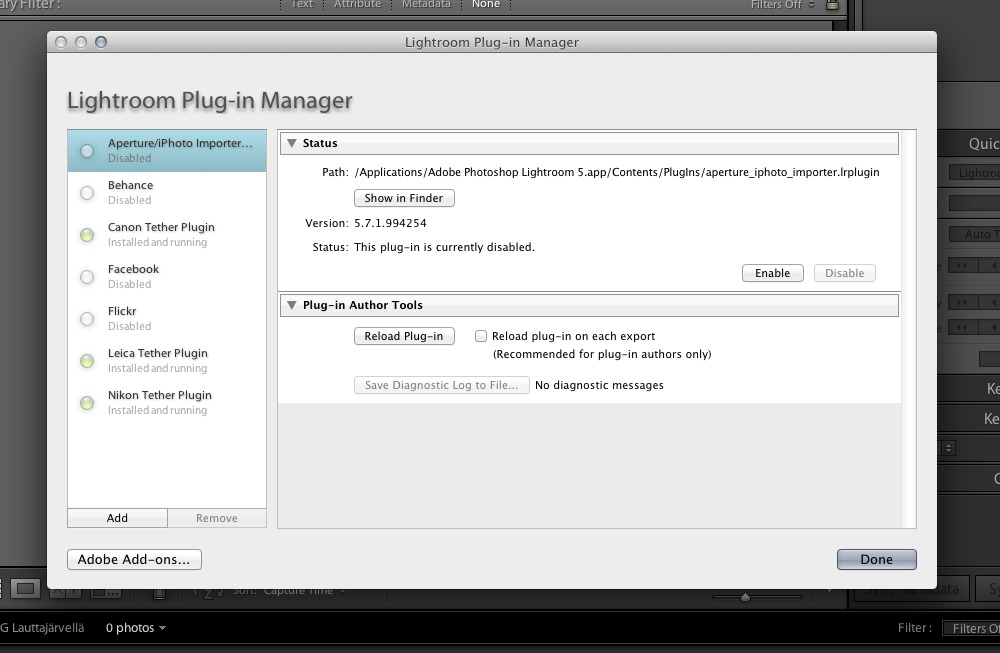
- Select the plugin file you’ve downloaded and hit Done.
- Congratulations! The plugin is now installed: you can configure it with your PhotoDeck login credentials, and you can import the gallery structure from your PhotoDeck site:


Updating the plugin with a new version
- Download the plugin
- If the downloaded files wasn’t automatically unzipped, do it now. You should end up with a file named PhotoDeck.lrplugin.
- In Lightroom, open the Publishing manager (see the + button next to the Publish Services dialog in the left-hand-side column):
- From there, open the Plugin Manager, and select the PhotoDeck plugin.
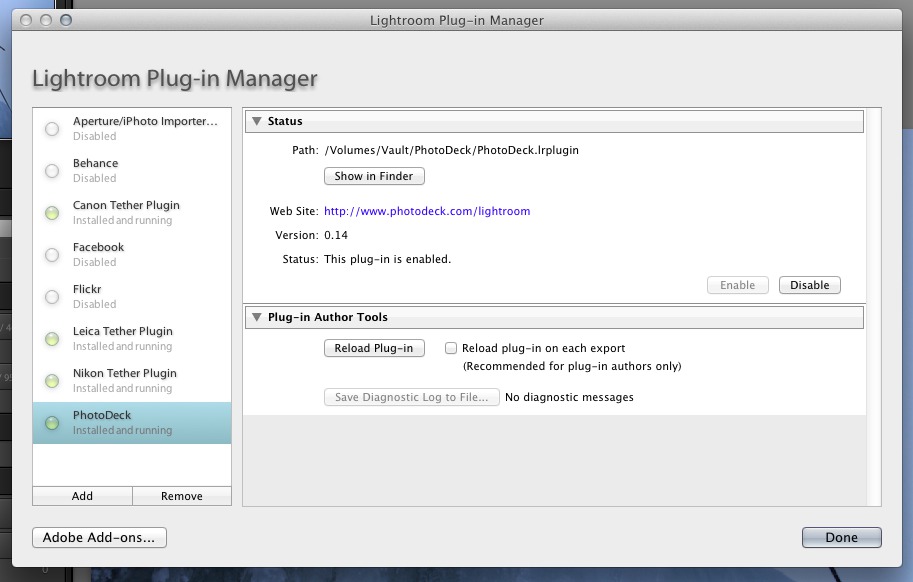
- Click on Show in Finder (OSX), and replace the PhotoDeck.lrplugin file with the one you’ve just downloaded.
- Hit Reload plugin.
- Done! You should see the latest plugin version indicated.

Do not remove the plugin from the Plug-in Manager if you wish to continue using a version of it. When removing the plugin, all information about previously published images is lost and cannot be recovered.
Folders and Galleries
Lightroom allows to create two different kind of collections:
- A “Folder” or
- a “Gallery”
In PhotoDeck, both are galleries. In Lightroom, a folder can only contain sub-galleries, not images. A Lightroom gallery can contain images, but not sub-galleries.
Therefore, to create from Lightroom a gallery that will contain sub-galleries, create a new “Folder”.
About Gallery synchronization
Gallery synchronization doesn’t match existing images in PhotoDeck with your Lightroom catalog, as there is no reliable way to achieve this: only images uploaded through this plugin will be visible in Lightroom.
Gallery synchronization is optional: when you create a gallery in Lightroom, a new PhotoDeck gallery is created only if no gallery with the same name and parent is found on your site. You can therefore simply add in Lightroom the PhotoDeck galleries you need to manage, without synchronizing the whole structure.
Gallery synchronization can be performed at any time from the PhotoDeck publish service settings.
Republishing images
When an image in Lightroom image is changed (metadata updated or image redeveloped), Lightroom will mark the image as needing a republish. Going through the corresponding gallery and hitting the “Re-publish” button will, by default, only update the metadata and not re-upload the image, as LR can’t tell whether the actual pixels have changed.
If you need to re-upload the image files, go to Lightroom’s PhotoDeck publish service settings and activate the Re-upload photo when re-publishing option. Don’t forget to uncheck afterwards it if this is a one-time need, otherwise the files will be un-necessarily replaced when just editing their metadata!
Watermark
Images uploaded via Lightroom will get the watermark that is defined as default watermark in your watermark settings in PhotoDeck (it can be “no watermark”).
Connecting several PhotoDeck websites
To connect multiple PhotoDeck websites to Lightroom, simply create a new connection for each website in Lightroom’s Plugin manager via the “Add” button. This applies to websites belonging either to different PhotoDeck accounts, or to the same PhotoDeck account.
Export only
This plugin also allows simple one-time exports, without having to publish in a gallery.
Exported images will show up in PhotoDeck under All files (they will not be visible on your website until you publish them from My images & videos in PhotoDeck).
Note to developers
This plugin is open source so any developer can keep improving it. The code is hosted on Github.
Uploading via Photo Mechanic
You can upload images directly from within Photo Mechanic. The PhotoDeck uploader is included with Photo Mechanic, but if your Photo Mechanic software isn’t up to date, you can manually install the latest plugin version:
- Download the PhotoDeck uploader template
- Open Photo Mechanic and go to “Photo Mechanic / Preferences / Files / Location of user Uploader templates” to choose the folder where you store uploader templates on your computer. You can create a new folder if you wish, for example under your Library folder if you are on a Mac.
- Unzip the PhotoDeck_latest.zip archive into that folder (or move the unzipped PhotoDeck folder if your browser automatically unzipped the downloaded file) and restart Photo Mechanic
- Done! When you choose “Upload” in Photo Mechanic, the PhotoDeck option should now appear along with the latest version number.
FTP upload
To upload images to your FTP account, connect using the settings indicated on the Upload page.
Images and videos uploaded via FTP are not published to any gallery. You will find them under All files, and you can publish them to a gallery from there. It is not possible to create galleries via FTP.
FTP folders are scanned once per hour for new images, which are then moved to your PhotoDeck account (if you don’t want to wait, you can force an immediate import from the Upload page).
You will receive a confirmation email after each successful import from your FTP folder.
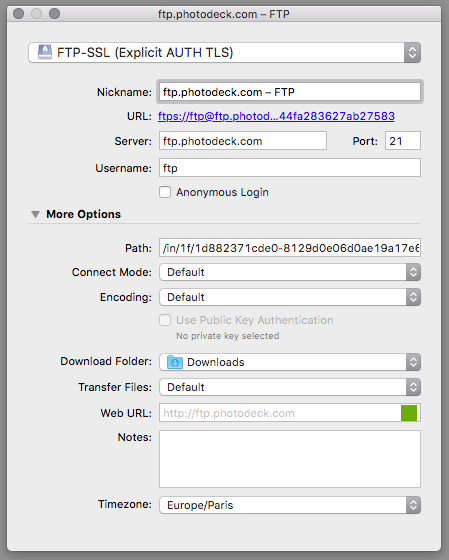
Please note:
- Make sure to use the TLS/SSL protocol if your FTP software supports it (or use software that supports it): connection to port 21, using AUTH SSL (“Explicit SSL”). This will encrypt and secure the file transfer.
- Keep your folder name secret, provide it only to people you want to allow uploading for: anybody who knows your folder name will be able to upload images to your account. If in doubt, you may change it at any time.
- For security reasons, folders are hidden: you should point your FTP client directly to your own folder.
- Files in unrecognized formats will be deleted.
- Files are automatically removed once they are imported to your PhotoDeck account
- You may only list and upload files to your inbox. Creating directories, renaming, deleting or downloading files is not possible.
- Only 3 concurrent uploads are possible. You may add as many files as you wish in a batch, but max 3 batches are possible at the same time.
Example settings: Cyberduck
About metadata and ingesting XMP/IPTC fields
Metadata is what allows to search for files on your website and in your admin space. It is also very important for Search Engines to properly index your website. XMP/IPTC metadata embedded into the files is automatically ingested by default.
Image metadata also includes your own star ratings.
Title
The image title (sometimes also called “Headline”) is used in several places:
- on the image page, below the image as a “h1” page title
- in the image page browser bar title
- in the image page URL
- within the HTML code that displays the image both on the image page and on the thumbnail pages.
If your images have embedded IPTC Description fields but no Title fields, no worry: for each image that has a Description but no Title, on your website we display the Description in place of the Title - until you define the image Title.
Description
The Description allows you to provide to your visitors more information about the image. It is used only below the image (except when you have a Description but no Title: in that case, the Description replaces the Title).
Upon upload, we import the IPTC Description / Caption field as the description.
Keywords
The keywords help Search Engines know what your image is about - and it allows them to index keyword searches. There is no penalty for having many keywords, but they should be relevant. 20-25 keywords per image is a good target, answering the usual “Who, What, Where, Why, When” questions.
ALT (alternative) text
ALT text is used to describe the content of an image. It is useful for example for visually impaired visitors, for people using screen readers, and to help search engines like Google understand the image.
Location, City, State, Country, World region
These work like additional keywords, but are displayed separately for your clients’ convenience.
Author and Copyright Notice
The Author (called in some applications “Creator” or “Photographer” or “By-line author”) and Copyright Notice fields are also imported upon upload and displayed on the image page if present.
Ingesting XMP/IPTC metadata at upload
When you import new files, the following options let you determine how the embedded XMP/IPTC metadata is processed:
- Ignore, don’t ingest: The file’s XMP/IPTC metadata fields are not taken into account.
- Ingest, don’t overwrite: Each XMP/IPTC field is ingested, except when previously defined, for example when the file replaces an existing file for which that field is already defined, or when the field is defined in the same upload’s options.
- Ingest, overwrite: All metadata fields are imported, overwriting any previously defined field.
- Clear and ingest: Previously defined XMP/IPTC-related fields are emptied, and the metadata embedded in the file is ingested.
The PhotoDeck fields are mapped to XMP/IPTC fields as follows:
| PhotoDeck field | Imported from embedded XMP, IPTC or EXIF metadata field (highest priority first) |
|---|---|
| Title | [XMP] Headline - [IPTC] Headline - [XMP] Title - [IPTC] ObjectName |
| Description | [XMP] Description - [IPTC] Caption-Abstract |
| Keywords | [XMP] Subject - [IPTC] Keywords |
| Location | [XMP] Location - [IPTC] Sub-location |
| City | [XMP] City - [IPTC] City |
| State | [XMP] State - [IPTC] Province-State |
| Country | [XMP] Country - [IPTC] Country-PrimaryLocationName |
| World region | [XMP] LocationShownWorldRegion - [XMP] LocationCreatedWorldRegion |
| Author | [XMP] Creator - [IPTC] By-line - [EXIF] Artist |
| Copyright | [XMP] Rights - [IPTC] CopyrightNotice - [EXIF] Copyright |
| Alternative text | [XMP] AltTextAccessibility |
| File rating | [XMP] Rating |
| Date created | [XMP] DateTimeOriginal - [XMP] DateTimeDigitized - [XMP] DateTimeCreated - [EXIF] DateTimeOriginal - [EXIF] CreateDate |
| Expiry | [XMP] LicenseEndDate (if account supports the file expiry feature) |
Star ratings and recommendation badges
You can star-rate your own images with the file ratings:
- for editing and sorting your media library
- to indicate to your clients what are your own “selects”, via an “Artists pick” recommendation badge (star icon displayed when an image as a 5-star file rating) - useful when you upload a shoot to a private gallery for a client to proof.
File ratings are automatically imported from the image metadata upon upload, so if you’re already rating your images with Lightroom or other similar software that follows the same standard, the rating will carry over. In any case, a single click allows you to add/change/remove a rating (enable the rating display on the thumbnails via the search box options under My images & videos). You can also batch-edit ratings and search for images by rating.
You can sort your media by file rating, and similarly you can reorder images in galleries by rating, to put your best images first.
A 5-star rating automatically adds a recommendation badge on the images on your website. To remove the star recommendation badge from an image, please change your rating of that image. To remove the star recommendation badge from all files, search in your media library for 5-star files, select them all, and change their rating at once.
Your own file ratings are independent from the client ratings, if you have enabled them for a given gallery.
Keywording and captioning by artificial intelligence

PhotoDeck’s AI assistants make it possible for you to submit your images to AI providers to automatically generate new keywords and metadata for your images.

Amazon Rekognition, Microsoft Computer Vision and Open AI ChatGPT are powerful AI tools that use machine learning algorithms to analyze the content of images and automatically generate tags and metadata based on what they “see”. By submitting your images to these services, you can quickly and easily add new metadata to your images, making them more discoverable.
To take advantage of this feature, select one of more images you want to submit to the AI providers, and click on AI Assistants. If you haven’t done so yet, add an AI assistant to connect to the provider of your choice with the analysis and metadata options you select. You can then submit the image(s) in a single click.
Once the analysis is complete (and it might take a few minutes), new metadata will be added to your images automatically.
Activate the Automatically perform on newly imported files switch in the assistant’s settings to automatically analyze future uploaded files.
Detection of keywords, tags, titles, texts, bib numbers…
PhotoDeck is about providing you control and offering transparency: AI is a powerful tool but not a “one-size fits all” solution, which is why we offer connections to more than just one AI provider, and we expose their settings.
Each provider offers different options to control how they analyse the images and what metadata they generate. Each assistant’s settings allow you to choose what kind of automated detection you want the AI to perform on your images.
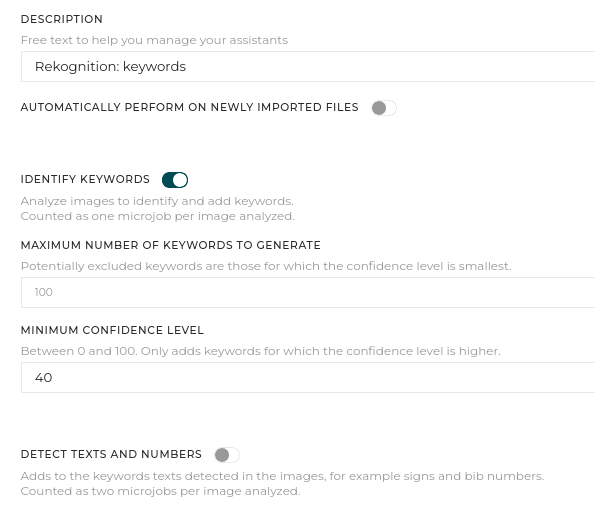
For example, one common option is to detect generic keywords and tags based on the content of the image. This would involve analyzing the visual elements of the image and identifying objects, people, and other elements that could be used as descriptive keywords. This kind of analysis can be helpful for generating broad, general metadata that can be used to categorize your images.
Another option might be to detect text and numbers present in the images, such as bib numbers on athletes or text on signs or advertisements. By detecting this text, the AI can generate more specific and targeted keywords that can help your images to be found by people searching for those specific terms.
In addition, Microsoft Azure Computer Vision and Open AI ChatGPT also allows to automatically create titles / captions which are used prominently on your website and can support your SEO efforts.
Note that you can define multiple assistants for the same provider, allowing you to customize the analysis for different types of images or projects.
For example, you might define one assistants for sports photography that is set up to automatically detect bib numbers, while another assistants for landscape photography is optimized to detect features like mountains, lakes, and forests.
Different AI providers have different approaches in generating metadata and the results might vary. We recommend you try all providers to identify which works best for you.
Make titles and keywords more relevant with ChatGPT prompt customization
ChatGPT’s strength is its ability to generate more “specialized” / less generic keywords and titles.
To steer the kind of keywords identified or make them more relevant to your images, you can adapt the instruction prompt, for example:
- “Identify car brands and makes, car models, their category and main characteristics. For example: Porsche 911 GT3, racing car, two-door”
- “Use the same words an architect would use to describe the image. Identify construction materials. For example: commercial building, glass facade”
Images are submitted one by one to ChatGPT, so refer to “the” image in singular form.
Good practises for effective prompts:
- Be specific in what you ask: for example, “identify animals”, “nouns” / “adjectives”…
- Provide examples of what you expect.
- Ask for objects characteristic or categories.
- Clearly separate (itemize) instructions.
- Provide context, especially if dealing with many images of the same kind: “In this lifestyle advertising image for a clothing brand, …”
Minor changes in the prompt can result in significantly different results, it is therefore worthwhile experimenting.
PhotoDeck lets you create many assistants for the same AI provider, so it is a good idea to create and optimize different prompts for different kinds of images or different contexts.
Write the prompt in English if possible, but other languages can work well too.
Things to keep in mind when using AI image analysis
- AI is a rapidly-evolving field, and image analysis results are not deterministic: the same image might yield different keywords and captions at different times.
- Before submitting images, especially sensitive images, to external AI engines for analysis, make sure to understand their terms and conditions and their implications regarding copyright and privacy, for example.
PhotoDeck does not submit your images to external providers unless you instruct it. In addition, to protect your work from being used to train AI models, we forbid via the robots.txt file known AI robots from crawling/parsing.
FAQ
How do I connect PhotoDeck to an AI provider like Amazon or Microsoft?
To start, you need to create an AI assistant. Select one or more images, click on the “AI metadata” action, and then add a new assistant. You will be prompted to select a provider (like Amazon Rekognition or OpenAI ChatGPT) and configure the specific analysis options you want to use.
Can I set up different analysis settings for different types of photos?
Yes, you can define multiple AI assistants for the same provider. This allows you to customize the analysis. For example, you can create one assistant optimized for detecting text in sports photos and a separate assistant optimized for generating landscape keywords, ensuring the most relevant metadata is created for each shoot.
How can I make sure all my newly uploaded images are automatically analyzed?
In the settings for any AI assistant you create, you can activate a switch that will automatically analyze any new files uploaded to your PhotoDeck account, ensuring your collection remains consistently and fully tagged without any manual intervention.
Custom Fields
Custom Fields can complement the standard metadata (title, description, keywords…) and let you add custom data to your files. They also allow to enrich the search feature with new drop-downs fields that are specific to your needs.
This feature is not available on all plans. You can compare plans under Avatar / Subscription & add-ons.

Adding and activating a new custom field
Add and edit fields under My images & videos / Manage custom fields.
Give the field a short name, keeping in mind that name will be displayed to users in the search forms.
Custom fields are created at the account level, but they can be activated/deactivated for specific media libraries.
Similarly, custom metadata can be activated, or left inactivated, on the front-end website(s). This lets you keep some metadata private (visible in your administration space but not on your website).
You can create up to 64 custom fields.
Only the account owner can create custom fields.
Custom field types
PhotoDeck supports different types of custom fields:
- Single choice : this option lets you create predefined values (tags) for the field (for example years, product lines, property names…). When tagging files, you will chose among these values, ensuring a controled vocabulary. These fields are searchable and, when searching, the user will chose among those tags from a drop-down list.
- Multiple choice : like above, but a file can be tagged by multiple values for this field (for examples, for different kinds of approved uses). This type of fields is also searchable and on search forms, a single tag can be seleted in a drop-down list.
- Free text : unconstrained text. This lets you add free-form text to this field, for any file. Text fields can be displayed next to the images on the website but are not searchable.

You can create up to 250 tags for every custom field of type Single choice or Multiple choice.
Deleting custom fields and tags
When deleting a tag (an option within a custom field), the tag is removed from all files that might be tagged with this value.
Similarly, when deleting a custom field, that field’s data are removed from all files in the account.
Tagging files with custom fields
Once custom fields have been created, files can be tagged with them. Under My images & videos, when selecting one or more files from a media library for which custom fields are active, these fields will appear under Custom fields.
Like for the standard metadata, custom fields can be edited for single files, or multiple files at a time, as well as via Automations.
Displaying custom fields data on your website
Gallery display styles define what custom fields metadata are displayed next to the files and their location in the layout. By default, they are displayed with the other metadata, but the display style editor gives you great flexibility in their presentation and lets you display them anywhere in the image layout. Please refer to the documentation on the gallery display styles.
Searching with custom fields

Under My images & videos, the Single choice and Multiple choice custom fields you have defined will automatically appear as search filter options.
The Single choice and Multiple choice fields that are active for a website (as specified in the field’s settings) will also be automatically included in the website’s search feature as drop-down dialogs. In addition, to show custom fields on images without making them available as search filters, you can disable custom fields search altogether on the website via its search settings under My website / Setup / Website search.
FAQ
Where do I create and manage new custom fields?
New custom fields are created and managed in your PhotoDeck administration area under My images & videos / Manage custom fields. Note that only the account owner can create these fields.
Which custom field types are available on PhotoDeck?
PhotoDeck supports three types of custom fields: Single choice, Multiple choice and Free text. Single and Multiple choice fields are used for controlled vocabulary and are searchable; Free text allows unconstrained text but is not searchable.
How do I add custom field data to my files?
After creating and activating a custom field for a specific media library, you can tag files by selecting one or more files in your administration space. The custom fields will appear under the Custom fields section, allowing you to edit data for single or multiple files at once, or via Automations.
Using automated face recognition
Face recognition and facial search make it easy to find images of a certain person, starting from another image of that person.
On your website, the face recognition search is limited to the galleries the visitor/client has access to, just like for keyword search.
Only images that have been analyzed/indexed for face recognition are searchable.
Face recognition is regulated in Europe (GDPR) and other countries. Prior written consent by the subjects is generally required, please consult with your legal advisor.
Faceclick
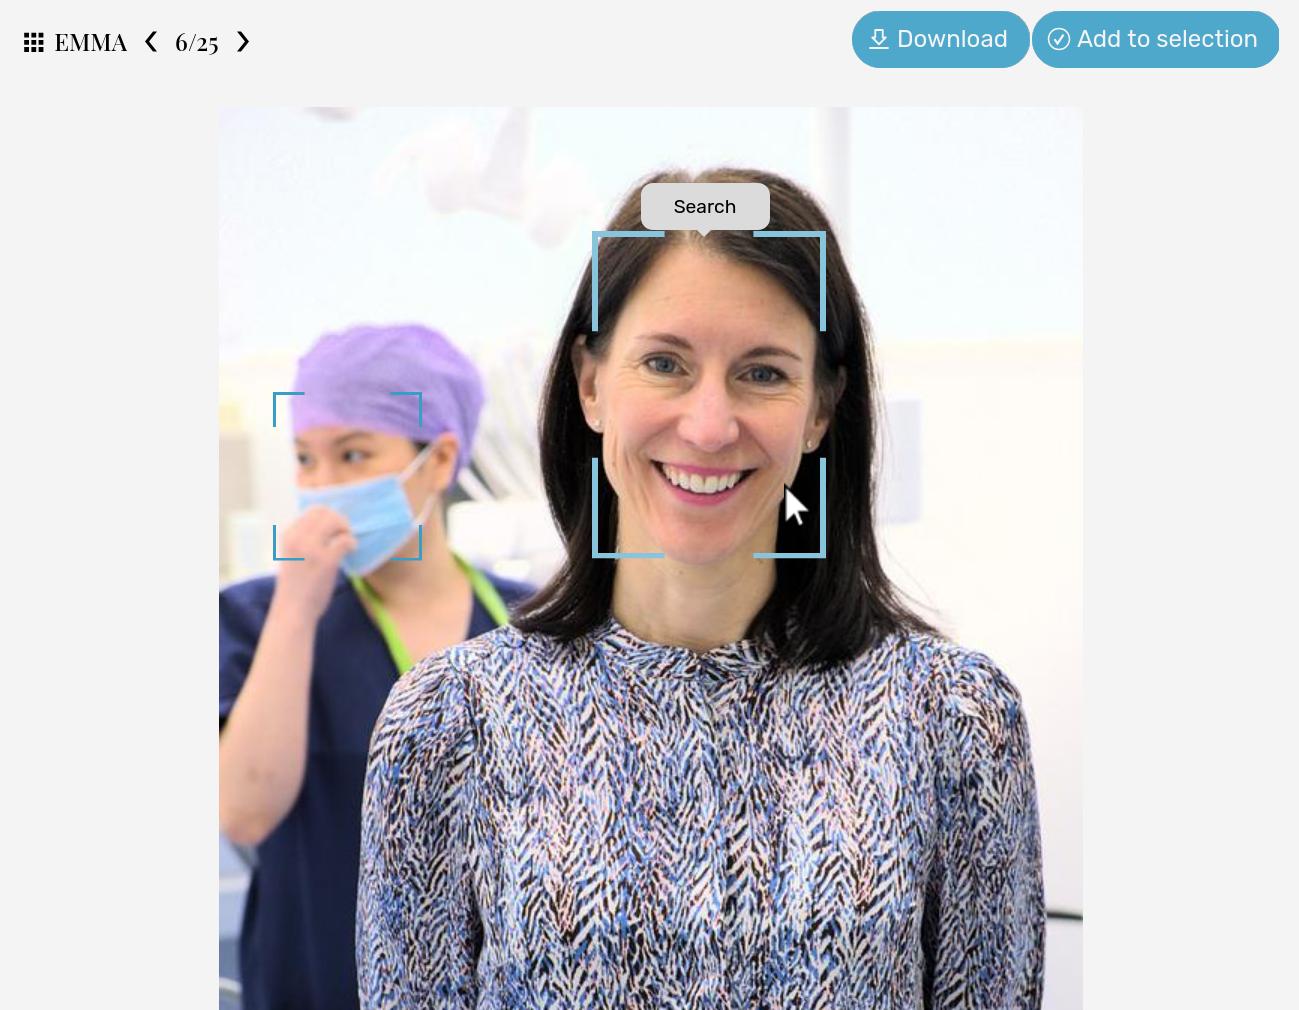
The Faceclick search is available both in your admin space and on your website.
When an image is searchable with face recognition (“indexed” for face recognition), a frame will appear on the image around the detected faces, both in your admin space and on your website. Clicking on that frame will search for indexed images that match that face.
The display on your website of the frame around detected faces can be activated/deactivated via the Faceclick facial search option on My website / Setup / Website search. It can also be deactivated in the gallery display style settings, allowing to remove it from certain galleries only.
Selfie search
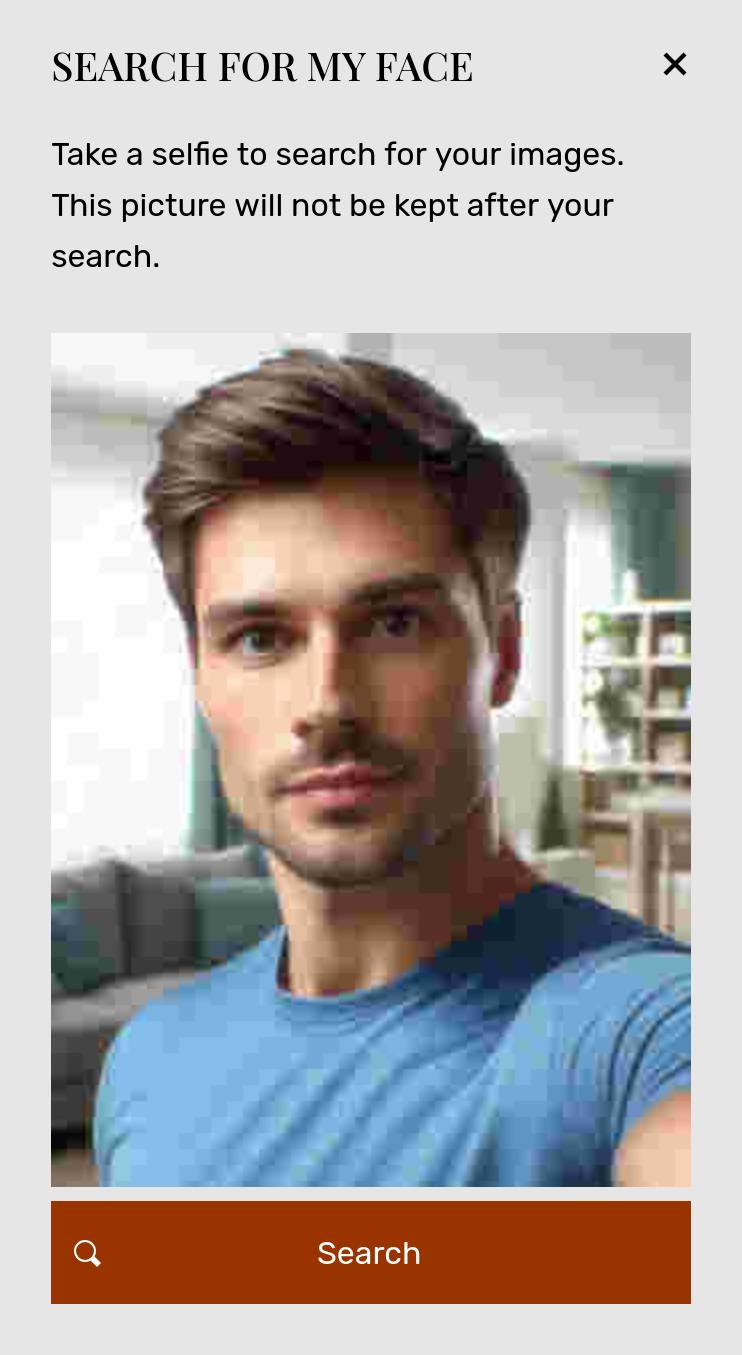
The selfie search allows users to take a picture of themselves on their computer or smartphone and to search for their own images. It makes it fun, easy and fast for them to see all images of themselves, and if you sell those images, it makes it more likely they will to purchase more of them.
To open the selfie search popup, a button is added to the search on your website.

The display of that button on your website can be activated/deactivated via the Selfie search option on My website / Setup / Website search.
On the same page, you can also globally deactivate the text search, if all you want is the selfie search. The search element can also easily be integrated via the free content editor on any page or gallery, for example on your frontpage above the thumbnails.

How to make images searchable with face recognition
For face recognition to work, the images must first be analyzed to make them searchable. The Face Recognition assistant detect faces and adds them to your account’s search index:
- Select one or more images, and click on AI Assistants.
- If you haven’t done so yet, add a Face recognition analysis assistant.
- You can then submit the image(s) to the assistant in a single click.
Activate the Automatically perform on newly imported files switch in the assistant’s settings to automatically analyze future uploaded files.
In your admin space, you can also search for images with detected faces, images that were analyzed but for which no face was detected, etc…
Facial search results
On the website, Faceclick and the selfie search will be limited to galleries accessible to the visitor/client, just like for any other search.
The most relevant matches are shown first.
Face matching accuracy and confidence level
This feature uses state of the art artificial intelligence models to identify and match faces with an average accuracy matching or exceeding the ability of a human being, but can also miss some matching images or return false matches. The accuracy of results depends on a number of factors, including the size of the faces in the image.
Face recognition works by analyzing how similar detected faces are. You can adjust the confidence level that determines when two faces are considered identical, in order either to ensure more accuracy in results (which might miss some images) or to make sure all images from a given person are found (which might include images from other people). This setting is found under My website / Setup / Website search.
Combining face recognition and similarity search
Faceclick and Similarity search can be combined to find similar images of a given person. Face recognition search is always performed first, and Similarity search then filters the results and produces a subset of the Faceclick search.
Face recognition and privacy
Face recognition on PhotoDeck is a search for identical faces where, starting from an image that includes a person, it is possible to find more images of that same person.
It does not identify people, and it is not linked to / accessible from external services or databases.
Both the face detection analysis and the face recognition search are performed on PhotoDeck’s own servers, without submitting any new information to third parties. Therefore, from a data protection / privacy standpoint, the data is treated like other client data or image in your account.
FAQ
How do I start making my photos searchable by face?
You must first index your images for face recognition. Select the desired images, open the AI assistants, and submit them to the face recognition assistant. You can activate the option in the assistant settings to automatically index all future uploads.
Can I disable the face frames that appear on my photos for certain galleries?
Yes. The global display of face frames is controlled under My website / Setup / Website search, and you can also adjust the specific gallery display style settings for individual galleries where you do not want the frames to appear.
What is the confidence level setting and how should I adjust it?
The confidence level determines how similar two faces must be to be considered a match. If you set it higher, you get fewer, but more accurate results (minimizing false matches). If you set it lower, you get broader results (ensuring all photos of a person are found), but you may include some images of other people.
Similar images: search and carousel
Similarity search is a powerful tool that helps your clients and users find images, and is very effective at increasing their engagement and encouraging them to discover your collectiom more deeply.
It makes it easy to find related images based on their content and semantic meaning: instead of just comparing colors and shapes, it uses artificial intelligence to identify the actual scene content and is able to link images that are visually dissimilar, but that carry a similar concept.
Only images that have been analyzed/indexed for similarity search are searchable.
The Similar images button
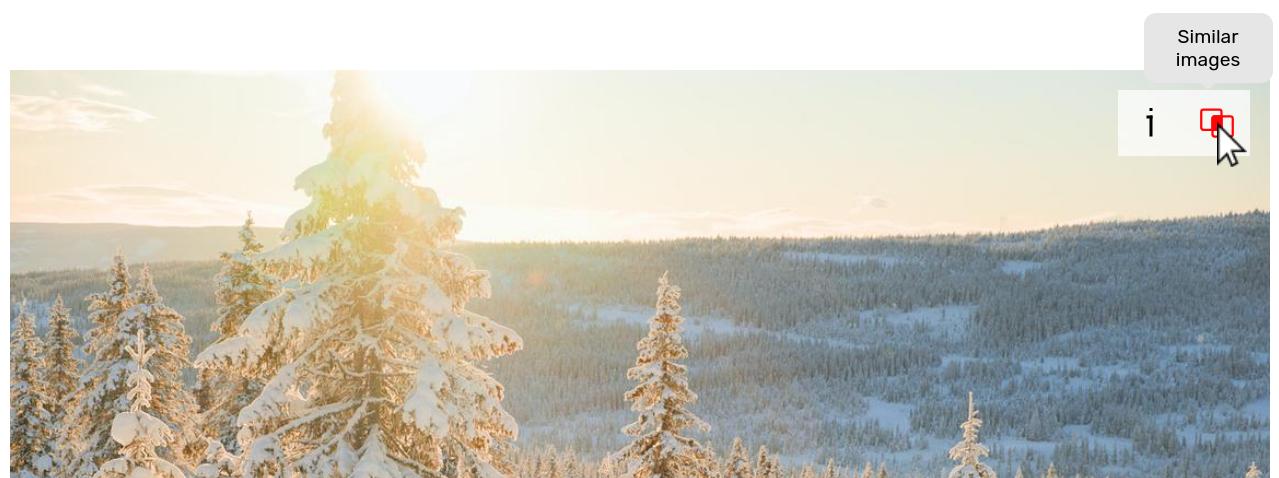
This button is displayed for images that have been analyzed for similarity search. It is activated/de-activated via the Similarity search option under My website / Setup / Website search.
The button can also be added or removed in the gallery display style settings in both the index (thumbnails) and the detail (enlarged images) views, allowing to hide or show them from certain galleries only. In the image detail view, the button can be displayed either overlaid on the image, or with the other buttons.
The Similar images button is available both on your website and in your admin space.
In your admin space, when an image has been analyzed for similarity search (“indexed”), a button will appear to search for similar images.
The most relevant matches are shown first.
The similarity search is also an effective way to find duplicates or near-duplicates for any given image in your admininistration space.
The Similar images carousel
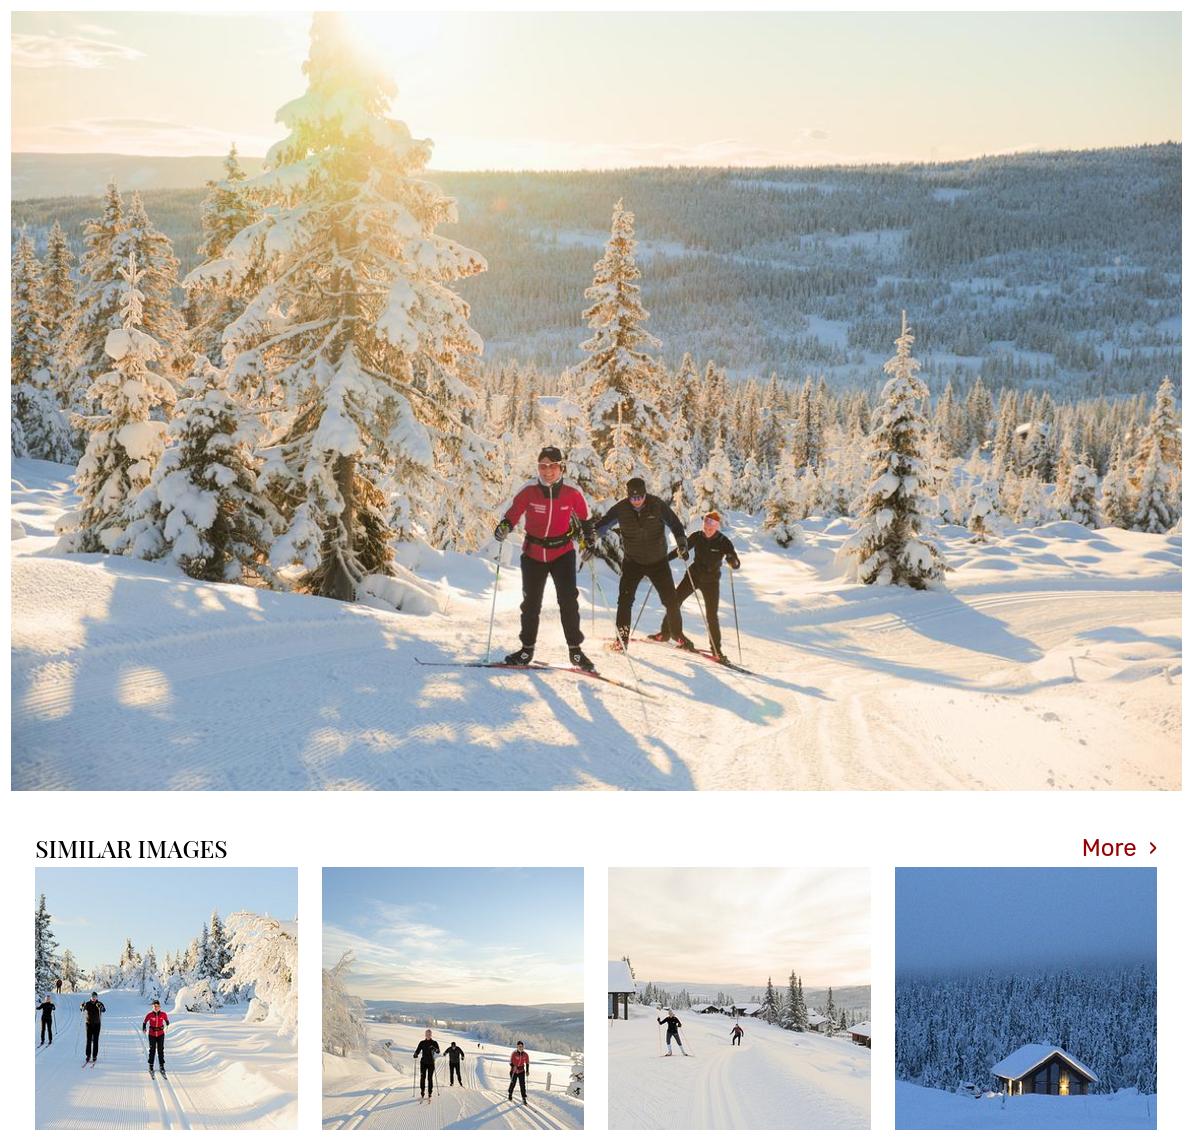
The Similar images carousel displays related images directly on an image’s detailed view.
This element is included by default in the E-shop and Stock photography gallery display styles. It can also be added to other styles via the gallery display styles customization.
How to include images in the similarity search engine
For similarity search to work, the images must first be analyzed to make them searchable. The Similarity Search assistant analyzes the content in images and adds them to your account’s search index:
- Select one or more images, and click on AI Assistants.
- If you haven’t done so yet, add a Similarity search analysis (BETA) assistant.
- You can then submit the image(s) to the assistant in a single click.
Activate the Automatically perform on newly imported files option in the assistant’s settings to automatically analyze future uploaded files.
In your admin space, you can also use the search feature to find images that were or were not analysed for similarity search.
Newly indexed images may not immediately appear on your website
To keep your website fast, the search results and the galleries are cached. Search results can take 15 minutes to be updated for the same query, and images may take a few hours to be visible in the Similar images carousel in galleries they are themselves not present in.
The search results in your admin space are not cached, and they are therefore immediately up-to-date.
Similarity search confidence level
You can adjust the confidence level that determines when two images are considered similar, in order either to ensure more accuracy in results (which might miss some images) or to make sure more similar images are found (which might include less relevant images). This setting is found under My website / Setup / Website search.
Similarity search and private galleries
Like for keyword search and face recognition, the similarity search includes all galleries, public or private, the current user has access to.
In public galleries, the carousel only includes images from other publicly searchable galleries. In private galleries, the carousel includes images in publicly searchable galleries and in other private sub-galleries under the same protection scope (i.e. protected by the same gallery).
Similarity search and videos
Similarity search also works with videos, by analyzing their cover image.
Combining face recognition and similarity search
Faceclick and Similarity search can be combined to find similar images of a given person. Face recognition search is always performed first, and Similarity search then filters the results and produces a subset of the Faceclick search.
FAQ
How do I activate the Similarity Search feature on my PhotoDeck website?
To enable the feature, you must first ensure your images are indexed for similarity search by using the dedicated assistant.
Can I combine similarity search with other search filters, like face recognition?
Yes, similarity search can be combined with other filters, such as face recognition. When combined, the face recognition search is performed first to find images of a specific person, and then the similarity search acts as a filter on those results to find the most visually or conceptually similar subset of images featuring that person.
Is there an easy way to check if I have accidentally uploaded the same photo multiple times?
Yes, the Similarity Search assistant is highly effective for identifying duplicates or near-duplicates. In your PhotoDeck admin space, you can run a similarity search on any image to quickly find identical or very similar copies across your entire library, helping you keep your collection clean and organized.
How does the search work?
The search on both your website and on the admin space look into all of your media files’ metadata (keywords, caption, location…), but they work in different ways.
Search in the admin space (“internal search”)
When you search for images within your admin space (My images & videos), the system looks for exact matches. For example, a search for cats will not return and image with the keyword “cat”. Partial matching and wildcards are not supported.
Tip: to look for an image, enter its ID. The ID of an image is its filename, without the .jpg/.tif extension.
You can limit the search to look only at keywords instead of the whole metadata by using the Keywords search field.
You can also save a search as a Smart Collection. The internal admin search is also used by the automation features.
The search is NOT case-sensitive. It looks at the following metadata: image ID (filename minus its .jpg/.tif extension), title, description, location, city, country, state, world region, keywords, author.
Special keywords
In your admin space Keywords advanced search field, use * to match files that have keywords, or ! to match files that don’t have any keyword.
Search on your website
On your website, the search looks at the same metadata fields, but is much more sophisticated. For example, it knows plurals, so a search for cats will return images with the keyword “cat”. It relies on a separate image search index, that is updated separately.
On your website, results for any given search query are cached for 10 minutes: if someone does a search right before you upload or update relevant files, it might take a few minutes before the change appears in the results for this specific search.
Updates will appear immediately for new, uncached search queries.
Hidden galleries
Hidden galleries are normally excluded from any search results, which two exceptions:
- They can be included in public searches by forcing their public indexing (see below), but in this case their content is accessible to everyone even when they are protected or under a protected gallery.
- When the search is made from within that very hidden gallery (and not from from a sub-gallery under it).
Galleries protected by password or login
Media in protected galleries are not included in your website’s public search index.
When a visitor logs in, the private galleries they have access to (up to 20) and their sub-galleries are then included in subsequent searches. Similarly, when they access a password-protected gallery, the password-protected gallery (and its sub-galleries) are included in subsequent search results.
Similarly to the access rights themselves, when a client has access to a private gallery containing sub-galleries, any sub-gallery that defines its own access rights might be excluded from the search results, unless it too specifically provides access to the client.
When testing access rights and private searches, first close your browser to ensure that no previous authentication is still active.
Including / excluding a gallery from the public search
In a gallery’s Authorizations panel, you can force a specific gallery to be either included in the results of public searches (made by unauthenticated users on your website), or excluded from them, via the Include images in public search option.
- When a gallery is included in public searches, anybody will be able to find and access its media. Forcing inclusion can be useful for hidden galleries, but we recommend not using this for sensitive content in private galleries, as it makes it publicly available.
- When a gallery is not included in public searches, its content will not be shown in public search results, except when the search is initiated from within that very gallery. It will still be normally included in “private” searches, i.e. if it is a private gallery that the visitor has opened access to.
This setting applies only to the gallery and does not impact the indexation of its sub-galleries.
Grouping search results by gallery on your website
When your galleries contain very similar images, you can group results by galleries via My website / Setup / Website search.
This way, when performing a search, your client gets the list of galleries having images that match, along with the number of results of matches per gallery.
Displaying search box on another website
You can display a search box on any website by adjusting and pasting the following piece of HTML code (replace YOUR-PHOTODECK-URL-HERE by your own website URL):
<form accept-charset="UTF-8" action="///YOUR-PHOTODECK-URL-HERE" method="get"> How to use file expiration?
Setting an expiry on a file helps prevent that it is used after a certain date, for legal or other reasons. For example, content might be licensed up to a certain date, or a file might not be relevant anymore after a certain point.

For a file with an expiry date:
- Two weeks before expiry, a reminder email is sent to the admin and all team members having Write access to the media library containing the file.
- At expiry, the file remains visible both in the administration space and on the portal website(s), but an Expired tag is displayed on it, and it is not possible anymore to download/order the file.
You can search in the administration space for files by expiry dates via the search filters under More search criterias.
Customizing and changing watermarks

A watermark is the only real protection against image theft and screen captures.
Watermarks and their settings are accessible via the Upload window. You can use multiple watermarks, and choose for each upload what watermark should be applied.

Watermarks are embedded directly into the previews
To offer a robust protection, watermarks are embedded directly into the preview images (or videos) displayed on your website. The watermark is therefore applied upon initial upload.
Watermarks don’t know about galleries: if an image or video is present in multiple galleries, the same watermark will be visible in all the galleries.
Watermarks are not applied to delivered files or files sent to labs for printing
Watermarks are only applied to the previews on your website, and therefore no watermark should be visible on the images delivered to your clients or sent to labs for printing. The only exception is the 1-click low-res download, which offers for download a preview image.
If you see a watermark in images delivered to clients or sent to a lab, it is most likely that you accidentally uploaded an image with an embedded watermark (for example by applying a watermark in Lightroom as part of the upload process). You can check the uploaded file by downloading it from your account.
Changing the default watermark
The default watermark is used when importing images through FTP, Lightroom and Photo Mechanics. It is preselected when opening the upload window.
To change the default watermark, open the watermark in the image upload window, and click on the Use as default watermark checkbox.
Customizing your watermark
You can either use the tools provided by PhotoDeck to create and customize a text watermark, or for best branding and flexibility (depending on your subscription level), use your own watermark image.
If you use your own watermark image, for best results use a PNG format with transparent background, and upload it in a large size (500 to 2000 pixels wide depending on how wide the watermark will be displayed). The watermark image must be under 3 Mpixels and its file size under 1 Mo, otherwise the import with message “invalid file format”.
My watermark appears cropped (or doesn’t appear) on my images!
The gallery display styles include an option to automatically crop preview images so that they appear bigger on the screen, especially for the Portfolio styles (for example for a full-bleed effect).
Depending on the purpose of the gallery in question, you can either reduce the amount of cropping allowed (via the corresponding gallery style settings) and keep the watermark (recommended for client and ecommerce galleries), or not use a watermark (recommended for Portfolio galleries). Alternatively, you can also center your watermark on the image.
My watermark does not appear on all images!
Please make sure your watermark of choice is set as “watermark by default” in its settings. This way, you won’t have to remember selecting it each time you upload new images, or when uploading from Lightroom, for example.
Applying a new/different watermark to previously uploaded images
Changing watermark on existing images requires the images to be re-uploaded, using the Replace feature to keep their metadata, pricing, etc…
- If your files have unique file names and they have not changed, you can easily re-upload many files at once using the Replace option in the upload window.
- If the images where uploaded via Lightroom’s PhotoDeck publish plugin, set the new watermark as “default watermark” in PhotoDeck, open the plugin’s settings to re-upload also the images files on update (don’t forget to disable it when you’re done), then republish the files from Lightroom.
Please note that when a file is replaced, a version number is added to its file name.
Right-click protection of images
Right-clicking on images is disabled in the galleries (and not on content added through the free editor), but it is mostly a small inconvenience for people wanting to grab an image from your site. For example, a screenshot is an effective and easy alternative, and slightly more sophisticated users can easily access the files of the preview images displayed on the site. An opaque watermark is the best protection.
FAQ
Can I change the watermark on images I already uploaded?
Since watermarks are baked into the preview images during upload for better security, you cannot change them with a single click. You will need to re-upload the images using the Replace feature, which will update the previews while keeping all your metadata, prices, and gallery settings intact.
How can I make my watermark stronger against AI removal tool?
Removal tools work by “imagining” missing parts of an image. To make their work more difficult or ineffective, we recommend to make sure a large and important part of the image is fully hidden by the watermark (for example a rectangle watermark with a fully opaque background).
Why is the watermark visible on my high-resolution downloads?
PhotoDeck never applies watermarks to your original files. If you see one on a delivered file, it is likely because the watermark was already embedded in the image before it was uploaded (for example, via a Lightroom export setting). You should check your upload workflow to ensure you are sending clean files to PhotoDeck.
Why does my watermark look cut off in my portfolio gallery?
Some gallery styles use automatic cropping to make images fill the screen for a full-bleed effect. If your watermark is too close to the edge, it might get clipped. You can fix this by adjusting the cropping settings in your gallery style or by moving the watermark closer to the center of the image.
Upload speed
Except when using FTP, uploads are made from your computer directly to our storage cloud providers without transiting through PhotoDeck servers.
We do not limit/throttle upload speeds, so upload speed depends on your Internet connection, the upload cloud provider used for your files, as well as on the interconnection between your Internet Service Provider (ISP) and that cloud provider. In the right network conditions, speeds of several MB/s (several dozens of Mbit/s) are therefore achievable.
Upload speed figures: KB/s vs Mbit/s
We display two upload speed figures in the upload window:
- The first one, in KB/s is the speed at which the file content is uploaded. It makes it possible for to you estimate how much time it will take to upload based on the size of the files.
- The second one, in Mbit/s is an estimate of the actual bandwidth used on your internet connection, in the same unit used by your ISP, and based on the following technicalities:
- The transfer protocols that make the Internet function divide each file into small data packets, and add information to the actual content that allows these packets to be secured, routed to the correct destination, reassembled in the correct sequence and verified for integrity. This so-called overhead reduces the apparent speed by approximately 5-20%, depending on the network technology.
- In addition, when uploading to a cloud over a long distance, 5-50% of the packets are typically lost and need to be retransmitted, slowing down as much the apparent connection speed. This can vary significantly depending on the quality of the connections and network congestion.
- 1 Byte (the B in “KB”) is 8 bits.
- The estimate assumes an efficient and good-quality connection like a high-end optic fiber link. Mobile, shared, sub-optimal connections or older technologies have greater overheads and will result in the estimate being underestimated, potentially vastly so.
If you use a high-quality, stable high-speed internet connection, use an Ethernet cable instead of WiFi to connect to your modem in order to make the most of your connection. If the upload speed you experience does not meet your expectations, please contact us.
Collections and Smart Collections
What is the difference between collections and galleries?
Collections are groups of images, just like galleries, but they are never published on your website.
They are therefore suitable for your own library management purposes, like selections for your admin space.
They can also be used to automate actions, for example automatically pricing images based on their metadata.
Unlike galleries, collections cannot be nested.
Using automation features
Galleries and collections can be associated with a series of actions to automate your workflow.
Automatically assigning images to a Collection or a Gallery
In the collection’s or gallery’s More / Automation settings, you can choose to automatically import images to the collection based on their metadata.
For example, you can create a collection named “Landscapes”, and use the Automatically import files that match… feature so that all images that match the keyword search “landscape” will be assigned to the collection.
Matching for images and videos occurs in the very same way as for the internal search in your library. Refer to the help on the internal search for more details!
Note: Images are checked for automatic import upon upload, keywords or author changes and when moved to another library. Check the box Rescan whole library and import matching files to check at once all images in your media library against the keyword search criteria.
Automatically applying pricing profiles or metadata to images
The following example automatically completes keywords and location metadata for images matching the search criteria “Manhattan”, and publishes them to dedicated gallery:
- Create a new collection ;
- Set the collection to automatically import images matching the search criteria “Manhattan” ;
- Set the collection to set the images’ Location to “Manhattan”, City to “New York”, and Country to “USA” ;
- Set the collection to add the keywords “city, megalopolis, metropolitan area” ;
- Set the collection to publish the images to a gallery named “Manhattan” ;
- Done! New images, or images with updated keywords, will be automatically considered for processing.
Metadata processing order
When files are uploaded, metadata are processed in the following order:
- First, metadata added in the upload form, via the Lightroom plugin or via the API are applied;
- Then, when the files are published to a gallery at the time of import, the automated actions of that gallery are performed. If a file is published at this stage to new galleries/collections that define their own automations, these are also performed;
- When a file is being processed (thumbnails generation), its embedded IPTC/XMP metadata are applied according to the chosen setting at upload (Ignore, Embed, etc…);
- Automated publishing into other galleries or collections based on metadata search, as well as the metadata processing actions that can be defined in those automations, are applied last. Metadata added here does not trigger a rerun of that stage.
What are smart collections for?
Smart collections are saved, dynamic searches. They allow you to quickly reuse searches and filters across your media library.
For example, you can create smart collections to quickly see what images are not published, what images have a certain keyword attached, what images have been uploaded in the past day, etc…
Website basic customization
Using my own domain: step-by-step guide
You can set up your PhotoDeck website under the address / URL (domain name) of your choice. For example, www.alexsmithphotography.com or archive.alexsmithphotography.com. When properly set up, your whole website will be under your custom domain, and the photodeck.com domain will not appear at all.
No domain transfer is usually required. You will merely point your existing DNS configuration to PhotoDeck servers for your website.
Since PhotoDeck does normally not have access to the configuration for your domain, you need to configure it with the company that manages your domain (e.g. GoDaddy, Moniker, Network Solutions, etc…). It is usually the same company you have purchased the domain from.
STEP 0: Purchase or get control over your domain
If you don’t own a domain name yet, purchase one from an independent provider. We recommend ovh.com. GoDaddy is also a popular alternative.
If you already own a domain purchased from the same company that provided your previous website, you must transfer your domain to an independent or specialized domain name provider. We recommend ovh.com. (PhotoDeck does not offer domain hosting, and it is best to host your domain separately from your website).
When your domain is under your account with a neutral domain name provider, you’re good to go!
PhotoDeck does not provide email services. If you wish to use email with your domain, the company that hosts your domain name is likely to offer such service.
STEP 1: configuring your domain
This first step allows a visitor’s browser to find out where on the Internet your website is: on PhotoDeck servers.
- You domain provider support team can probably do this step for you for free. Provide them the following instructions:
Configure the “www” record as a CNAME to sites.photodeck.com and set the domain apex (@) as a web redirect (301, visible) to “www”. Also add “include:spf.sites.photodeck.com” to the SPF record. - You can also hire us to do it for you.
- Log onto the administration panel provided by the company that manages your DNS
- If your DNS host allows it, start by adding a web redirect from your domain apex (e.g. “alexsmithphotography.com”) to the hostname you will use for your Photodeck website (for example “https://www.alexmithphotography.com”), using a “visible” redirection. This way, visitors not typing in the “www” part will still be properly directed to your website. Different DNS hosts offer this feature in different ways, please contact your DNS host support if you need help!
- Look for the “DNS records” page, sometimes also called “Advanced DNS”, “DNS zone”, “zone records” or “zone file”
- Edit the host (also called “subdomain” or “record”) of your choice, or create a new one if needed: for example host “
www” for “www.alexsmithphotography.com”. The record must be of type “CNAME” (if the record already exists but is of type “A”, you might need to delete it first).
As a value for the CNAME record (sometimes labeled “points to hostname” or “other host”), enter: “sites.photodeck.com”. (Some DNS hosts require you to add a dot, i.e.sites.photodeck.com.).
Do NOT set the CNAME directly on the @ record (the @ record is the root of your domain, e.g. “alexsmithphotography.com”), as this would break email!
(Optional: if there is a TTL setting, enter “3600”)NOTE: Do not redirect directly to your own personal PhotoDeck URL - it won’t work properly !!!
- We strongly recommend you use a contact email address for your website that is also on your domain (e.g. alex@alexsmithphotography.com), to help reduce the probability that messages send to your clients (like file deliveries) are accidentally categorized as Spam. To allow it:
1- Look for a TXT or SPF record that starts with “v=spf1” and addinclude:spf.sites.photodeck.comto it.
Example of a full record:"v=spf1 include:_spf.google.com include:spf.sites.photodeck.com ~all".
2- If you don’t have such a record: create a new TXT record with the following content:
"v=spf1 include:spf.sites.photodeck.com ?all".
This configuration change will be taken into account within approximately 24 hours.
First step is complete. It might take a few hours to be effective. Once your URL points to PhotoDeck servers, you will see the front page of your website, or alternatively a PhotoDeck “website not found” error page. In both cases, proceed to step 2 to properly link the URL to your own website.
Q: What is your server’s IP address?
A: You shouldn’t need it, unless your domain host does not offer the basic options we recommend using (in which case changing host might be a good idea). Our primary IP addresses might change at any time without notice -- that is why it is important that you stay as close as possible to our recommendations.
If you really don’t have a choice, you can find the current IP addresses for sites.photodeck.com here, for example.
Example: OVH
- Find the DNS settings for your domain in the OVH admin space
- Under DNS Zone, delete the www.mydomain.com row and recreate it with a CNAME type (notice the dot at the end of sites.photodeck.com):
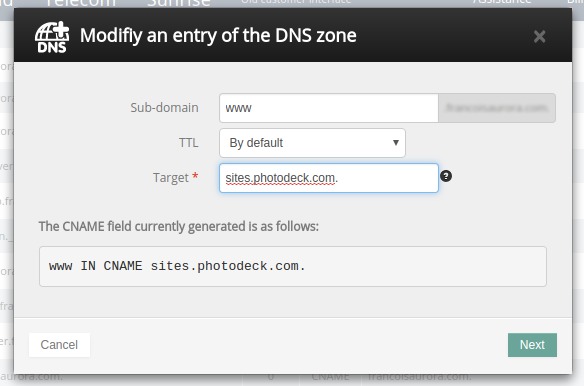
- OVH special: remove any TXT row for www.mydomain.com as they otherwise will interfere with your configuration
- Under Redirection, have mydomain.com redirect to http://www.mydomain.com
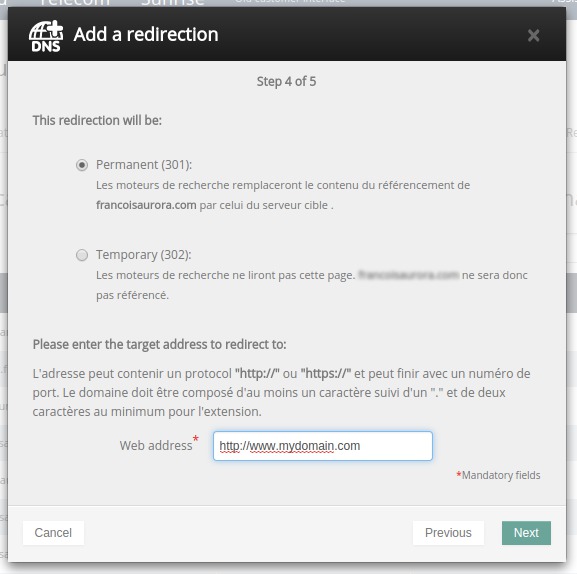
- Adjust the SPF record as described above.


For further help with this step, please contact the support of the company that manages your DNS.
STEP 2: configuring your PhotoDeck website
When Step 1 is complete, your URL will redirect to PhotoDeck, but it will not yet work properly with your website.
This second step is to tell PhotoDeck what your website custom URL is, so that when a visitor’s browser comes to our servers asking for your website, the system knows that it is your website that is being requested.
- Log in to your PhotoDeck account, and go to: My website / Setup / Name & URL
- Activate the option to use your own domain
- Enter your website URL, for example:
www.alexsmithphotography.com - Check that your DNS settings are correct, via the Check DNS settings button
- Click on “Save”
- Your own URL is now connected to your PhotoDeck website, and it replaces your default .photodeck.com URL. The SSL certificate for HTTPS secure connections will be automatically installed within a few hours.
- If possible, adjust the contact email address to use one under the same domain.
STEP 3: updating manual links
This applies only if you have links in custom pages, for example, if you have build a custom splash page with an ENTER link.
Links on custom pages are created manually, and therefore not automatically updated. If you have created custom pages, make sure the links work, and update them if necessary.
Changing my website’s language(s)
Your PhotoDeck website is a language freak! Not only can you change your website’s language, you can also have it support multiple languages via the Multi-language add-on.
Languages other than English
All messages that PhotoDeck displays on your website have been translated into multiple languages. We have also translated the default navigation links for the major languages.
Once you have changed your website language, you might still need to translate your own navigation links, and naturally, your own content (pages, metadata, pricing profiles names…).
Multiple languages

With the Multi-language add-on, your website can work in several languages:
- The primary language is the default language, it is the one used when going directly to your website (e.g.
mywebsite.photodeck.com) - Secondary language(s) are accessible via their own URL. For example:
mywebsite.photodeck.com/esfor Spanish, ormywebsite.photodeck.com/defor German.
When your website supports multiple languages, we recommend you add the “Language switcher” Component in your website design, to make it easy for your visitors to switch language.
Then, all your content can be edited in the various languages your website support.
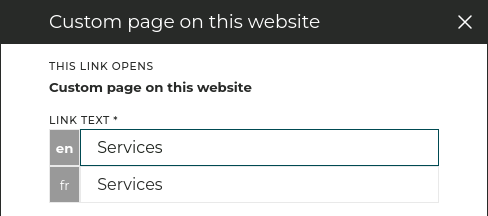

Note: your website automatically notifies Search Engines of the various languages available for each page. This way, Google will automatically direct visitors to the most appropriate language version of your website, depending on their location and language choice.
Changing your website’s frontpage
The front page (“home”) is what visitors first see when they go to your website URL. It can be changed under My website / Front page.
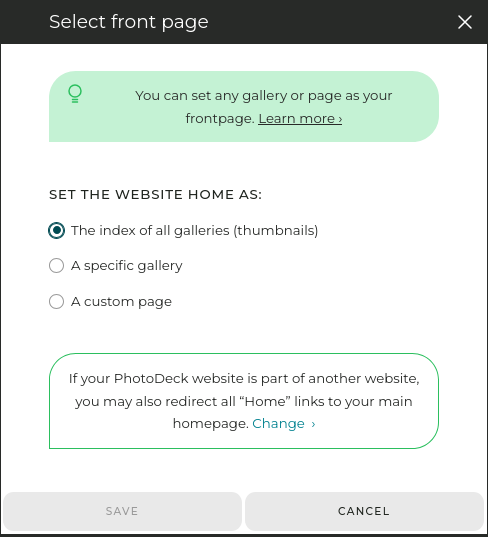
The front page can be:
- The index of all galleries (thumbnails). This is the default. Hidden galleries are excluded.
- A specific gallery. For example, you can display a portfolio gallery with a selection of your most unique shots and videos (see below to create an impressive frontpage slideshow).
Alternatively, if you have organized your galleries by categories (e.g. “Portfolio”, “Archive”, …), you can also put the most important top-level gallery/category as the frontpage. The index (thumbnails) of sub-galleries under it will then be displayed. - A custom page, if you prefer to have a free-form page on your frontpage, for example with a full-page background slideshow (see tutorial below). You can select a different frontpage for your smartphone website.
If you set a specific gallery as the frontpage, you will need to make sure that the other galleries are accessible via links in your navigation menu. Refer to the section on menus for further help!
TUTORIAL 1: displaying a full-bleed background image, video or slideshow on your frontpage
- Create a new custom page under My website / Pages not in menu ;
- Leave the page content blank, and click the Banner / background button ;
- Select the Site background template, optionally add the text that will be displayed over the slideshow, and hit the Create button ;
- Select the gallery you want to take the slideshow images / videos from. You can also hand-pick the images you want to include (the slideshow can be limited to a single image or video)
- Adjust the settings under the Texts section to taste. If you display several images, instead of (or in addition to) a fixed text, you can also use the images titles to have the text change with each image. You can also adjust the slideshow luminosity and text color for legibility ;
- Close the banner / background popup, and under the page’s Page settings tab, activate the Make this page the front page checkbox.
TUTORIAL 2: Displaying an auto-scaling slideshow on your frontpage
- Set your frontpage to be a specific gallery, one that contains the images you want to display (see above). It can one of your existing galleries, or a new gallery created for that purpose.
- Make sure that gallery uses the default “Portfolio” display style. (You can also use a different gallery style, but it must be set to open galleries to their first image, with both auto-scaling and slideshow enabled.)
- If needed, adjust the slideshow timer, loop type, transition style and maximum image crop by editing the display style. You will also be able to hide the Selection and e-commerce buttons if appropriate.
- Optional: if you wish, you can also hide the gallery so that it doesn’t appear in the galleries thumbnails index.
The size and layout of the slideshow within the page will be directly based on your design.
What is a custom page?
A custom page is a page of free-form content, mostly useful for information pages.
Custom pages are independent from the galleries but, like galleries, are displayed within the global website design.
You can create a new custom page from the My website panel. From there, click on Edit menu / Create custom page to create both a new page and a link to it in your navigation menu, or on Pages not in menu / Create custom page to create the page without adding it to the menu (you will be able to add it later).
When creating a new page, you can either start from a blank page, choose from a list of templates, or copy / duplicate a previous custom page.
Using the free content editor
The free content editor lets you add elements (text, images, buttons, quotes, preset forms and more) in a layout you fully control.
The content is organized in rows. Each row can be a single element, or be split into columns. The columns’ widths adjust to the screen’s width while retaining their respective proportions. On smartphones, the columns are displayed one above the other.
Columns can be easily resized by drag-dropping the resizing bar, visible when placing the mouse between the columns.
- click on the + sign at the left or at the right of the row to add a new element into its own column ;
- or drag-and drop an existing element into the row. If the row already has columns, depending on where the new element is dropped, either a new column will be added, or an existing column with be further split “one level down”, allowing for complex layouts.
The Text element: formatting text and paragraphs
- Just like in a word processing software, use
ENTERto create a new paragraph, orSHIFT-ENTER(CONTROL-ENTERon Safari) to insert a simple line break without additional white space. For visual harmony, the space between paragraphs is the same as the height of one line, which is customizable in the website’s design panel. - The Pencil icon lets you change the text size of paragraphs. Note that the HEADING options also insert HTML heading tags and style the text as titles. For example, XLarge just makes the text large, while HEADING1 inserts an H1 tag.
Adding images
The Image element lets you easily add images from your collection. It is not possible to embed a full gallery into a custom page but instead, you can customize a gallery and add other elements to it just like for a custom page.
Embedding a product
The Product element lets you embed a product pricing and purchase module for special cases:
- Images and videos are normally purchased from their galleries, but this allows for example to create an additional, dedicated page for a specific fine art print, to add more information than possible in the gallery. Please note that we do not recommend creating more than a couple of dozen custom pages to sell images this way, galleries are more effective and efficient for larger collections.
The image can only be embedded as a product if it is in a public gallery!
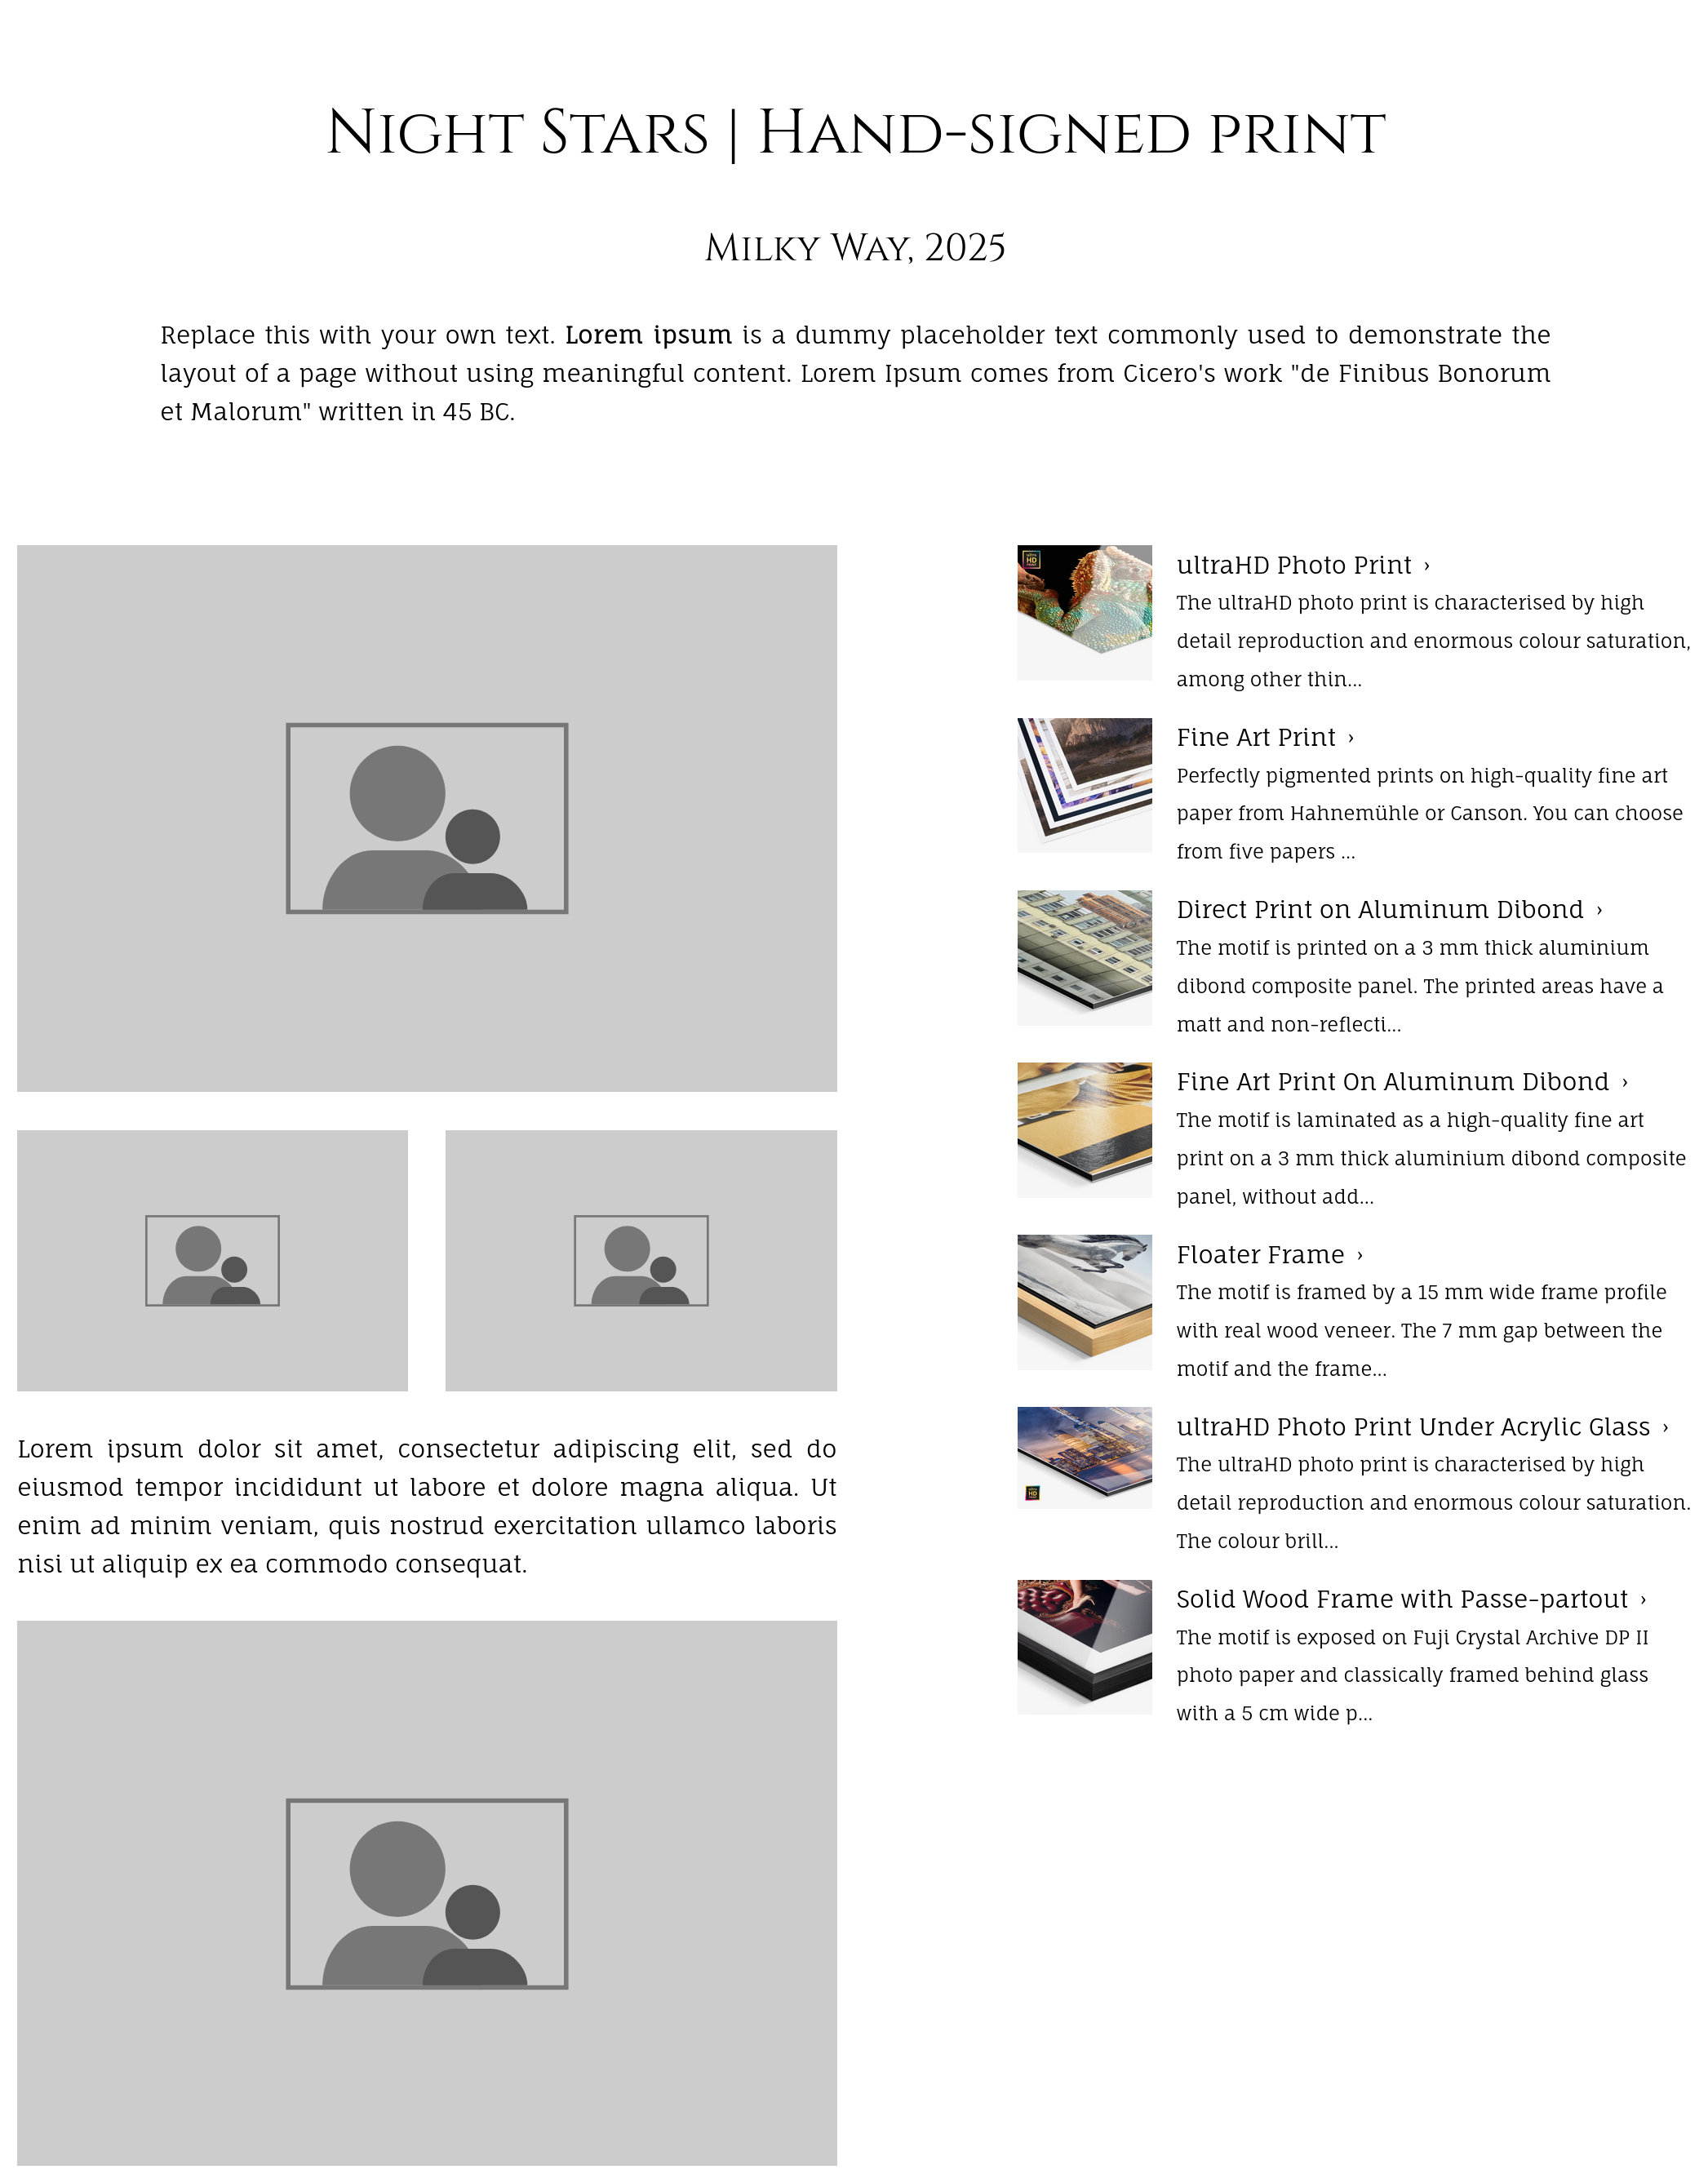
Purchase module for a fine-art print embedded into a custom page - Similarly, custom products like shooting sessions or workshops also have their own product page. Embedding their sales module on an additional page allows to group several products on the same page (maximum 3-5 products per page).

Embedding external videos and widgets
It is easy to embed a video from an external website like Youtube or Vimeo into a custom page or a gallery introduction: simply add an HTML code element via the free content editor, and in that element, paste the provided HTML code.
The HTML code element can also be used to embed widgets like a Google Maps, but note that the embed must be based on an iFrame (i.e. the code starts with <iframe>. Most external widgets are based on javascript, and this is not allowed on PhotoDeck due to security and legal (GDPR) reasons.
Custom slideshows as banners and page backgrounds
These custom slideshows are designed to enhance a page or a gallery overview. They can contain images and videos that will automatically play (or naturally, just a single fixed image). They can be located:
- As the background for your website on that page. In this case, the website design will automatically adjust to display as much of the image / video as possible, and to unify the text color ;
Background with splash text - Above the page content, showing either images / videos in their normal proportions or a banner ;
Banner with fixed text and image captions


To showcase a full gallery by itself in slideshow mode, use for example the Portfolio gallery style on the gallery instead of a banner slideshow.
Creating a new slideshow
To create a new custom slideshow for a gallery, open that gallery’s Banner dialog, and and choose a template.
To create a new custom slideshow for a custom page, open that custom page in your admin space, and choose a template under the Banner / background tab.
Adding images and videos to a slideshow
The simplest is to add content taken automatically from a gallery.
You can also hand-pick images and videos, in order to display a single one, to remove some of them from the slideshow (e.g. images in portrait orientation), or to add images/ videos from different galleries.
The quality of the images / videos is the same as when they are displayed by themselves (i.e. determined by the gallery display style).
Slideshow layout
These options allow you to position the slideshow either above the content, or as a background for the page.
The Max height setting is important when you display the slideshow above the content: regardless of the size of the viewer’s display, it allows to always display some of the content below the slideshow. This can be useful to constrain the slideshow to a banner format (e.g. max 40% of the window height), or to make it more obvious without scrolling that there is more content on the page than the slideshow (e.g. max 90%).
It is normally not a good idea to constrain the slideshow height if you display it as the page background!
To be able to nicely fill the whole space allocated to the slideshow, the images / videos are cropped. The Max cropping options allow you to limit the cropping to avoid having important parts of images cut out.
Adding text to the slideshow
When adding overlaid text, it is even more important than usually to test the result also on a smartphone.
Optional slideshow text include:
- Free text common to all the slideshow images / videos. It can be displayed as an overlay for maximum effect, or below the slideshow.
- Image-specific text, that will therefore change with each image / video. The slideshow pulls the title and/or the description of each image / video, which you can modify under My images & videos.
Text color and legibility
When displaying text over a slideshow (or a slideshow as a page background), it is important that the overlaid text stays highly legible. To that avail, you can change the Color of overlaid text setting. In addition, the Images luminosity option can come in handy to dim/lighten the slideshow and ensure that the text stands out.
What is a navigation menu?
A navigation menu is a set of links (also called menu items), displayed on your website.
These links can point to any part of your website, or to any external website (for example, another website of yours).
A navigation menu is displayed within a Menu component in your website design and its style can be customized in the design editor. Navigation menus also often inherit styling from a larger navigation block that might also include for example the logo or the language selection.
PhotoDeck base themes include a single menu. Website designers can add an additional navigation menu, by adding a Menu component in the theme’s HTML code and associating it to a new menu (set of links).
Adding a link, gallery or page in the menu navigation
To add a new link to your website menu, click on Add link under My website / Edit menu and choose the kind of link you wish to add. A number of options allow you to easily link to specific parts of your website, for example to specific galleries, to the cart, etc… Use External website / full URL to link to an external page, or a page you want to provide the full URL of.
To reorder the links within the menu, simply drag and drop them into their new position.
You can also use Add separator to split your menu into groups. The separators have their content and style defined via the design panel, as part of the Menu Component options.
Creating a drop-down menu
A drop-down menu (also called sub-menu) allows you to nest up to 15 links under a single menu item.

Existing menu items can’t be used as drop-down menus, new drop-down menus with their own title must be created. A click or tap on a drop-down menu title opens it, revealing its nested links, or closes it.

To create a drop-down menu, use the Add drop-down menu button in the menu editor and give it a title. You can then add links by clicking on the Add button.
You can reorder items within a drop-down menu by drag-dropping the items into the desired order. Using separators is also possible.
Favicon and touch-icon
A Favicon (“Favorite icon”, also known as shortcut icon, bookmark icon…) is usually displayed on visitors’ web browser in the URL bar or when bookmarking your website.
You can upload your own Favicon under My website / Setup / Favicon.
You can also upload a “touch icon” that will be used on iPhones or iPads when visitors add your website to their home screens (Web Clip). The uploaded image will be scaled by each device to fit their native resolution, and rounding and glass-like effects will be added automatically.
Social media icons and share button
PhotoDeck websites are linked to social media in different ways:
Links to your own social media networks
You can define links to your own social media networks (like Instagram, Facebook, X (Twitter), LinkedIn, Threads, Bluesky, etc…) under My website / Setup / Social networks. These links will then be displayed as icons on your website.
In the website design customization, you can change the size and look of the social network icons.
Each theme / design has a designated spot to display these icons, but note that you can also display them as part of the website navigation menu. To do so, add a new link to the menu and select the Social network icons option as the destination of the link.
Make sure to link back from your social network pages to your website, as links are important for search engines like Google!
Letting visitors share your website on their social networks
A Share button / icon can be displayed on images detail pages and galleries. It opens a popup that lets visitors select their social network (including Pinterest, Whatsapp…) and share the page in question (its link).

The button is displayed on images details pages if allowed by the gallery display style in use (in the gallery display style editor, under its Detail pages tab / Enlarged media element settings). It is shown on galleries’ thumbnails pages if the action buttons are active under the gallery display style editor’s Thumbnails pages tab / Gallery content element’s settings. Disable these options if you wish to remove the image and gallery share buttons.
This button is never shown in private galleries.
Note that there is no Instagram share button, because Instagram is not designed to let users share others’ websites or images. But if you use Instagram, do make sure to add a link to your own Instagram page (see above).
Sharing images from your PhotoDeck admin space
You can also share images/videos (links to pages on your website) directly from your admin space. Please refer to the dedicated help section on this topic (see links below).
How can I get my site (ranking well) in Google?
Your PhotoDeck website is optimized for search engines, which means that we make sure it is easy for search engines to understand how the site is structured and to discover images.
We also automatically submit to search engines a sitemap of your site when they index your site.
To get your website in Google, you must have links from other websites pointing to your own site, preferably with your website name in the link text. You can start with links from your public social network profiles.
How well your site ranks on Google for specific searches depends on many factors, and the most important ones relate to how popular Google thinks your site is, based for example on the number of links coming from other websites, and how fresh the content is.
To go deeper, check out our full guide on SEO for photographers!
SEO customization with PhotoDeck
If you wish to fine-tune the way search engines index your website, you can adjust a number of settings under My website / Setup / SEO. Some of these settings can also be set (overriden) in a gallery’s or custom page’s own SEO settings.
Main Keyword
Someone looking for photos of New York might type in a search engine “New York photos”, “New York pictures” or “New York images”.
Your website cannot rank high on all search terms, so pick your main keyword meaning “photograph”. That word is displayed in many places throughout your website, for example below the images.
Title text in Browser bar
It is a key element in how your website is indexed by search engines (also called HTML Title Tag). It usually appears as the website title on Search Engines result pages.
On galleries thumbnails pages, the browser bar text is automatically generated based on the gallery name and your global SEO settings. You can add text before and/or after the gallery name.
In addition, you can specify a custom title for individual gallery indexes and custom pages via their settings.

On pages that feature a single image (or video), the browser bar text is always automatically generated based on the image title and your global SEO settings.
HTML Meta tags
The Meta tags are embedded in the HTML code of each page, but not displayed.
The Meta Description sets the content of the Description Meta tag of a page on your website. It is sometimes used by search engines (when displaying results, not for ranking), and by social networks.
Like Titles, the Meta Description is automatically generated based on your global SEO settings, and you can specify a custom description for individual galleries and custom pages via their Settings.
The Meta Keywords fill the Keywords Meta tag on every page of your website. Search engines don’t use it and its use is therefore very limited.
Google Search Console
Google Search Console can provide useful insights on the indexing on your website and on the keywords that bring you organic traffic.
Nonetheless, the reports can be slightly misleading, and you might in particular get the following messages:
Page Indexing issue: Blocked by robots.txt
This message means that the Google crawler has found some pages on your website for which the instructions we provide in the robots.txt file indicate that they should not be indexed.
This is by design: the pages in questions include for example image price pages and search results. Google allocates an “indexing quota” to websites, depending on their popularity, so it is important to help the crawler focus on the important content and avoid indexing pages that are not likely to be useful SEO-wise, especially for photography websites with lots of image pages.
This is therefore not an error and you can safely ignore that warning.
Mobile Usability issue: Content wider than screen
Google Console sometimes reports that a specific page does not display well on mobile because its content is too wide.
This is usually a Google Console bug, and the message may come up even if you haven’t changed the page in question in a long time. We recommend you proceed as follows:
- Check the page in question on your mobile phone to make sure it works properly and without horizontal scrolling. PhotoDeck pages are designed to be mobile-friendly, but it is for example always possible to add custom HTML code that doesn’t scale well on small displays.
- Once you have checked that the page is indeed fine on your mobile phone, use Google Console’s Validate fix feature to force them to check it again. In most cases, the error will disappear by itself within a few days.
Adding Google Analytics and other tags/scripts
PhotoDeck lets you integrate your website with some providers like Google Analytics to analyze traffic, as well as add certain site ownership verification codes or “tracking pixels”.
To see the supported providers and add new integration code, head over to My website / Setup / Analytics & site verification.
For security, performance, and consistency with your website’s cookies policy, it is not possible to freely add custom scripts like booking systems, live chat or ads. The content of the HTML HEAD tag cannot be customized. Please contact support if you wish to suggest the addition of a provider!
Cookies Consent: what option to use and how to customize
The European Union law requires that a website shall get user consent before setting cookies. These cookies include tracking cookies used by analytics services (like Google Analytics) and by embedded content providers (Vimeo, Youtube, Facebook widgets, etc…). Purely technical, short-lived cookies such as those set by PhotoDeck are exempted.
DISCLAIMER: PhotoDeck does not offer legal advise nor qualified recommendations. If in doubt, please consult with your attorney or local government body.
PhotoDeck provides you with several options to best adapt to your specific situation.
Consent mode options
You can adjust the type of consent required for cookies on your website under My business / Legal / Cookies consent.
- Don’t request consent
This option does not display any information bar about cookies, and does not prevent any cookies to be set. This is probably the best option if the EU law does not apply to you. - Info bar only
This option displays an information bar to let your visitors know that your website uses cookies. Your visitors can close the information bar but cannot decline cookies. - Opt-Out
This option initially assumes that your visitors accept cookies, but displays an information bar with ACCEPT / DECLINE options. Cookies are set (tracking services and embedded third-party content are enabled), until the visitors indicates that he/she declines cookies. When cookies are declined, existing cookies are deleted when technically possible (PhotoDeck cannot delete all cookies set by embedded third-party content providers). When cookies are declined, analytics services are disabled and embedded content is also replaced by a message indicating that cookies must be accepted. This option is not strictly compatible with the EU law. - Opt-In
This option disables Google Analytics and similar services, and replaces all embedded third-party content with a message indicating that cookies must be accepted. The information bar offers ACCEPT and DECLINE options. When cookies are accepted, tracking services and embedded third-party content are activated. This option offers the best legal compliance of all options, but is also the worse in terms of website usability.
Automatically generated “Cookies policy” page
PhotoDeck automatically generates for you a cookies policy page based on your chosen option for cookies consent.
This policy is linked from the default cookies consent bar on your website, and you can also add it to your website’s navigation menu via its dedicated link type.
The full URL for this page is http://YOUR-SITE-URL/cookies-policy.
Customizing the cookies consent bar and the cookies policy

You can easily change the message displayed on the cookies consent bar. In this case, the link to the default generated policy is also removed, so you can either:
- Manually add the link to the default policy into your custom message, using HTML code. For example:
<a href="/cookies-policy">Learn more</a> - Create your own Cookies policy page (as a normal custom page), and add a link in your message using HTML code. For example:
<a href="/PAGE-URL-FRAGMENT">Learn more</a>(The page URL fragment is defined as part of the custom page settings. See screenshot for full example)
Defining my own Terms and Conditions
Your own Terms and Conditions, if defined, must be accepted by your clients upon ordering and registering. You can define them under My business / Legal / Terms and conditions.
You can also add a link in your menu to view them at any time, by choosing the “Terms and Conditions Page” from the link target drop-down.
The date when a client accepts your terms, if it has been recorded, is visible on the client’s record page.
These terms can also be delivered to your clients as a PDF file along with ordered image downloads.
Using your own PDF file as website terms
Entering your terms and conditions text in the interface guarantees that the text will be nicely integrated on your website and will display well on mobile too. But if you wish to have more control over the format of the file delivered to your clients, you can also import a custom PDF file instead, and it is what will be both shown on your website and optionally included in file deliveries.
Terms and Conditions accepted by your clients are a contract that helps safeguard your business interest and for example, are a good place to provide mandatory information, or set boundaries on what your clients can do with the images they download. If you serve clients in Europe and are subject to the General Data Protection Regulation (GDPR), they are a good vehicle to comply (they provide a “contractual basis” for the data).
If you haven’t defined terms and conditions yet, and especially if you sell goods or services through your website, we encourage you to learn more about this topic as well as the GDPR if it applies to you. If contacting a qualified legal counsel isn’t practical, it is easy to find Terms and Conditions templates on specialized websites (make sure they apply to your location and the kind of products you sell, if any).
The terms might be complemented with the information we provide on the data collected on your website and its location and on cookies.
Note: the information on this page does not constitute legal advice.
Integrating PhotoDeck galleries or eCommerce with another website
PhotoDeck includes a complete website builder, but you can also use PhotoDeck only for galleries or eCommerce and integrate them with an existing website.
Technically, PhotoDeck galleries and pages will always be displayed via a PhotoDeck “website” on its own URL. This guarantees ultra-fast page loading and excellent mobile responsiveness. Here are our recommendations so that the integration is as seamless as possible for your audience:
- Add links from a website to another on both websites, for example in their respective navigation menus. You can easily customize the navigation menu on PhotoDeck to include different links to pages on your main website.
- Under My website / Setup / Website integration, activate the option to integrate with another website. This will ensure that all “Home” links and the link on your logo redirect to your other website.
- Customize the PhotoDeck design to use the same logo, colors and fonts as on your main website. PhotoDeck includes in-depth design customization so that you can align its visual identity with your main website in a way that is transparent for your visitors.
- Optional: consider placing the PhotoDeck galleries under the same domain as your main website, using a different subdomain (for example: galleries.mydomain.com).
Linking images on another website to their product page on PhotoDeck
Upload the images also to PhotoDeck galleries and attach them to a pricing profile to offer them for sale. On your other website image pages, place “Buy” links that point to:
http://[your PhotoDeckURL]/media/IMG_1234.JPG/price: link to the pricing page for the image whose original file is IMG_1234.jpg. Make sure all your files have unique filenames!- or
http://[your PhotoDeckURL]/media/302348fe-41ac-11df-8124-002219dda2c0/price: link to the pricing page for image whose PhotoDeck ID is 302348fe-41ac-11df-8124-002219dda2c0. Use our CSV export feature on the My images & videos / CSV export page to get the list of your images and corresponding PhotoDeck IDs. This is the safest and best-performing method, especially if your filenames are not unique.
Customizing the website design
Changing and customizing my website design / theme
A design in PhotoDeck is only concerned with the overall layout and the style of your website. Designs are like “skins”, the same features are always available regardless of your design.
It is also possible to greatly customize the way the images and galleries are displayed (via the Gallery Display Styles), what is shown on the front page when a visitor comes to your site, etc…
Video tutorial: customizing the design
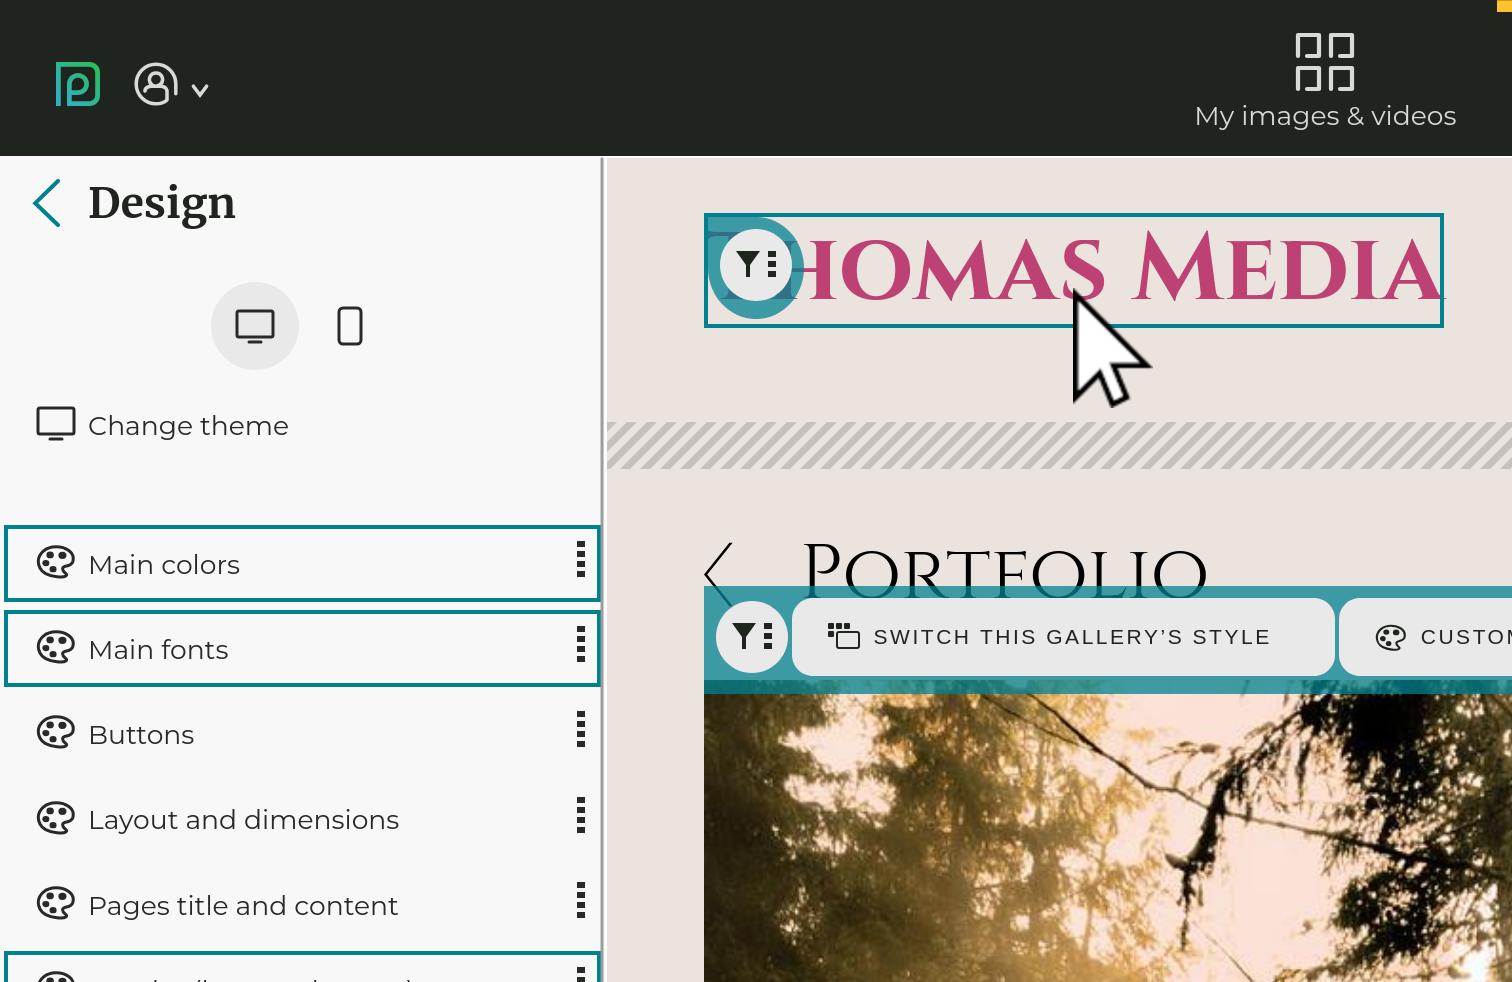
The Design panel
Your website design settings are at My website / Design.
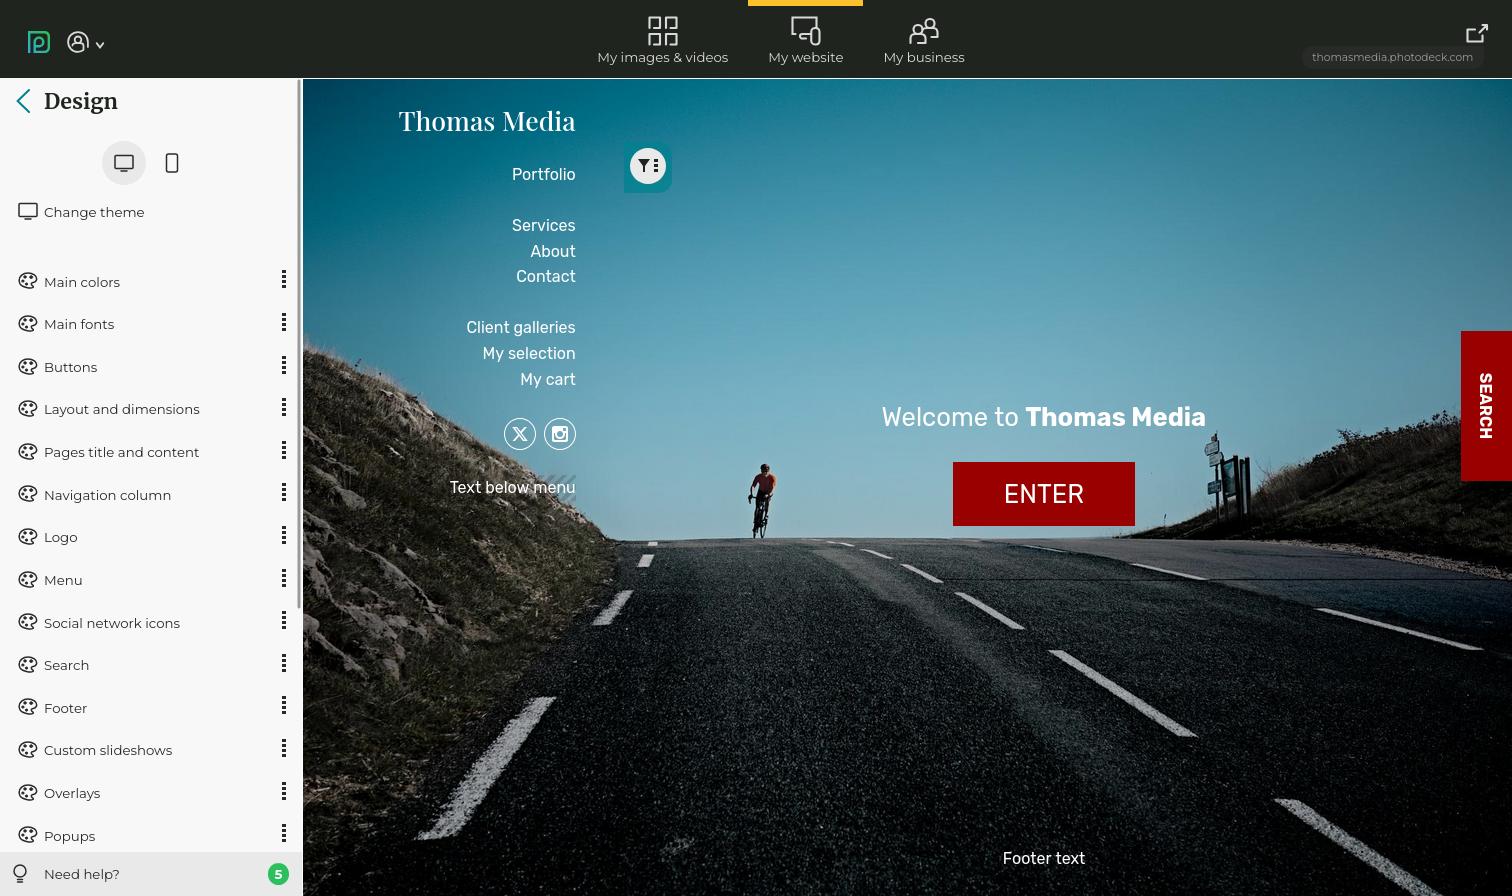
This is where you choose and customize the overall “skin” for your website. What is done on this panel applies to all pages of your website.
This is where you customize the items that form the layout of your website: logo, navigation menu, colors, fonts, …
Apply - Revert
Changes you make to your design are not automatically applied to your live website, so you can try new options with no risk. If you are unhappy with the changes you have made, hit the Revert button to reset the work-in-progress design to what you have on the live website.
Click on Apply once you are happy with the changes. After that point, it is not possible to go back to a previous design or version.
Changing and selecting a theme
You can change theme under My website / Design / Change theme.
All features are available for all themes, and all themes are highly customizable. Choose a theme based on its layout and on the size and shape of your logo. The images will use the space left available by the logo and menu, so if you wish to display images as large as possible, we recommend a two-column theme (like #1) as your desktop theme, especially if you use a large logo.
When changing theme, the builtin gallery display styles are reset (the gallery display styles you might have created are left unchanged). Your content is left untouched, so you can freely change theme at any time.
Before changing theme, you can take a backup of your current theme and customization via the Advanced panel, making it easy to go back if needed.
Theme customization
Changing the global colors allow to easily create a professional-looking and unique color palette, when the individual components’ colors are automatically computed:
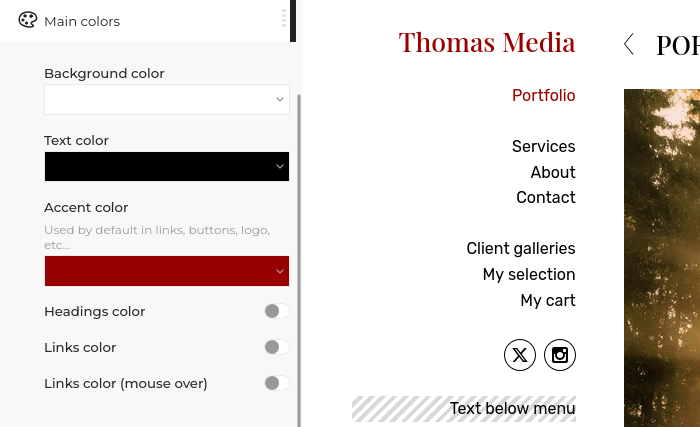
The options follow a hierarchy: what is customized at the global level applies to any individual component, except if that component defines its own customization. Hovering with the mouse over an option group shows what components are affected by these options:
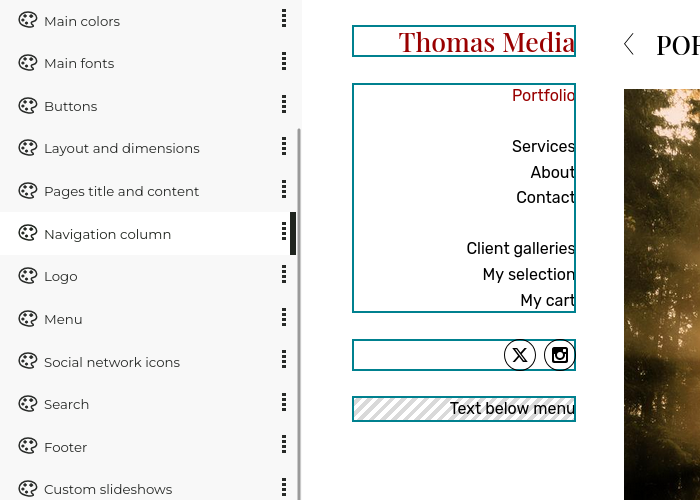
Similarly, clicking on the “filter” icon on a component (for example your social networks icons) will bring up all relevant customization options:
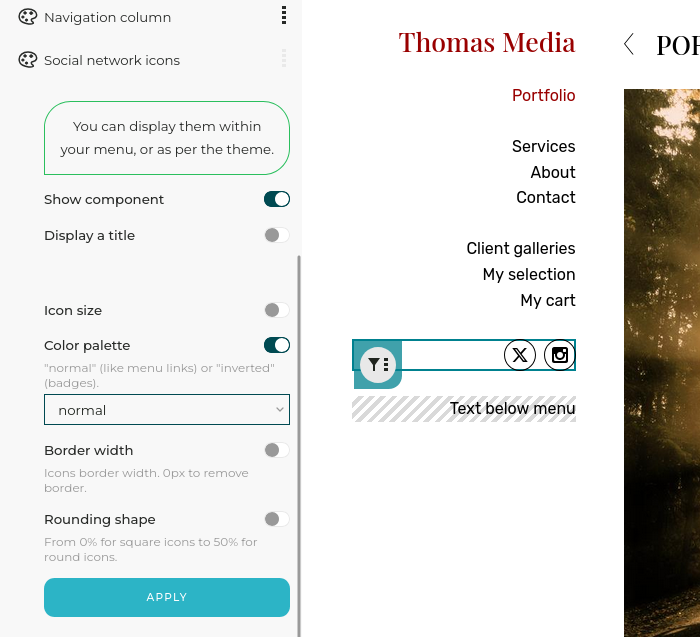
Every setting has a “switch” which allows to activate or deactivate its customization:
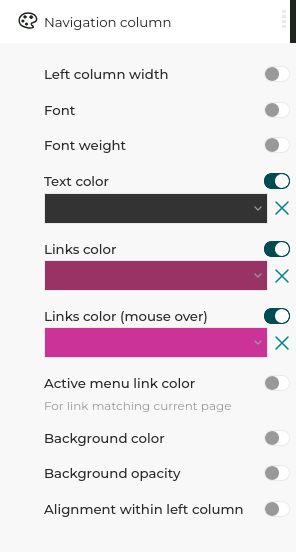
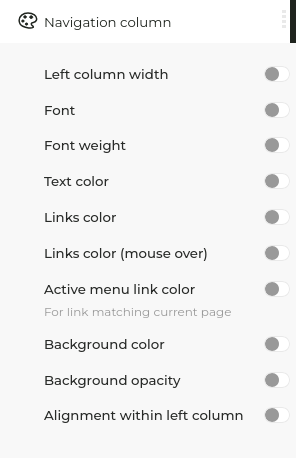
Gallery Display Styles
The gallery Display Styles allow you to customize how images are displayed, based on the purpose of the gallery they are in. Please refer to the section on Gallery Display Styles for further help.
PhotoDeck websites are designed to adapt automatically to small displays like tablets. When you change your design, it is therefore important that you make sure your website still looks great on tablets. If you don’t have a tablet, simply progressively make your browser window smaller until it is approximately half the width of a standard laptop display, and you will get a good feel on how it will behave on small tablets.
Custom CSS/HTML design
To go further, PhotoDeck also lets you customize the theme HTML/CSS code. This allows you to modfiy the theme in ways not possible via the options offered in the interface, or even to implement a specific design. Using this option requires the help of a qualified independent designer. Please note that technical support is not available for custom coding.
Using my own logo
To add your own logo:
- Prepare your logo in the size and format it will be displayed on your website. If it is meant to be displayed in a side column, it is best not to go over 250px of width, depending on the theme. We recommend saving the logo as a PNG file, with transparency if appropriate, or to use a SVG graphics file after running it through a SVG optimizer (e.g. via a specialized online service).
- Go to My website / Design and open the logo options by clicking on the filter icon above the logo and opening the logo options in the left-hand side column.
- Click on the Image option. In the popup window, upload your logo file, or select a file previously uploaded into your Visuals & assets.
- Your logo is now visible in the preview window. Once you are happy with it, click on Apply to apply the changes to your live website.
Choosing fonts
Google fonts
Choose your font on the Google font repository. Then simply type its name in the PhotoDeck panel to select and use it!
It is best to restrict yourself to a maximum total of one or two fonts in your design, and/or a couple of font weights. This way your site will stay clean-looking, and will keep loading fast.
Font pairing examples
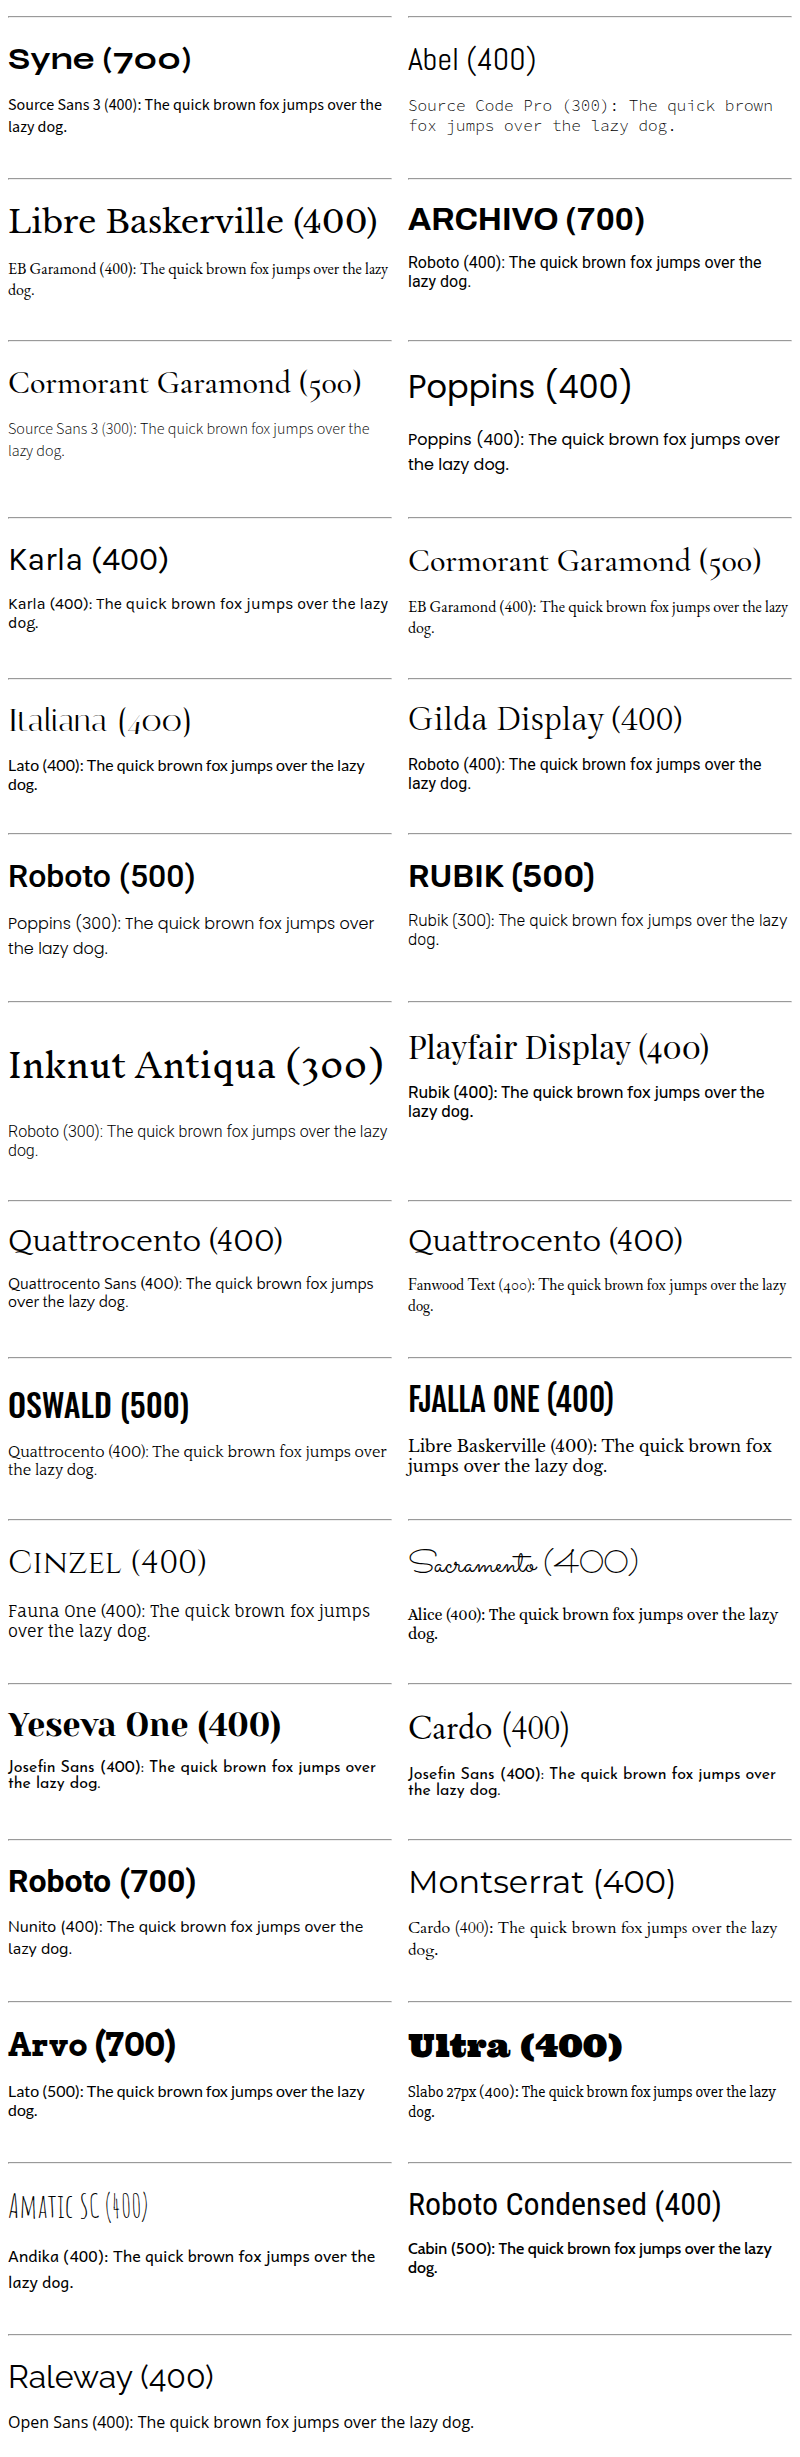
Adobe Font integration
We don’t recommend using Adobe Fonts if you are located in the E.U., as Adobe fonts are served by servers outside of the E.U. and consent from visitors isn’t collected.
Adobe Fonts (formerly Typekit) is a leading commercial webfont provider.
- Create a web project with the fonts of your choice in the Adobe Fonts interface ;
- Enter your Adobe Web Project ID under My website / Design / Main fonts. Your web project ID is shown in the Adobe Fonts interface on top of this page:
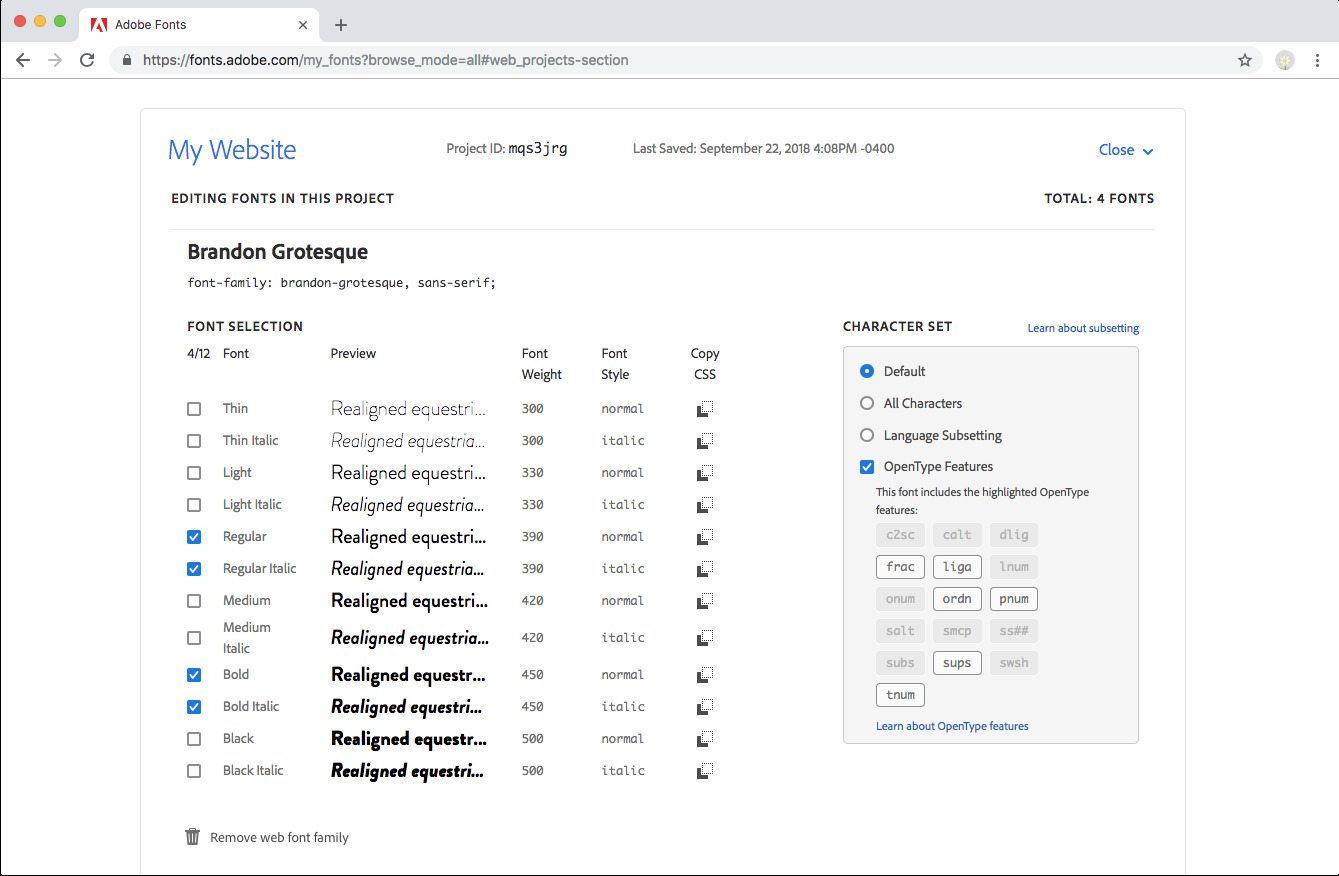
The embed code will then be automatically added to your website. - You must then edit your custom CSS code in your PhotoDeck admin space to apply the font(s) as you wish. For example, to apply by default the Proxima Nova font to the whole site:
#ws_page { font-family: "proxima-nova", sans-serif; }. For titles/headings:h1, h2, h3, h4, .title { font-family: { font-family: "proxima-nova", sans-serif; }. The font-family value is shown in your Adobe interface for each font in your project. If you wish to apply a font to a single component of your design, you will need to be familiar with CSS coding and use your browser’s developer tools to identify the proper CSS selector. Please note that PhotoDeck does not provide CSS coding services.

Using custom fonts font files
If the fonts provided by Google or Adobe do not suit you, for example if you need to apply a specific font to match your branding guidelines, you can embed a font that is hosted on an external server (it is not possible to host font files on PhotoDeck), adding code to the Custom CSS section of your designs. For example:
 @font-face {
  font-display: swap;
  font-family: myfont;
  font-style: normal;
  font-weight: 400;
  src: url(//<FONT URL ON EXTERNAL SERVER>) format("woff2");
 }
 #ws_page { font-family: myfont, arial, helvetica; }
 h1, h2, h3, h4, .title { font-family: myfont, arial, helvetica; }
The exact CSS code will be provided by your graphical designer. Please note that PhotoDeck does not provide CSS coding services.
Classic fonts
These are fonts present by default on most devices.
(For each pair listed, we use additional similar-looking fallback fonts for systems where either font is not installed).
Website design backup
It is easy to backup the design of your website, for example before making changes to the design customization or upgrading the theme to a newer version. This is not designed as a long-term backup: old backups might not be restorable.
You will find the feature to backup (or restore) your theme under My website / Design / Advanced.
This only backups your design, i.e. the “skin” of your website. This does not backup the galleries, pages, website configuration nor any content. As your PhotoDeck website is not just a simple batch of files, it cannot be backed up or exported as a single entity. Please refer to our data protection policy to learn more about how we store and safeguard your data.
Integrating a WordPress site
Once you have completed the design of your PhotoDeck website, you can export it as a WordPress theme. This way, your blog will appear to be completely integrated into your website.
The resulting WordPress theme is based on WordPress’ default Twenty-Twelve theme, which is part of WordPress 3.0 (and above) distributions. If the Twenty-Twelve theme is already installed (which is normally the case), all you need to do is install onto WordPress the custom PhotoDeck theme (zip file).
The theme has multiple widget areas, so it is easy to customize it with blog archives, linkrolls, tag clouds and any other WordPress widget.
Note that for best results, the block that normally contains the images on your website should be at least 950px wide.
How to install your theme on your WordPress blog
Once you have downloaded your custom WordPress theme, log onto your WordPress blog as an admin and go to: Appearance / Install Theme / Upload.
WordPress limitation: if you want to update a former custom WordPress theme, you will have to delete it first. (If it is active, you have to switch to another theme before being able to delete it).
NOTE: www.wordpress.com does not allow the installation of custom themes. Most website hosting services offer full-fledged WordPress blogs, though.
Note to Safari users when downloading your custom theme
By default, Safari automatically opens downloaded zip files, whereas WordPress requires the theme zip file. To work around this, you have 2 options:
- Recreate a zip archive of the downloaded folder (“PhotoDeck-WP”)
- or change Safari’s behavior so that it does not open the downloaded file: Safari > preferences > General > uncheck “Open safe files after downloading”
Selling files and products
What can I sell with PhotoDeck and how?
There are three kinds of sellable products in Photodeck:
- Individual images (sold either as downloads or as prints), videos or documents: These are the most common products and are likely to form the basis of your sales. To make a file available for purchase, you connect it to one or several pricing profiles (price lists). They are the main subject of these help pages.
- Complete galleries: the customer is able to purchase all the files in a gallery, usually as a download, at a given price.
- Custom products: these are products that are not linked to the files in your galleries and that you provide/deliver outside of PhotoDeck. For example: services (shooting sessions, photo tours…), calendars, books, …
Note that PhotoDeck also allows you to let clients download files for free, via the galleries’ settings. This article focuses on selling, please refer to the help pages on client galleries to learn how to enable free downloads.
Regardless of the product, customers pay you directly as part of the checkout, for example to your own integrated Stripe or Payment account. When such an integrated payment provider is used, the delivery is automated whenever possible (digital sales or print fulfillment via an integrated lab). When using a lab to print images, the lab charges you separately for their service.
PhotoDeck does not take any commission.
What is a pricing profile?
A pricing profile is a set of prices that is applied to individual images (to sell a whole gallery, see the gallery’s options instead).
It can be a simple price list, or a much complex structure for which the final price depends on a number of options -- PhotoDeck gives you extreme control over your offering and your prices.
To show prices on your website for an image or video clip, you must attach one or several pricing profiles to the image / video clip.
Defining several pricing profiles allows you to split your media library into different pricing tiers, and/or sell different kinds of products.
There are multiple pricing profile templates available to sell downloads, prints, stock photography, videos and documents, and all can be deeply customized.
Adding information to products and customizing their presentation
Adding text and content on the product and pricing pages helps you promote them with sales messages, but also provide additional information to reduce the buyers’ uncertainty and reassure them.
For example, it is a good idea to provide details about finishing and mounting for framed prints, as well as information on delivery (also for digital products), right on the product page (perhaps with links to dedicated pages to learn more).
To add information to all image/video products offered via a given pricing profile, open the pricing profile under My business / E-commerce / Products, then open the Presentation and Settings tab.
You can then customize the Product presentation field and add text or images, either before of after the pricing module. Please check the result also on a mobile device.
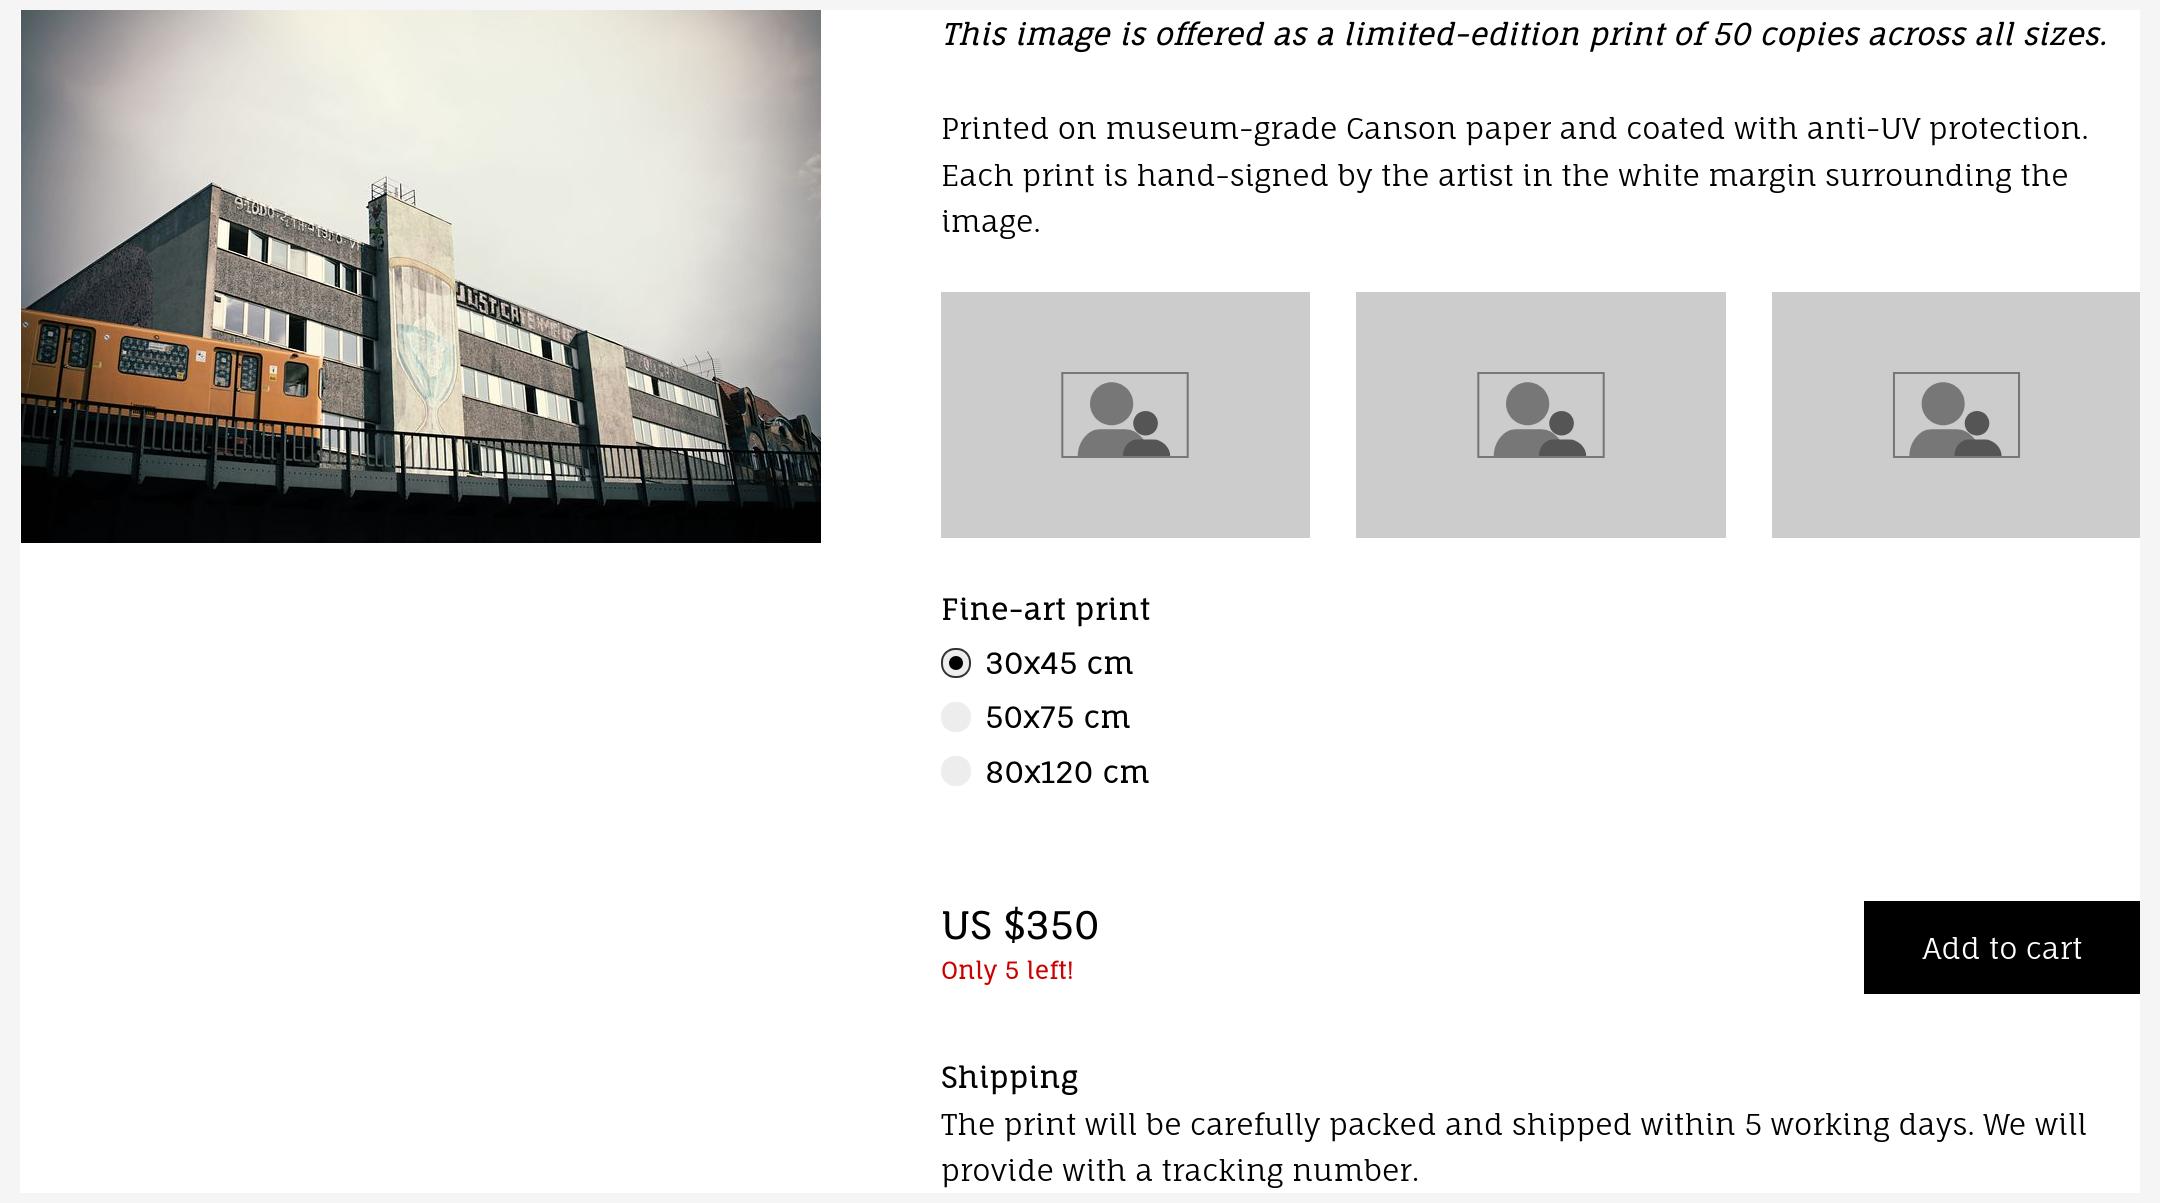
Adding image/video-specific information
In addition to adding information displayed for all files, you can also add details specific to an image/video, for example notes about a limited edition. Unlike the file’s title and description, this will only be shown in connection with the pricing module for that pricing profile and in addition to the general information provided by the pricing profile.
To add information for a specific image, select the image under My images & videos, and under Products click on the pencil icon next to the pricing profile in question.
Your website’s currency
You can change your website currency under My business / E-commerce / Currency.
Your website supports a single currency, but you can also display prices in alternative currencies for international customers via the pricing profiles’s settings. The currency rates are automatically updated on a daily basis.
Selling downloads and licenses
PhotoDeck provides different pricing profile templates to sell digital files. They make it possible to sell and automate delivery of individual images (JPG/TIF as well as RAW), video clips and documents. In addition, the Packages templates allow to sell multiple images at a given price, and it is also possible to sell whole galleries under a single price.
To create a new pricing profile and see the available templates, go to My business / E-commerce / Products.
Selling downloads

The Downloads pricing profiles template types are simple pricing lists, easy to customize, and easy for your clients to use.
You can reorder the list by simply drag-dropping rows in the list table.
When an image is delivered to your client, it is automatically resized in the size you define in the Delivery Specifications column.
Note that PhotoDeck does not display prices for sizes that are bigger than the uploaded image file.
For example, if you upload an 11 Mpixels image and if you have defined a price for 12 Mpixels, that price will not be displayed (PhotoDeck does not upsize at delivery).
Royalty-Free pricing profiles
The terminology used in the Royalty-Free templates is designed for stock photography, but technically they are the same as the Download pricing profiles (see above): simple price lists where you define size options and their prices.
Rights-Managed pricing profiles

The Right-Managed template and the template based on the PLUS standard are complete, multi-level pricing structures that are fully customizable.
They allow to price files based on the intended use, and for each use, different parameters like distribution size and geography, image size, etc…
The templates are merely a starting point for your own customization. Note that the prices are completely indicative: there is no standard in image licensing pricing, only you can decide how to price the work you distribute.
The customization of these pricing profiles is explained in a separate help topic.
Selling download packages
The Multi-image Package pricing profile template lets you set a fixed price for a given number of downloads of different images, in one or several sizes.
When viewing an image, the customer can choose the purchase the package. A button will then appear next to all other images to select and add them to the same package.
A customer can finalize the order even if the package is not fully used, but the package can only be used in a single order (it cannot be completed later on in a second order).
Important workflow options
All pricing profiles include flexible workflow options under the Presentation and Settings tab:
- The Offer only for files in specific state option restricts the pricing profile to the files in a specific Proof or Final state. This lets you for example sell unedited Proof files for retouching, and when a file is replaced by a retouched version and marked as Final, it won’t be offered for purchase anymore.
- Similarly, the Immediately deliver only files in Final state option restricts immediate delivery of files to those in Final state. This gives your the possibibility to retouch and replace non-Final files if needed before they are delivered.
- The Offer to add many files to the cart in one go option lets the client purchase at once all files in a gallery (if also activated in the gallery settings) or in their selection, each at their individual price.
- Lastly, you can also allow clients to leave comments/messages to their order, for example for retouching instructions.
FAQ
Can I sell RAW files or videos with PhotoDeck?
Yes, the digital sales templates support individual images in JPG, TIF, and RAW formats, as well as video clips and document files.
Why aren’t all download files visible?
To ensure high quality, PhotoDeck never upscales your images. If a pricing profile includes a size larger than the uploaded file, that specific price option will be hidden from the client.
Can I prevent clients from downloading files until I have retouched them?
Yes, you can use the delivery settings to only allow immediate delivery for files marked as Final. This allows you to sell files that are in a Proof state and replace them with the finished version before the client receives the download.
Selling prints
You can either sell self-fulfilled prints (where you manage the printing and shipping process yourself) or leverage our lab integrations to fully automate both production and delivery.
Using pricing profiles, you can easily sell dozens of thousands of different images, potentially offering different products for different images, but you can also create custom product pages with illustrations and texts specific to each image as well as manage inventory for fine-art prints.
To create a new pricing profile and see the available templates, go to My business / E-commerce / Products.

Creating a pricing profile where you manage printing and shipping
You can define exactly all the sizes and options you wish to sell, and two templates are available:
- Prints without options: this pricing profile is a simple price list, where you can create as many sizes as you wish, but without any additional option;
- Prints with options: use this pricing profile when you want to offer additional options like paper type, matting, framing etc… You will then be able to create a complete table with sizes, options and prices.
When an order is placed and paid for, you will receive an email notification so you know when a print needs to be prepared and shipped.
Using an integrated lab for full automation
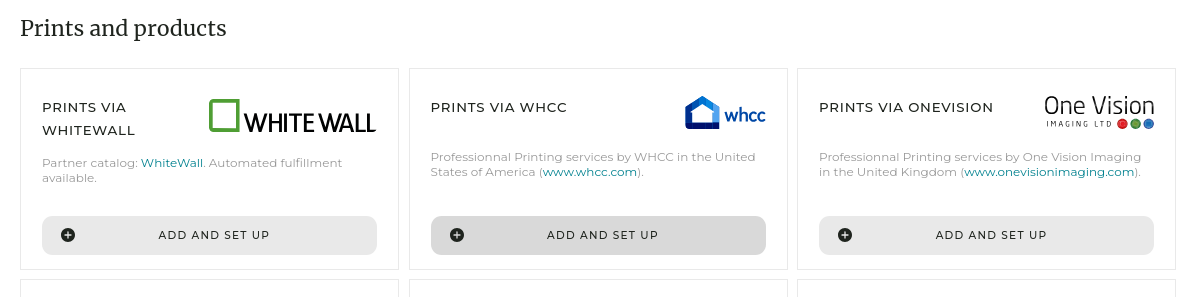
Each integrated lab (WhiteWall, One Vision Imaging and WHCC) has its own pricing profile template.
All products options and sizes offered by the lab are included in the template, and you can easily select what you want to offer to your customers. You keep full control on pricing: you can initialize the prices based on the labs’ prices to get started quickly, and then refine all prices as needed.
When using an integrated lab, it is possible to have the orders automatically forwarded to the lab. The lab will then bill you separately for their work.
For more details on lab integrations, please see the dedicated help page (link below).

Image ratio vs print ratio
When using integrated lab products, or when you specify the physical print size for a size option, the system automatically determines whether the print ratio matches the image ratio (height/width proportion). For any pricing profile, you can specify under the Presentation and Settings tab what happens when ratios don’t match:
- do not offer sizes that don’t match the image’s ratio (+/- 10%), or
- offer your customers the ability to crop the image to match the print ratio.
Image resolution vs print density
Similarly, you can specify what happens when the digital image file does not allow to print in a given size at more than 150 dpi:
- Do nothing and keep the size (for example if you self-fulfill and you know you have higher image resolution available), or
- Automatically add a mention about the minimum recommended viewing distance for the print, so that the customer knows what to expect.
FAQ
What is the difference between prints with and without options?
The simple template is for a basic list of sizes, while the options template allows you to create a table where customers select additional features like paper type or matting.
How does the system handle images that don’t fit a specific print size?
You can set your pricing profile to either hide sizes that don’t match the image ratio or allow the customer to crop the image themselves during checkout.
Why are there missing print sizes on the product page?
Depending on your settings, images that don’t match the print’s height/width ratio may be hidden. You can allow cropping instead, in the pricing profile settings.
Selling prints via a partner lab (with video tutorial)
Setting up automatic fulfillment through a leading pro lab is as easy as creating a pricing profile.
You retain all the powerful customization options and full control over pricing, taxes, and the scope of products you want to offer. In addition, you also keep a direct relationship with the lab.
Video Tutorial: Selling prints with WhiteWall
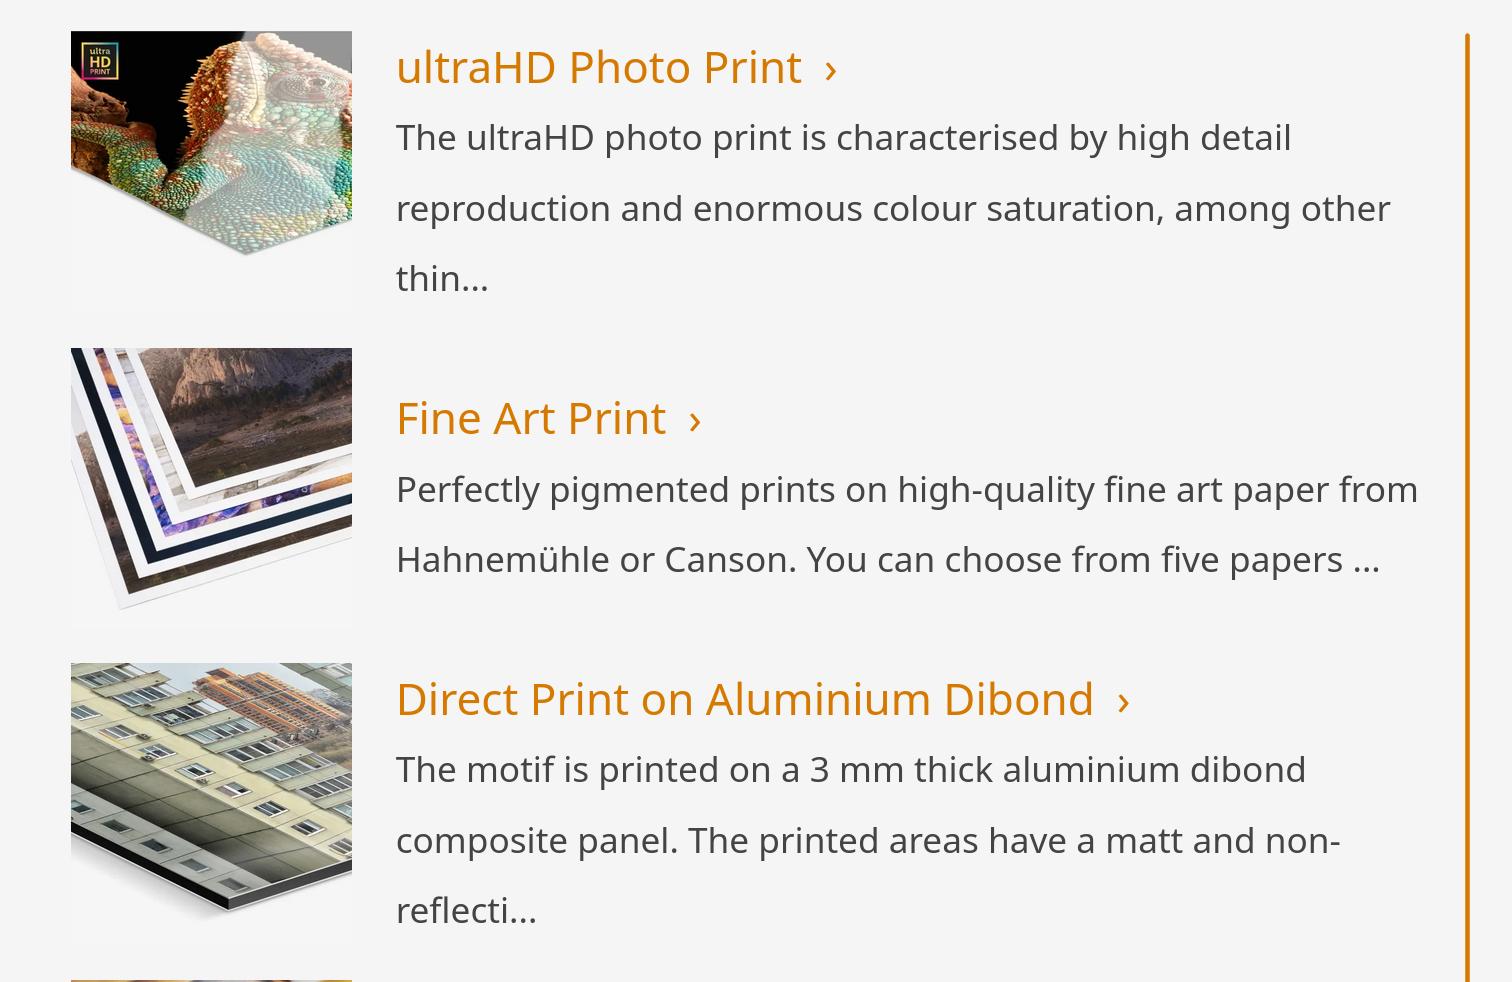
Selling prints fulfilled by a partner lab
- To get started, simply create a partner lab pricing profile under My business / E-commerce / Products.

- Then, customize the product catalog and the prices to your preference (see dedicated help topic). You will be able to easily check estimated costs for each size/option, as well as define your own markup.
- Connect the profile to your account with the lab:
The lab will bill you directly for each fulfilled order.
You keep a direct relationship with the labs you use. PhotoDeck´s role is merely to forward orders for fulfillment purposes on your behalf, it is therefore your responsibility to ensure that no unnecessary order is sent to a lab!
Some partner labs, like WHCC, WhiteWall or One Vision Imaging, require a customer account with them, and it must be connected your PhotoDeck account.
Connect a pricing profile to your account with a partner lab via the pricing profile’s Lab connection tab.
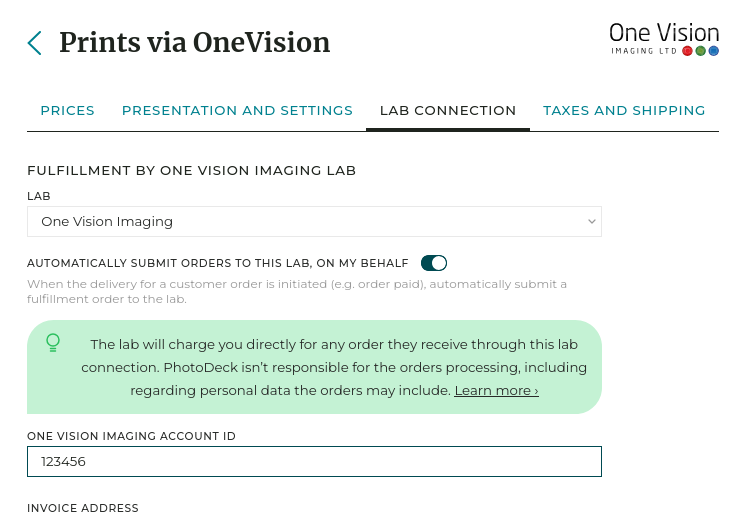
- Under the Taxes and shipping tab, select the tax profile to use, and select the shipping methods to offer to your customers (see dedicated help topic). Opening the shipping profile will show estimated costs, and will also allow you to take a margin on shipping.
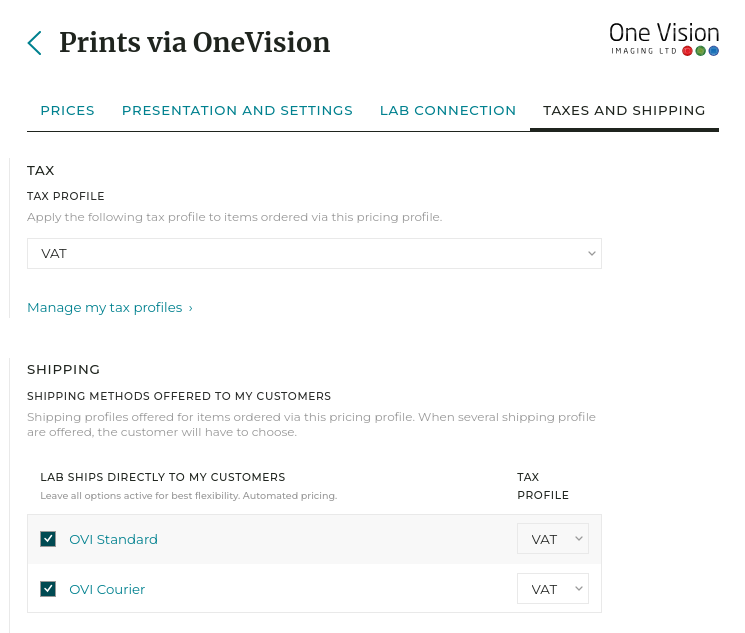
- Attach the pricing profiles to the images you wish to sell.
- Done! When a customer purchases a product from this pricing profile, a fulfillment order will be automatically sent to the lab.


Fulfillment options
The Automatically submit orders to this lab, on my behalf option activates the automated fulfillment. When enabled, as soon as an order on your website containing items linked to this pricing profile is paid (or manually marked as such), or when you manually trigger the delivery of such an order, PhotoDeck will order the corresponding fulfillment to the lab, on your behalf.
Alternatively, when the option is unchecked, you will have to manually trigger the lab order. In addition, when the option is unchecked, and for lab orders sent to you (i.e. not directly to your customers), you also have the option to allow lab orders to be grouped. If you frequently fulfill orders within a short timeframe that are all sent to you, this can help you save on shipping costs.
Monitoring and managing lab orders
To view all lab orders, submitted or pending submission, go to My business / Orders / Orders to labs. Each order placed on your website also links to the corresponding lab order(s).

Who do I contact if I need help?
PhotoDeck’s role is to automatically submit orders on your behalf to the lab of your choice.
Once an order is submitted to a lab, please contact the lab directly if you have questions or concerns regarding that order. Each lab order carries an order ID, known to the lab.
Customizing a partner lab’s catalog
When you have created a pricing profile connected to a partner lab, you can customize what products to offer to your customers, and their price.
Product list
A partner pricing profile includes all the products that can be offered through this lab. The first step is to determine what products you wish to sell for your images, within this pricing profile. You can add/remove products from your pricing profile at will. Once a product has been removed, it can be readded later on.

Don’t overwhelm your customers with too wide a choice: make it easy for them, only offer a few options.
You can also change the names of the products shown to your customers, as well as their description: once you add a product to your pricing profile, the description field is prefilled with information about the product. You can also supplement this information with your own description, and even add your own images.
The price table
For each product, its price list defines what options are available to your customers, and at what price.
The column on green background defines the “base price”. Each option in the table carries its own additional price.

You can elect to simplify a product by removing options: simply keep the corresponding cells empty, and the option will not be offered to your customers.
Estimated costs
Estimated fulfillment costs for each option, provided by the lab, can be displayed via the Display estimated costs checkbox.
The system allows you to sell below estimated cost. A red background will appear for all prices that are below estimated costs.
To see the price table in action, use the Check prices facility at the bottom of the screen.
Resetting all prices based on your own markup
Prices can be reset all at once at any time via the Reset all prices checkbox. This allows you to easily define prices based on your margin preferences and cost estimates provided by the partner lab. The exact formula is:
price = image price + print cost x (1 + markup on print / 100) + options cost x (1 + markup on options / 100)
The prices are then rounded according to your rounding preferences, set under the Presentation and Settings tab.
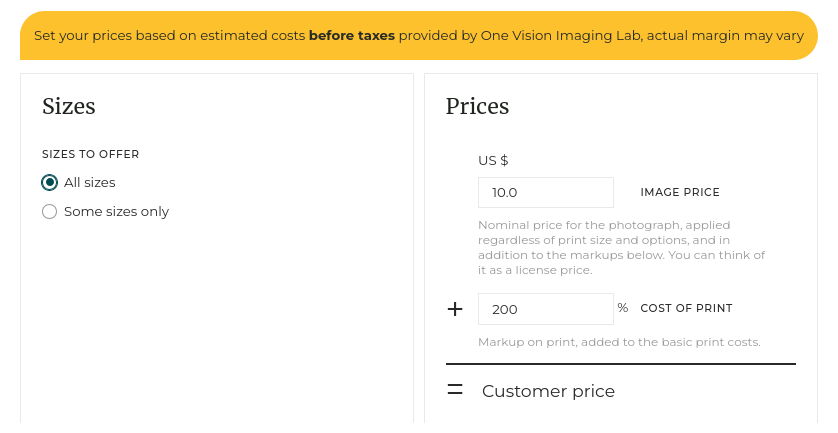
Customizing Rights-Managed profiles
Rights-Managed pricing profiles are extremely customizable. To make the most of this ability, please note the following:
- you can add/create/invent as manyh pricing options and sub-options as you wish
- a pricing option can be based on a custom list of values, or it can depend on further sub-options
- you must define a base price (and optionally a minimum price) for each group of options at the top level
- the base price corresponds to a specific set of sub-options.
- sub-options are ultimately based on choice lists. Lists include price ratios:
Price ratios
Price ratios answer the following question: “how much more expensive is this option compared to the base price option?”
Consider the following example:
- the base price for an image is $100, corresponding to an A4 image size
- in the image size value list, the following ratios are defined:
- A4: 200
- A3: 300
The price for an A3 image would then be: $100 * (300/200) = $150
Image delivery for Rights-Managed prices
The image is delivered in its original size and format, unless for web uses where a pixel size is defined. In that case, the image is resized to the corresponding size.
Selling a gallery as individual images, or as a whole
The images/videos in a gallery can be sold independently (as separate items), or a gallery can be sold in full (in this case all files are sold to the customer under a single price, regardless of the gallery size).
To access the pricing options for a gallery, open the gallery under My images & videos and open the Prices popup.
Selling individual images
This section attaches predefined pricing profiles to all files in the gallery. It simply automates the process of selecting one or more images or videos and attaching/detaching pricing profiles. Please refer to the pricing profiles documentation for more information about pricing profiles.
Selling a whole gallery at a fixed price
This allows you to sell a gallery as a whole and deliver all files under a single price. Just like for individual images, it is possible to sell the original files downloads and/or also to sell lower-resolution downloads.
In addition, it is also possible to sell the gallery as an “offline” product, i.e. a product that you will deliver outside of the system (e.g. physical product).
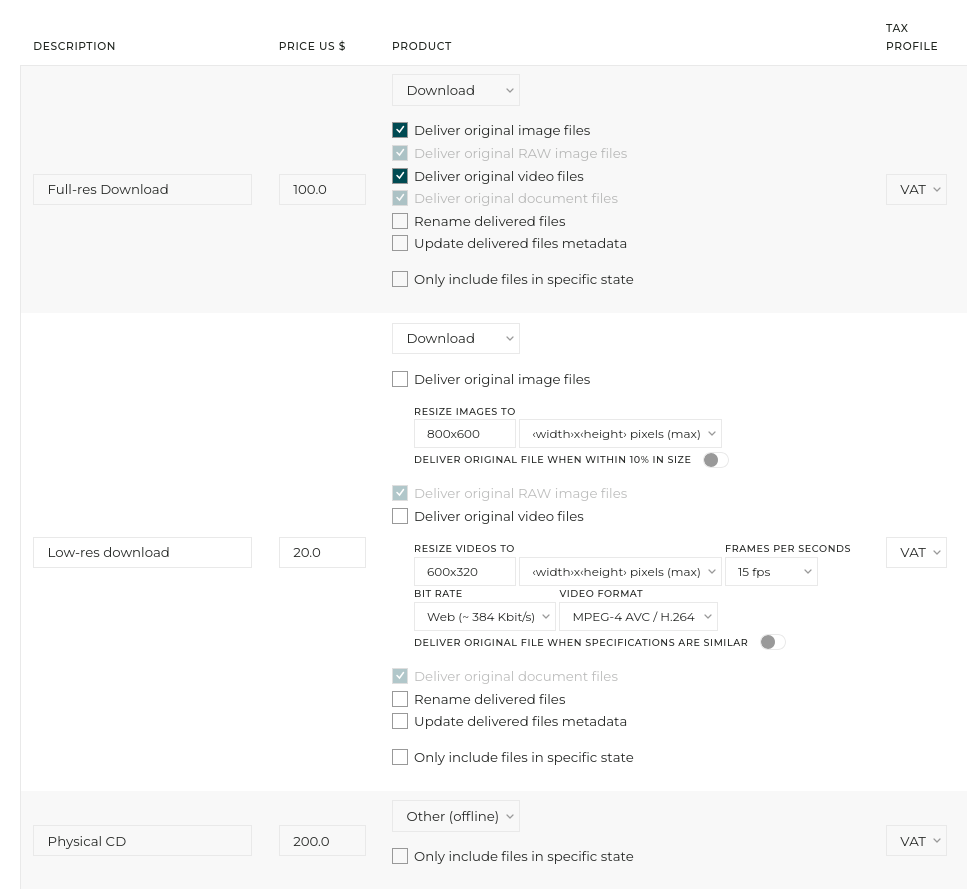
This feature is available for galleries of up to 2000 files. The Buy whole gallery button will not appear on the gallery (thumbnails pages) if the gallery display style used by the gallery hides the gallery-wide “action buttons”.
Selling all files in a gallery at their unit price
On your website, this adds the option to add to the cart all priced files in the gallery, at once, via a customizable Buy whole gallery button.

The files are priced according to their individual pricing profile(s). When the files have different pricing profiles, the customer will be able to add to their cart all files for the pricing profile of their choice.
Only the pricing profiles with the setting Offer to add many files to the cart in one go activated are considered.
This feature is available when adding up to 500 files to the cart. The Buy whole gallery button will not appear on the gallery (thumbnails pages) if the gallery display style used by the gallery hides the gallery-wide “action buttons”.
Showing products sizes that don’t match image ratios

When selling prints and products, the Image cropping setting lets you chose what to do about products print sizes that don’t match the image being purchased:
- None: only offer products which ratio matches the image’s: products sizes that don’t approximately match an image’s ratio will not be shown to your customers for that image. Only print sizes which ratio is within 10% of the image’s are offered.
- Show: offer all products and display the cropped area: all products sizes are offered, even for print ratios that are significantly different than the image. The cropped area is displayed on the website, so the customer sees exactly what to expect.
- Yes: offer all products and let the customer move the printed area: like the Show option, but lets the customer adjust the cropping on your website by moving the printed area. For prints fulfilled by an integrated lab, this option is only offered for those labs that permit it.
For pricing profiles where you create yourself the list of options (self-fulfilled or fulfilled by a non-integrated lab), this feature requires that you specify the exact ratio or size of each option offered. Indicating the exact size in cm/inches also allows to display a warning for print sizes that are too large in relation to the selected image’s definition.
For the options Show and Yes, if you fulfill the prints yourself, orders will include the printed area details. Make sure to place a test order to check that you are able to fulfill the cropping! Non-integrated labs (that get automated orders by email) will receive precropped files.
Prints fulfillment via your local lab
This type of automated fulfillment is meant for local and flexible pro labs, and in case our off-the-shelf partner lab integration does not suit you.
You can work with any lab for automated print fulfillment, as long as they are able to receive orders via email.
If automated fulfillment is enabled for one or more items ordered on your website, the system will automatically email an order to the lab(s) in question, on your behalf, to print and ship these items.
An order email to a lab includes:
- The information you will have specified when connecting your account to the lab: your contact and billing information, printing and shipping preferences, special instructions, etc…
- A delivery address, either yours or your client´s, depending on your preferences and the lab´s drop-ship capabilities ;
- The detail of the ordered items to print (as shown in the order placed by your client, i.e. as you have specified them in their pricing profile). Your sales prices are excluded, as well as items not fulfilled by the lab ;
- A link for the lab to download the original high-res files required for printing. The files will be precropped as needed, if print sizes are known and cropping is enabled on the corresponding pricing profiles.
You will receive a copy of all orders emailed to your lab(s).
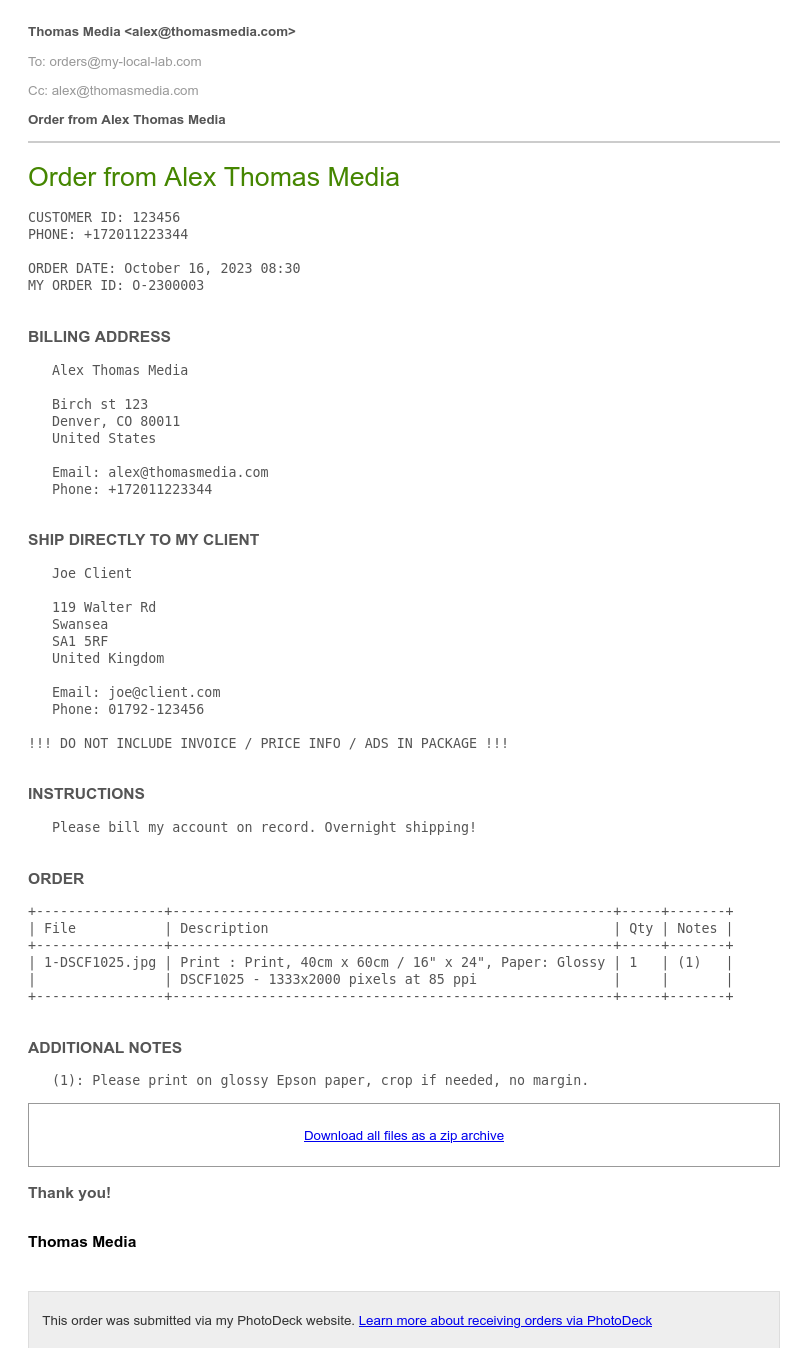
Is my lab supported?
Any lab that is able to accept orders by email is supported. A lab simply needs to open a free Lab account on PhotoDeck to be supported. The lab will bill you directly.
Feel free to send your lab more information about receiving orders via PhotoDeck.
You keep a direct relationship with the labs you use. PhotoDeck´s role is merely to forward orders for fulfillment purposes on your behalf, it is therefore your responsibility to ensure that no unnecessary order is sent to a lab, and that if any personal data is included in the orders, the lab is able to process them legally (e.g. GDRP)! You also need to make sure that the lab can work with the descriptions you use in your pricing profiles and your additional instructions.
How do I enable fulfillment by a lab?
The connection happens in your pricing profiles. For every Print pricing profile, you can associate a lab for fulfillment. This way, you can chose to have some products fulfilled by a lab, and others (using a different pricing profile) by another lab, automatically.
You can also associate a pricing profile with a lab for fulfillment without having orders automatically emailed to the lab. In this case, you will have to send the order manually via a dedicated button on the client´s order page in your admin space.
Step-by-step setup
- Open the pricing profile for your prints under My business / E-commerce / Products, and click on Lab connection ;
- Activate the checkbox Products in this pricing profile are fulfilled by a third-party lab ;
- Configure a new lab:
- Enter the email address of the lab where orders will be sent (communicated by the lab), and a name for the lab (for your own use). The lab must have a Lab account associated with that email address ;
- Enter your Account number with the lab (optional) ;
- If you wish to send the orders to the lab manually via the dedicated button on each relevant order´s page, uncheck the Automatically submit orders to this lab, on my behalf box ;
- Fill in the instructions that will be sent with every order. For example, invoicing/billing instructions -- but don´t include confidential information! (You will be able to reuse this lab connection of other pricing profiles). You can also provide additional instructions specific to the products in the pricing profile, if needed. For example, paper and margin choice.
- Click on the Create button.

- Hit Save. Done!

Make sure that the lab is able to fulfill your orders as specified !!!
Shipping
To charge for shipping, select a shipping profile under the Taxes and shipping tab. You might need to create a shipping profile first. Once the shipping profile is associated, you can define in the shipping profile settings whether you would like the lab to ship directly to your clients, or to you.
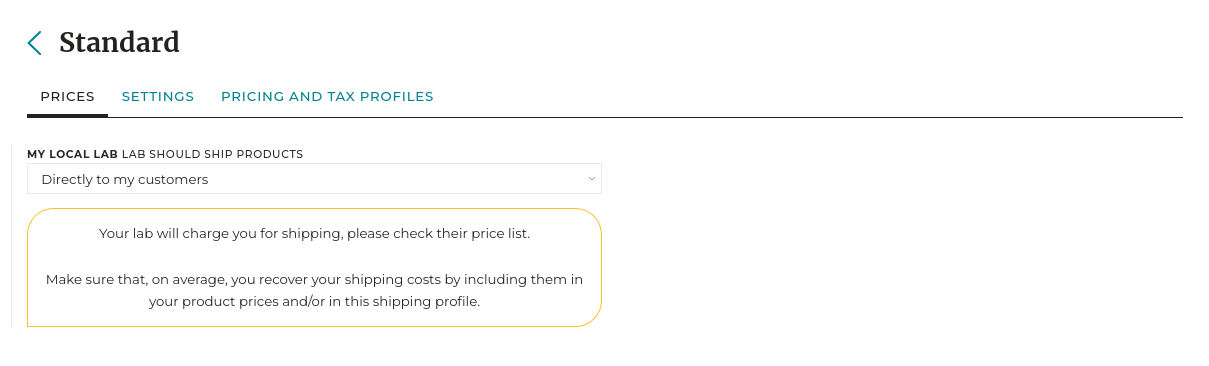
If no shipping profile is associated to the pricing profile, shipping will be free to your customers, and the lab will be instructed to ship directly to them.
Fulfillment for Packages
A lab can also be used in connection with a Package pricing profile. In that case:
- Only the Print items will be ordered from the lab (packages can contain both prints and digital downloads) ;
- You can also exclude items in the package from being fulfilled by the lab, via the Prices table where the package items are defined.
Grouping orders to save on shipping
To automatically group multiple client orders into a single order to the lab:
- Open the settings for the lab connection ;
- Uncheck the Automatically submit orders to this lab, on my behalf box ;
- Check the Group multiple customer orders into single lab orders box.
When new customer orders are ready to be delivered (e.g. when they are paid), they will be combined into a single order to the lab, until you manually send that grouped order to the lab (via the dedicated button from any relevant customer order page).
Allowing clients to add information to an order
Two options in a pricing profile’s Presentation and Settings tab let your clients add comments / notes / messages to orders that include articles from this pricing profile.

You can separately allow comments globally at the order level (“message”) and/or for each item in the cart (useful for example to collect retouching instructions):
- Let clients add a message to their orders: This will let the client add a message to their order, from the cart. When a client adds a message to an order, no automated delivery takes place. You will receive a notification and you will have to click on the delivery button on the order page to trigger the delivery process after having read the message / note.
- Let clients add a comment to each item in the cart: This option lets the client add comments to individual items / files in the cart. You can customize the label of this field. This is ideal for example to ask clients for retouching instructions. If automated immediate delivery is available, it is not interrupted with this option.
The message and/or comments are then displayed on the order page in your administration space and in the email notification you receive, making it easy to process them.
Automatic quantity discounts
In addition to discount coupon codes, PhotoDeck also allows you to create automatic quantity discounts. They make is easy to encourage customers to purchase more of the same kind of downloads or prints.
They let you define automatic percentage discounts depending on the number of ordered items. It is possible to define multiple volume tiers, for example to offer a 10% discount for 3 to 4 items, or 20% for 5 or more.


Quantity discounts apply only if items of the same kind are ordered, for example prints of different images but under the same product and in the same size.
The discounts are defined directly in the pricing profiles, close to where you set normal prices.
Quantity discount examples
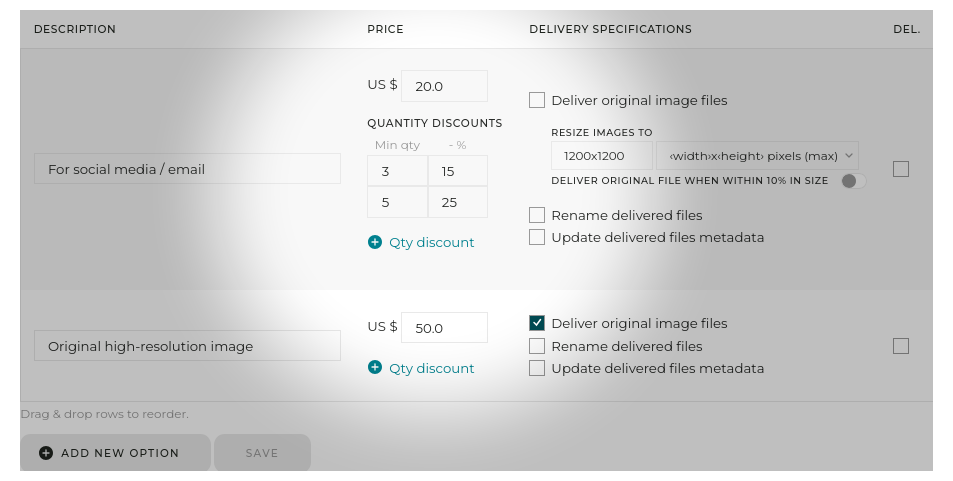
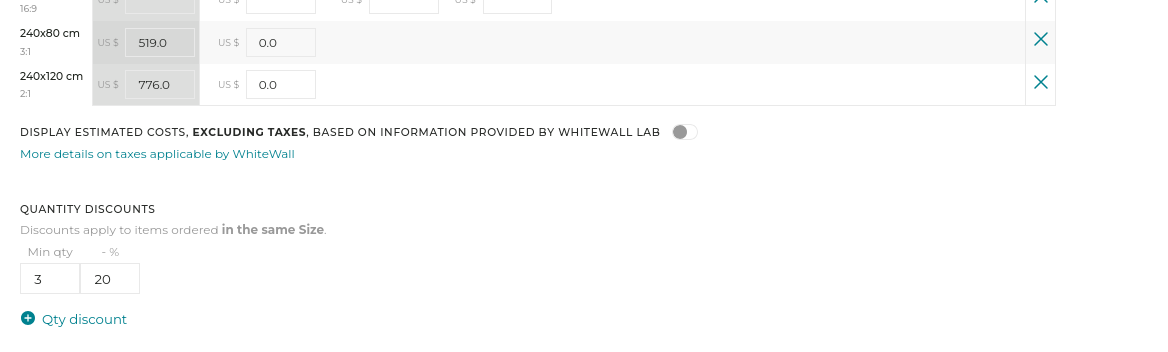
This feature can also be used for temporary discount campaigns, from the first item ordered. The discounted price is then displayed immediately when choosing a product, next to the normal (striken) price.
Managing inventory/stock, limited editions
Adding an inventory to products allows to indicate on their page, next to the pricing, when the remaining quantity available to order is low, and makes a product unavailable for purchase when sold out.
Inventory can be added to both image/video products (offered via pricing profiles) and custom products.
Inventory for images/videos
This is useful for example when selling limited-edition prints.
To add inventory to a specific image or video, select the file under My images & videos, and under Products click on the pencil icon next to the pricing profile in question.
Note that the inventory is common to all options for that pricing profiles. For example, an inventory of 10 on a pricing profile for prints in various sizes will run out when the image is sold 10 times though this pricing profile, regardless of the sizes purchased. This lets you for example offer multiple mounting and framing options without interfering with the print’s limited edition.
If you need different inventories for different options, please create different pricing profiles.
Showing inventory on your website
You can define a threshold number for inventory via the Inventory level information option:
- When the remaining quantity is above the threshold, it will be indicated on your website that the quantity available is higher than that threshold.
- When the remaining quantity is lower, the exact remaining quantity will be displayed.
This option can be defined in the pricing profile’s Presentation and Settings tab. For custom products, you will find as part of that product’s settings, where you also set the initial stock quantity.
If you do not wish to display inventory information on the product pages, simply leave the threshold empty.
Discount coupons
Coupon codes are a great way to promote your products and reach new customers. It’s a familiar concept with online shoppers, and setting one up for your own clients is fast and easy.
Discount codes can be used in addition to automatic quantity discounts, and they apply on the price after quantity discounts.
- Navigate to My business / E-commerce / Coupons and click on Create a new coupon. The first thing you’ll want to do is give your coupon an informative name to help you keep track of it. For example, you could name it “30% Discount” or name it after a client group you want to use the coupon, such as “Repeat customers”. Note that your customers won’t see this name.
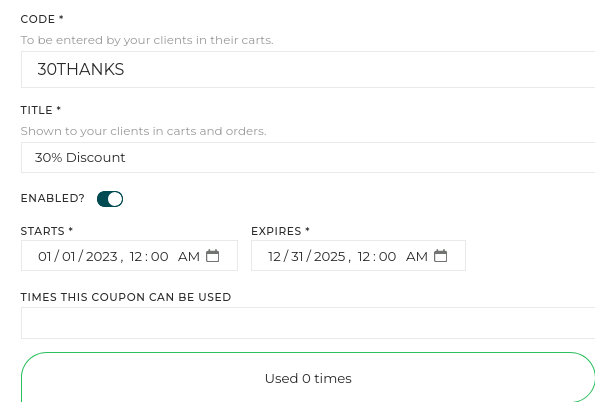
- Next, enter a code that you will give to your clients. This can be anything you like, so be creative! If you’re setting the coupon up for a single customer, this would be a great opportunity to make them feel unique by including their name in the code, for example.
- Now you’re ready to set up the actual discount. This can be a set amount or a percentage. You can also set up a minimum order requirement - a good idea especially to incentivize customers to purchase more. If you only want the discount to apply to a specific product, you can assign it to a pricing profile directly.
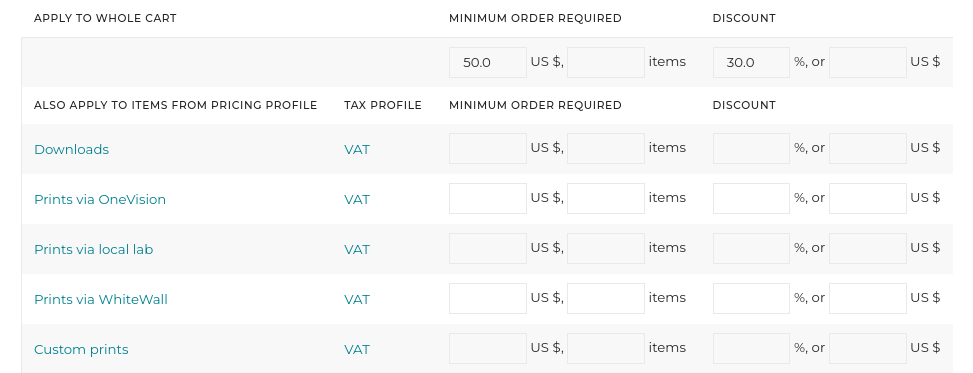


If you’re giving a global discount, be careful to not apply additional discount rules for individual pricing profiles. The discounts will be added together, and you may end up giving a much bigger discount than intended.
Please note that a coupon code is never technically personal, i.e. it is not possible to assign, attach or limit a coupon to a given client. It would be enough for the client to use a new email address to bypass that limit. You can nevertheless manually create a code that is not easily guessed and give it to a given client, and if needed configure the coupon so that it can only be used once.
Your clients may have only one coupon in their carts. A coupon can only be applied to items attached to the same taxes.
What is a shipping profile?
A shipping profile defines a method of shipping and its associated prices.
Shipping profiles must be attached to the pricing profiles they correspond to (you can reuse the same shipping profile for different pricing profiles).
You can also create and attach multiple shipping profiles to the same pricing profile, to offer various shipping options to your clients: “standard shipping”, “overnight delivery”…
When you sell prints fulfilled by an integrated partner lab, shipping profiles are automatically created and all you need to to do is attach a tax profile to them, if you use a tax profile.
Shipping options for partner lab fulfillment
When using a partner lab to fulfill print orders, shipping profiles specific to the lab are available and must be used.
Partner labs can either ship products directly to your customer (“drop-ship”), or to you.
To enable/disable a shipping method, simply check/uncheck the corresponding box under the pricing profile’s Taxes and shipping.
Lab shipping directly to the customer
When the lab ships directly to your customers, the shipping options and prices are directly linked to what the lab will actually charge you. You can optionally also define a markup on the estimated costs.
Shipping directly to your customers is by far the simplest option.
Lab shipping to yourself
When the lab ships to you, you can create a fully customized shipping profile to define your own prices. Note that you must then aim to recover both the shipping costs charged by the lab when sending products to you, and the costs of forwarding to your customers.
This option is useful when you must review the products before forwarding to your customers, or when your customers can physically pick-up the products from you.
This option can also be handy to ship to destinations not covered by the lab, or when the lab’s drop-ship prices are prohibitive.
How do custom shipping profiles work?
When a client purchases an item on your website, the system looks for Shipping Profiles attached to this item (based on its Pricing Profile).
If there are several shipping profiles available for that item, they are displayed as options, and the client can choose upon checkout. To offer multiple shipping options, you must create a shipping profile for each option.
If the items are in different Shipping Tiers, the price for the Shipping Tier with highest Priority (usually the most expensive) is used. Shipping tiers are used to offer different prices based on size and weight (see below for details).
Example
You have defined 2 shipping methods (ie. you’ve created two shipping profiles), “Standard Mail” and “Expedited delivery”, and associated them to your Pricing Profile for Prints.
For both Shipping Profiles, you have defined 2 shipping tiers, “small items” and “large items”.
A client purchases the following:
- 1 large print
- 6 small-size prints

The client chooses the “Standard delivery” option. Shipping costs to your clients will therefore be the price you have set for the “large items” tier in the “Standard Delivery” Shipping Profile.
Shipping prices do not take quantities into consideration. For large/heavy items, it is therefore important to factor some of the shipping costs into the actual products’ prices (i.e. in the pricing profile).
Shipping Tiers
Shipping tiers are used to define what price to apply, within a shipping profile, based on the size/weight of items. (Shipping tiers are invisible to your clients. To offer multiple shipping options, you must instead create a shipping profile for each option.)
This allows you, to some extent, to align Shipping Tiers with the Shipping Tiers used by your Shipping carrier. For example “Small items under 1 pound” would be a good shipping tier if the shipping carrier for that Shipping Profile has defined such a tier.
Shipping Tier Priority
When multiple items of different sizes are purchased, the underlying idea is that the biggest item(s) define the shipping cost.
To that avail, the Priority defines what tier should be used when multiple items are purchased, with different Shipping Tiers.

For example, when a client purchases items in a “large items” Shipping Tier, and items in a “small items” Shipping Tier, the Shipping price will be the one corresponding to the Shipping Tier with highest priority (normally the most expensive).
Keep it simple!
Considering that the number of items purchased does not affect the shipping price, and that customers are used to simple, flat-fee shipping costs, we recommend you keep your shipping profiles simple and that you consider shipping as a product of its own, rather than attempting to match exactly actual shipping costs.
Attaching Shipping Profiles to Pricing Profiles
For each Pricing Profile, you can offer several shipping options, by linking the Pricing Profile to several Shipping Profiles.
When attaching a Shipping Profile to a Pricing Profile, you will define the default Shipping Tier to be used. For example, if you sell mostly small prints, the default Shipping Tier for a Shipping Profile would be the one corresponding to small items.
Then, for each option in the Pricing Profile, you can define a new Shipping Tier that will override the default. For example, if the default Shipping Tier is for small items, you can specify that for large prints, the Shipping Tier be changed to one for bigger items.
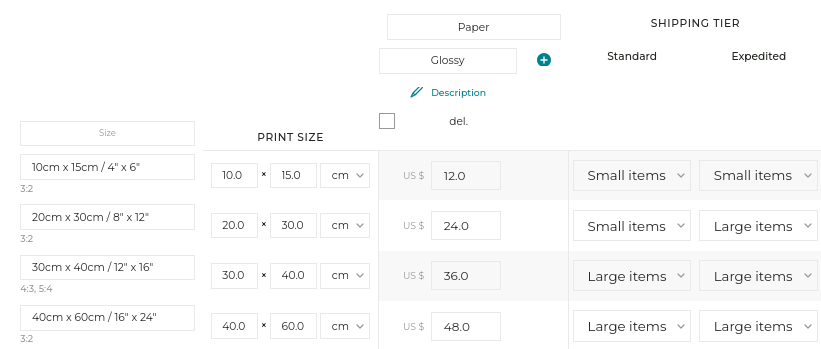
Step-by-step shipping setup
If you sell physical products other than through the integrated labs, creating one or more custom shipping profiles allows you to define shipping costs:
- Create a new Shipping Profile based on the template of your choice (one Shipping Profile corresponds to one shipping carrier/option) ;
- Customize the Shipping Profile with a proper description, and chose what Tax Profile, if any, should be applied to the shipping costs ;
- If you wish your shipping prices to stay close to actual shipping costs, check the shipping tiers your shipping carrier uses, based on package weight and/or size ;
- Define your own Shipping Tiers based on your carrier’s shipping tiers. Keep in mind that the quantity of items purchased will not affect the price, and that for any order, only 1 tier per Shipping Profile will be used. Create the shipping tiers in the Shipping Profile, and assign them priorities (the more expensive the Shipping Tier, the higher the priority) ;
- Adjust your prices for each shipping tier / destination combination, adding/removing destination territories at will (“Default” territory applies for destinations not otherwise specified)
- For each Pricing Profile that should have Shipping and Handling costs attached:
- Attach the new Shipping Profile to the Pricing Profile, under the Pricing Profile settings, and specify the default Shipping Tier to use (the most common based on the Pricing Profile offer) ;
- For items in the Pricing Profile requiring a different Shipping Tier, indicate the Shipping Tier to use ;
- Repeat from Step 1 if you wish to offer different shipping options to your clients ;
How do custom quotations work?
The Quotations system allows you to handle price requests and negotiations with the same level of automation and professionalism as with standard sales.
Clients can request quotations from your website, and you can also create new quotations by yourself.
Quotations can be managed and created under My business / Orders / Quotations.
Quotation requests from clients
Your clients can request a quotation for single images, or for the images in a selection (and it works with video clips, too).

When a client requests a quotation, you will receive an email notification with a link to manage it. Set the description (it will be used in the final receipt to the client) and price for each item. Then, send the quotation to the client.

Creating a new quotation
In addition, you can also create yourself new quotations from your admin space via the Create a quotation button on the quotations pages, which can be useful for example to collect payment for files or a service discussed separately.
Adding new items to a quotation
You can add items at will to quotations:
- Add a product lets you add a pre-defined product (for example, an image normally sold via a pricing profile) at the price you wish, or a custom service;
- Add media lets you add an image, video or document that can be delivered automatically in its original format, or offline outside of PhotoDeck.
Checkout and payment
When he/she receives the quotation link by email, the client can view the quotation, accept it and add it to the cart. The checkout, including payment, happens in the same way as for standard sales.

Integrating with Card Payment Providers
I already have a merchant account with XXX, can I use it?
It is only possible to use the providers we have integrated with: the payment integrations are complex, as the system must be notified when payments have been made (for example, to automatically deliver digital purchases). It is not possible to easily add new payment providers.
PayPal integration
Head over to My business / E-commerce / Payments, add a PayPal payment processor, and follow the instructions in the interface to retrieve and indicate the Client ID and Secret Key corresponding to your PayPal account.
Don’t forget to disable PayPal’s shipping and tax calculations if you have used them in the past and now prefer to use PhotoDeck’s!
To allow clients to pay without owning or creating a PayPal account, make sure that the PayPal account optional option is enabled in your PayPal account’ Website payment preferences.
Stripe integration
- Open an account with Stripe if you don’t already have one, and sign-in;
- Activate your Stripe account according to their instructions;
- Open the Developers / API keys panel;
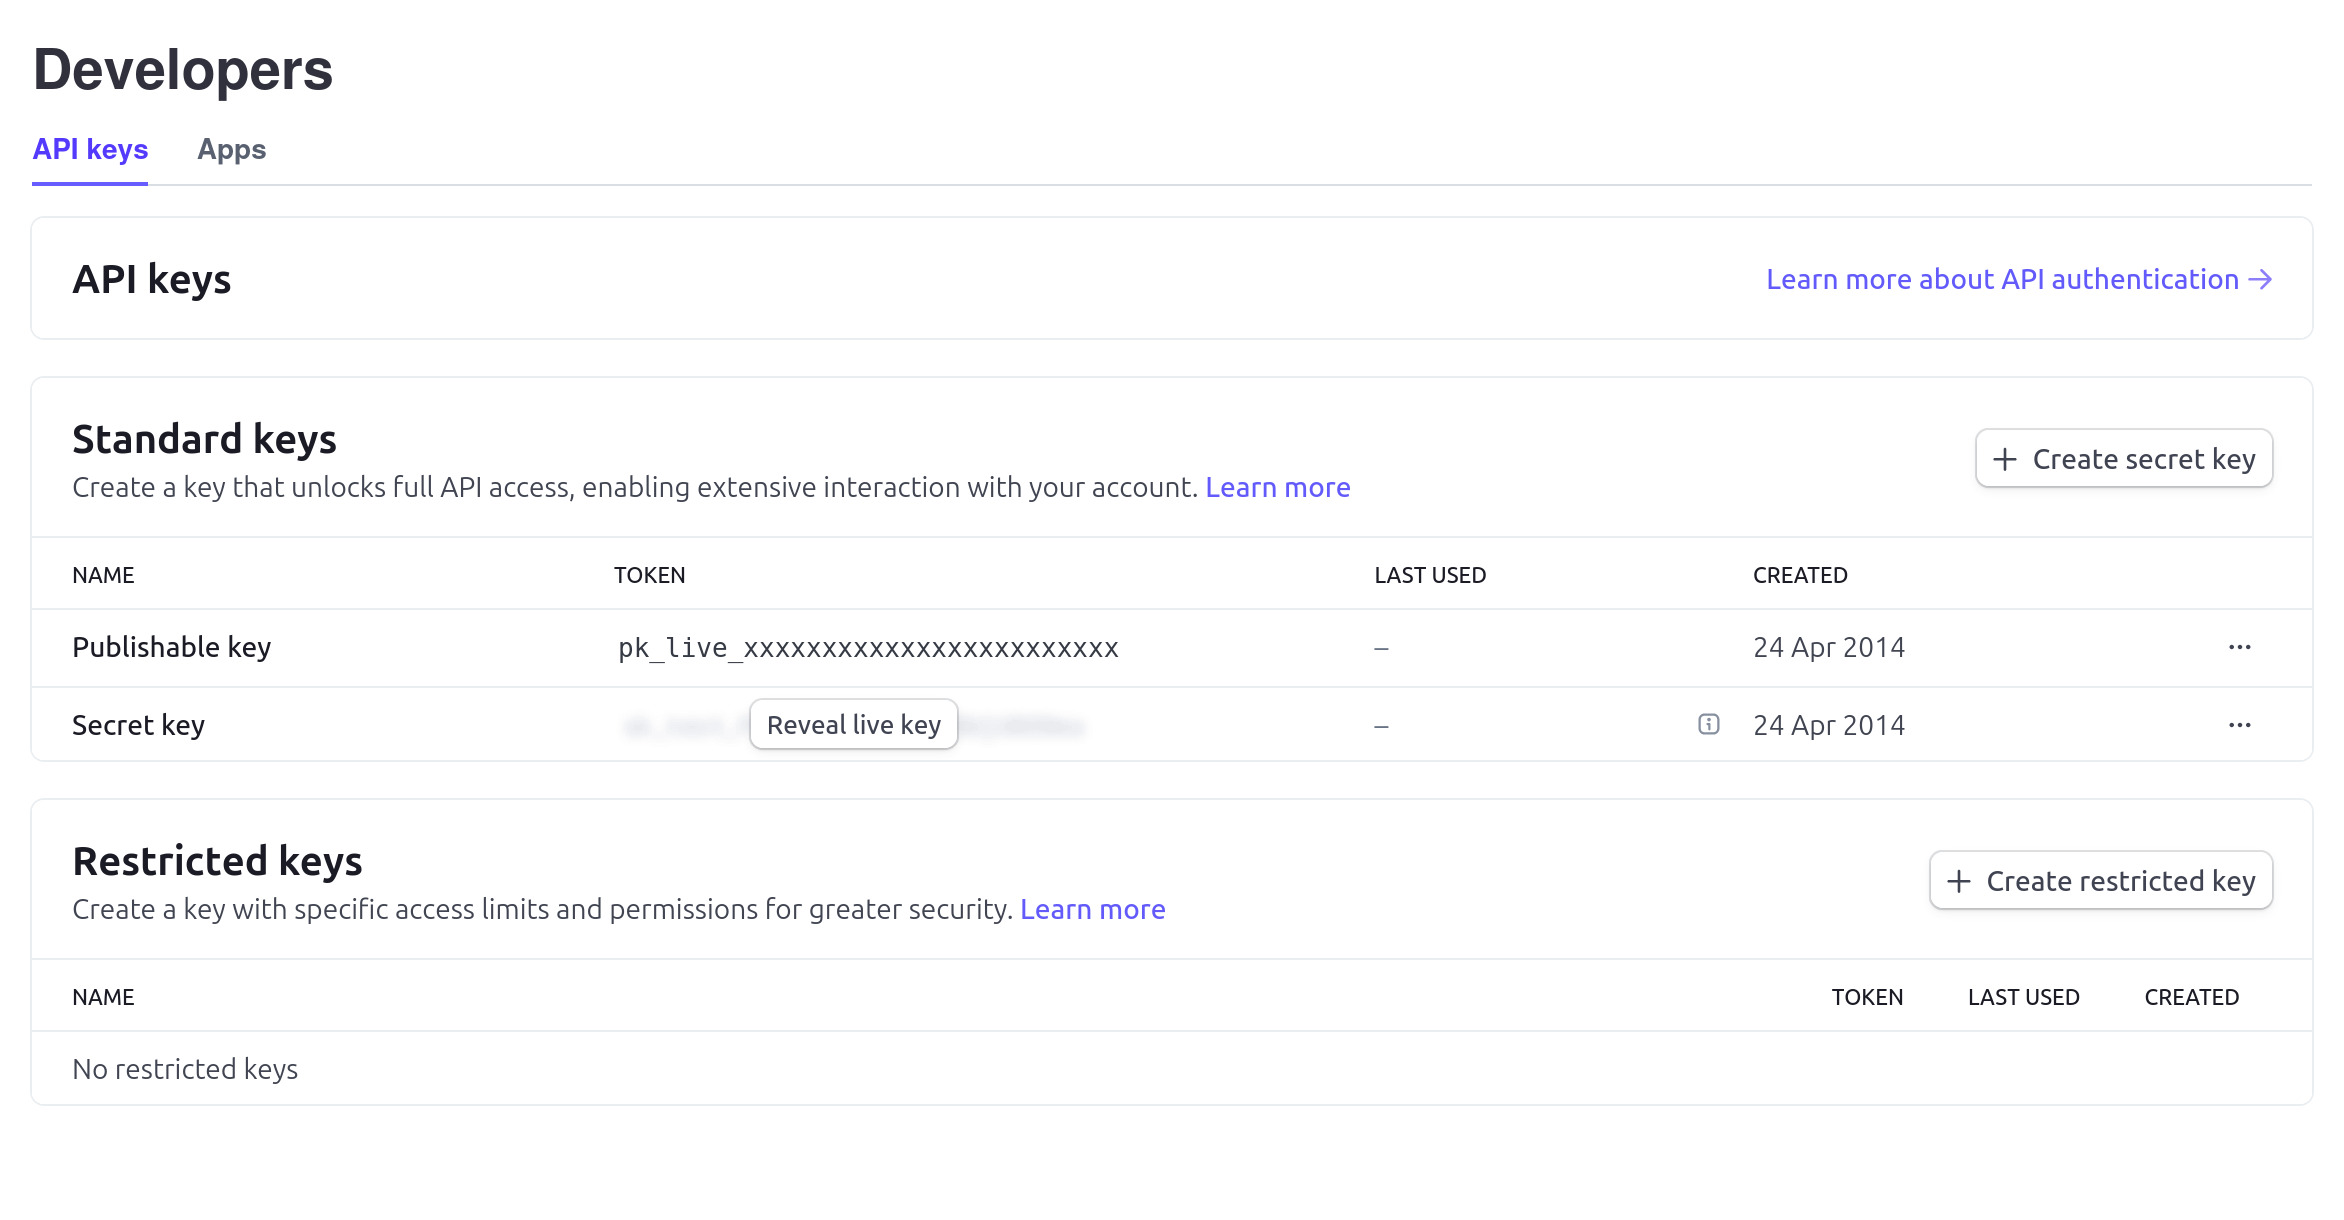
- In a new window, open your PhotoDeck admin space, and under My business / E-commerce / Payments, configure your Stripe integration by copy-pasting the 2 API keys provided by Stripe (secret and publishable);
- In your Stripe account configuration under Developers / Webhooks, create a new Webhook endpoint (a Webhook is what allows Stripe to notify your website when a payment has been made): copy-paste the Webhook URL shown in the PhotoDeck admin space and specify the event types to send (all
payment_intentevents). Click on the Add endpoint button to create the Webhook;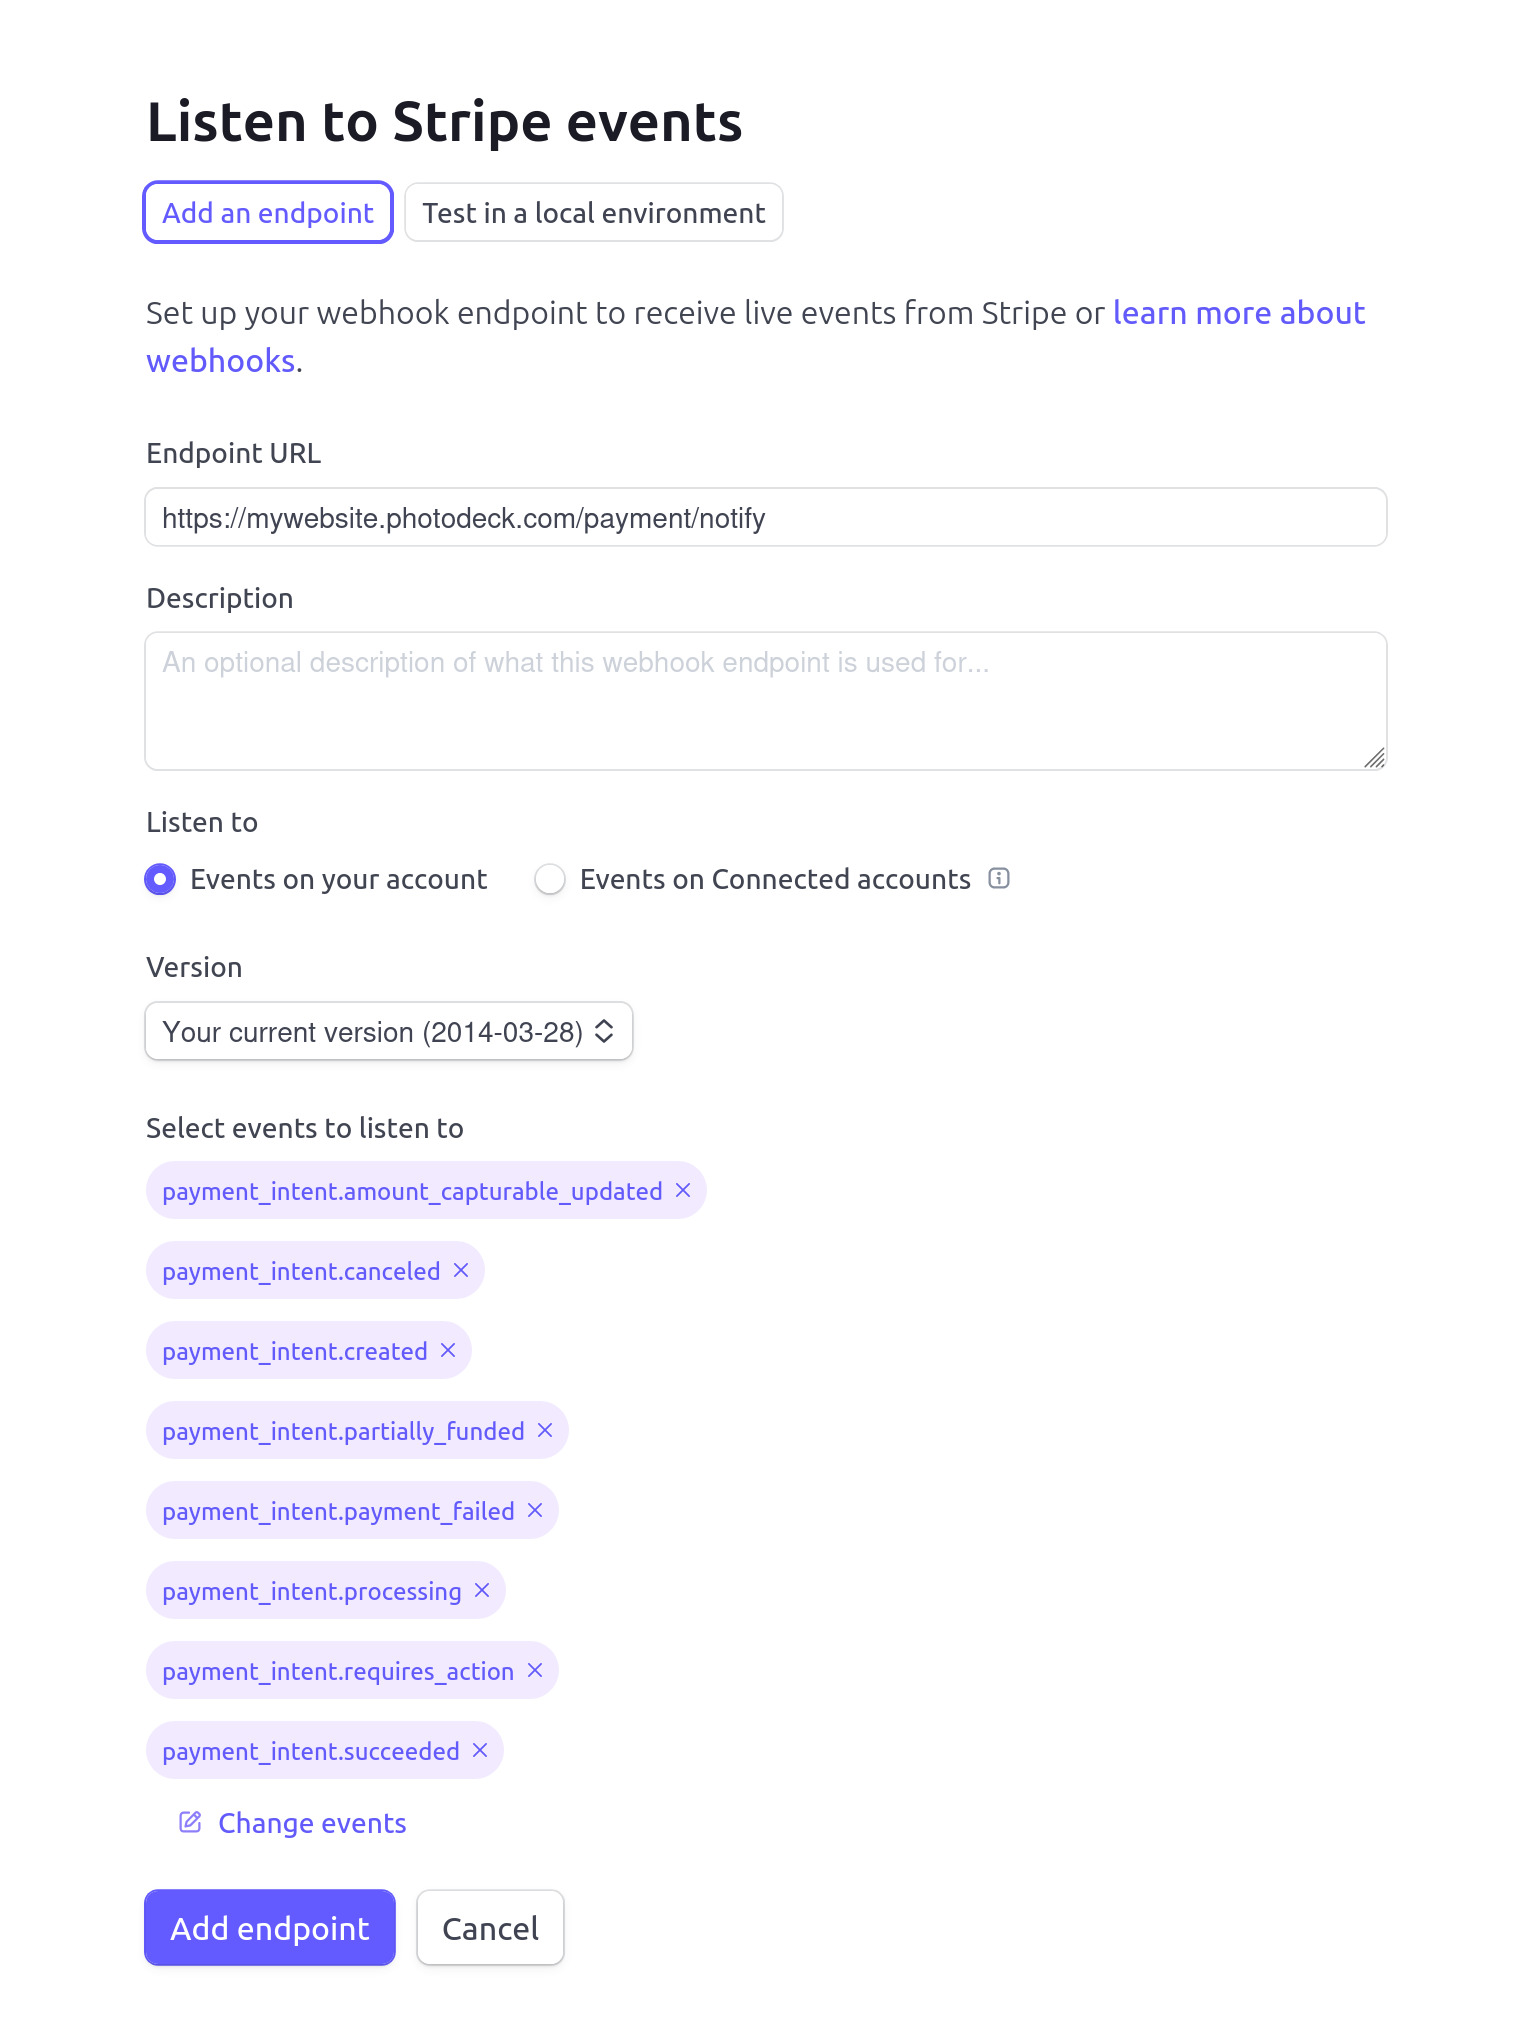
- Click on the Reveal button to retrieve the Webhook Signing secret;

- Copy-paste the Signing key from the previous step into your PhotoDeck configuration;
- Make a test order on your website and verify that you are properly directed to the Stripe payment page;
- When the first real order is placed on your website, if the payment doesn’t appear in your PhotoDeck admin space, check if it appears in Stripe. If it does, double-check your Webhook settings (steps 5 and 6 above).


If you operate in Europe, you may also activate additional payment methods, such as SEPA direct debits or iDEAL in the Netherlands.
Authorize.Net
You need an account with Authorize.Net to access their Server Integration Method (SIM) service. Note that Authorize.Net serves only US clients and only supports US dollars.
- Login to your Merchant Account with Authorize.Net
- Under Account / Transaction Format Settings / Response/Receipt URLs, add to the Default Relay Response URLs the following URLs:
http://[your website URL]/payment/notifyandhttp://[your website URL]/m/payment/notify, for example:http://alexsmith.photodeck.com/payment/notifyandhttp://alexsmith.photodeck.com/m/payment/notify - Under Account / Settings / Security Settings / General Security Settings / API Credential and Keys, note your API Login ID. You should have also received from Authorize.Net a Transaction Key.
- Still in the same Authorize.Net panel, generate a new Signature Key.
- Open your PhotoDeck admin panel in a new window, and configure your Authorize.Net payment integration by copying your API Login ID, your Transaction Key and your Signature Key.
- Activate the payment processor in your PhotoDeck admin panel
- Do a test purchase and verify that the purchase is automatically marked as Paid in your PhotoDeck panel
- Done!
Moneybookers (Skrill)
- Connect to your Moneybookers account. Under My Account / Merchant Tools, set your Secret Word to a random string of characters of your choice. This is necessary to make sure that payments are automatically marked as paid on your PhotoDeck website. (If you didn’t use the link above to register and don’t find the Secret Word option, e-mail merchantservices@moneybookers.com to request Merchant Tools to be enabled)
- Under My Account on the Moneybookers website, note your Customer ID.
- In your PhotoDeck admin panel, under My business / E-commerce / Payments, configure your Moneybookers payment integration by copying your Moneybookers login (email address), Customer ID and Secret Word.
- Activate the payment processor in your PhotoDeck admin panel
- Do a test purchase and verify that the purchase is automatically marked as Paid in your PhotoDeck panel
- Done!
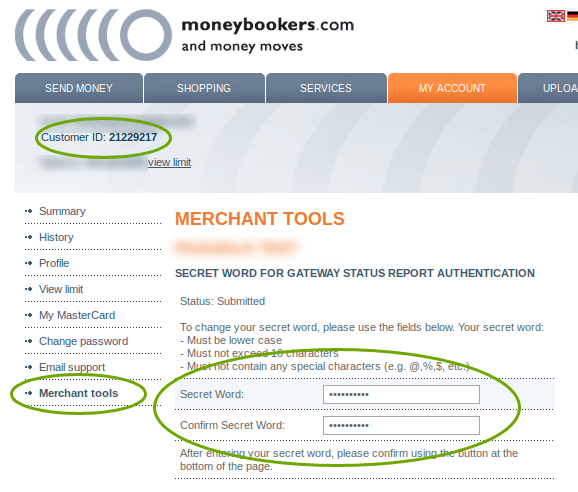
Accepting other forms of payment
You can accept any form of payment outside of the system, by using an “offline payment” payment processor as an alternative for checkout. See this example:


When you receive an offline payment, your website will not be automatically aware of it. You can mark orders as paid with a single click on Mark as paid on the order’s page in your admin space to initiate the automated delivery of any licensed image file present in the order.
Canceling an order
A received order can be deleted / canceled via the Delete button on the order page.
To refund a payment, please use the tools provided by the payment provider.
What happens when a client orders digital images or video clips?
- After the client enters his address in the checkout flow, a new order is recorded in the database, and you are notified by email.
- If you have enabled manual validation for all orders, the client is notified that the order will be processed offline and that you will get back to him.
- Otherwise, the client is directed to the payment page: if you have enabled card payment, there will be a “secure payment” button on the page that will take the client to the payment processor. If you have not configured a card payment processor, no payment button will be displayed, only your payment instructions (or a default “contact us” text if you have not specified instructions either).
- When the order for a download is paid (by the client via card, or if you click on Mark as paid on the order page in case of off-line payment), the image is automatically delivered to the client (unless you have restricted immediate delivery to files in Final state. You can also force the delivery of the digital files even if no payment has been made.
Exporting orders for statistics, reporting or accounting
You can export orders via the orders page at My business / Received orders as CSV files that can be opened for example in Excel or LibreOffice.
You can then manipulate and filter the data in the spreadsheet, for example to:
- compute statistics about downloads or sales totals by gallery
- compute statistics about sales or downloads by image/video
- search for orders of a specific image or video
- list orders linked to a certain gallery
- transfer sales data to an accounting system
- …
The export contains two files, one with a row for each order, and another one that lists all ordered items (images, videos, etc…) along with the gallery they were ordered from.
If the spreadsheet does not recognize it automatically, make sure to select the ; (semicolon) sign as column separator. This will ensure you get neat columns in the spreadsheet.
How to sell services: shooting sessions, workshops…
PhotoDeck makes it easy not only to sell images, videos and documents, but also to promote, sell and collect payment for services like shooting sessions or workshops.
This page is about selling standard services at a fixed price. When the service or the price varies depending on the client, use personal quotations instead of products.
Step 1: create a custom product
Create a new custom product via My business / E-commerce / Products / Custom products.
Give it a name, a simple description (displayed in the cart and orders), and a price. When selling events (e.g. workshops) with a limited number of seats, you can use the stock/inventory feature to make sure to not sell beyond what is available.
The product is ready to be purchased as soon as it is activated, and a product page is immediately created on your website (but not linked from anywhere, therefore hidden).
Step 2: promote the product on your website
How you should promote the product on your website depends on whether you want to let people purchase it online on their own (for example a workshop at a fixed date), or if you need to first discuss with the client to close the sale and agree on a shooting date or other details.
Alternative 1: direct online purchase and payment
Enrich the product page to make it a proper sale page, presenting your service with information about what the client will get, images, etc… The editor gives you the same full flexibility for the product page as for custom pages!

Once the product page is ready, you can simply add links to it in your navigation menu and/or in other pages on your website.
When selling multiple services or products, note that you can also create a custom page that lists several products (max 3-5), and directly integrate each product’s price and “Add to cart” buttons into the page, via the editor’s Product element.
Alternative 2: promote, discuss with client, then collect confirmation and payment
When the client will not immediately purchase the service but must contact you first, create a custom page to promote the product, and integrate a contact form as the main call-to-action. You can customize the contact form to add fields to collect specific information, but we recommend to keep the form short.

Once the client is ready to confirm, you can send him/her the link to the product page to finalize the purchase. If you wish, you can have clients add a message to their order to confirm a date or other information.
If, after discussing with the client, it turns out that the service or its price does not correspond to a standard, pre-configured product, you can send a quotation for this custom service instead of the link to the standard product page. You can also use quotations to offer a standard product along with an extra (or a discount).
FAQ
How do I handle services where the price varies?
If the price or the service is not standard, it is better to use the quotation feature instead of a fixed-price product. This allows you to send a personalized offer to your client.
Can I display several services on a single landing page?
You can create a custom page and use the Product element in the editor to insert the price and “Add to cart” buttons for up to 5 different products directly into that page.
Will these service products be visible to everyone on my site immediately?
When you create a custom product, a hidden page is created. It will only be visible to your clients if you manually add a link to it in your navigation menu or on another page of your website.
Charging sales taxes
If your business is subject to sales tax, Tax Profiles help you collect taxes and comply with your obligations. Tax profiles can be found under My business / E-commerce / Taxes.
Tax profiles allow you to collect sales taxes based on the customer’s country or state. We offer templates for common cases, but please note that you must make sure to adjust the templates for your particular situation.
Please always check with your tax office or accountant what your tax obligations are, and verify / test on your website that your tax setup is correct.
You can create several tax profiles: different products might have different tax rules, and shipping might also have a different tax rate, so you can create different tax profiles for different cases.
For a tax profile to apply, it must be attached to the pricing profile it refers to. A pricing profile can only have one tax profile attached, so make sure that all products in a pricing profile are subject to the same tax rules.
Similarly, a tax profile should also be attached to your shipping profiles if the shipping is subject to tax.
Taxes are automatically added to a customer’s cart based on their location, and the are shown in the invoices issued to the customers, when they are enabled.
Ordering and delivery of digital files
How are digital images/videos delivered?
PhotoDeck sends the client an email with links to download the images. The images are potentially resized to the specified size.
The images are sent in the same format they have been uploaded in (JPG or TIF), and all the metadata present at upload is preserved.
Videos are re-encoded if needed, according to the order specifications.
RAW images and PDF files are delivered as they were uploaded, without any change.
A PDF copy of your own Terms and Conditions is also included if you have specified them (under My business / Legal / Terms and conditions).
The client can also download their order via your website, from their secure area.
Defining delivery format of images and videos
For digital sales (stock or downloads), when defining a price value, you can indicate that the purchased image or video must be delivered in a certain format (the Description does not matter).
Images
You can define a size in KB/MB, in which case the image will be resized to exactly your specifications (1 Mpixel = 3 MB).
Alternatively, you can define a pixel size, as well as whether the delivered image should fit within that size, or should be just big enough so that the defined size can be cropped without resizing.

For example, if your original image width/height ratio is 3:2:
- 100x100 px (min) will deliver an image of dimensions 150x100px (i.e. 100px on its shortest side)
- 100x100 px (max) will deliver an image of dimensions 100x67px (i.e. 100px on its longest side)
Note that PhotoDeck does not display prices for sizes that are bigger than the uploaded image file.
PPI (or DPI): a confusing figure
PPI (pixel per inch) is a figure that indicates to a printer what physical size the image should be printed to based on its pixel size. It is just a metadata figure, that has no one-to-one relation with the size or quality of an image. For example, a “300 ppi file” (commonly called “300 dpi file”), says nothing about the quality unless a size is associated with it -- a tiny 30x30 pixel image can be printed at 300 ppi, it will just come out as a 0.1 x 0.1 inch print.
What really matters is the pixel size!
Note that we indicate, for your clients convenience, how big a specific image size would print if it where to be printed at a “standard” 300 ppi resolution, but it doesn’t mean anything more than that.
Videos
Similarly, video pricing profiles allow to define options for delivered sizes, as well as encoding format.
Specifying delivered files’ names
You can change the name of files when they are delivered, for example based on their delivery format, using the following variables (with the {{ and }} braces) :
{{basename}} | The original filename, without its file format extension (1) |
{{seq}} | The file’s sequence number within the delivery |
{{width}} | The width of the delivered file |
{{height}} | The height of the delivered file |
{{created.year}} | The year in the file’s shooting date (2) |
{{created.month}} | The month in the file’s shooting date (2) |
{{created.day}} | The day in the file’s shooting date (2) |
{{created.hour}} | The hour in the file’s shooting time (2) |
{{created.min}} | The minutes in the file’s shooting time (2) |
{{created.sec}} | The seconds in the file’s shooting time (2) |
{{updated.year}} | The year in the file’s last update date (3) |
{{updated.month}} | The month in the file’s last update date (3) |
{{updated.day}} | The day in the file’s last update date (3) |
{{updated.hour}} | The hour in the file’s last update time. |
{{updated.min}} | The minutes in the file’s last update time (3) |
{{updated.sec}} | The seconds in the file’s last update time (3) |
(1) Special characters are replaced by an underscore.
(2) If the shooting date/time is unknown, the upload date/time is used.
(3) The last update date/time changes for example every time the file’s metadata is changed in your admin space, or when it is replaced.
Examples
The variables can be mixed as you wish. Here are a few simple examples:
- To denote that a file is low-res:
{{basename}}-lowres - To add the delivered size to filenames:
{{basename}}-{{width}}x{{height}} - To replace the original filename by a client or project’s name with a sequence number:
PROJECT_X-{{seq}}. We don’t recommend you remove the basename if there is a chance the client might ask for a different edit or format, as it will make it much more difficult for you to identify the file on your end, especially if you don’t include the shooting date/time.
Do not include a file extension (.jpg, .tif, .mp4, etc…), it is automatically added based on the format delivered.
Limits on large downloads
To help reduce delivery issues that can appear when orders for downloads are too large in size (e.g. failed downloads), some limits apply.
When offering galleries for download, please keep in mind the following:
- No button to download all files is presented in galleries with over 2000 images or other files ;
- Orders that would result in a digital delivery of over 20 GB size will fail (“Invalid cart” error) ;
In most cases, simply splitting a large gallery into two or more subgalleries will help ensure your client can easily and successfully download all files.
Working with your clients
How do client accounts work?
Regular clients can log on your website to access advanced their own client space. There, they can easily access their order history, shared galleries, selections, etc…
Client accounts are usually created seamlessly, for example when they receive an invitation to access a private gallery or when they place an order for the first time.
Your visitors also have the possibility to create a Client Account by themselves from the registration page on your website. In this case, the client receives an email and must then click on a link to activate the account, to make sure his is not being impersonated.
Does my client need an account?
There are few things more annoying on a website that having first to create an account to be able to use it or to place an order. At PhotoDeck we believe in making your client’s life as easy as possible. A visitor can manage a selection and place orders without first creating an account.
An account is required to access login-protected galleries, but its creation happens seamlessly when accessing the first protected gallery. (Galleries protected by a simple general password don’t require login/client accounts.)
Having an account also offers more possibilities: a logged-in client can easily save and manage multiple selections, does not need to re-enter address information upon purchase, can view past orders, etc…
Client login page
Links to the login form are automatically presented on your website when needed or useful, for example when accessing a protected gallery, or in the cart or lightboxes.
You can also add a link to the Login page to your navigation menu, by selecting the type Client area: client login & logout, dashboard when creating a new link in the menu. If a client is already logged in, this link will bring them to their dashboard on your website.
If the client does not have an account, the same page can also be used to register and open an account on your website.
How do I create an account for my client?
You shouldn’t need to: for example when sharing a protected gallery to a new client via PhotoDeck sharing features, the process seamlessly has the client create the account in a secure way if needed, while accessing the gallery, i.e. without adding significant friction. In other words, you can authorize a specific client to access a gallery by login before they have created their account.
We do not recommend you create user accounts on behalf of your clients, for both security and liability reasons.
If for some unforeseen reason you really need to create a client account on his behalf, follow the same steps your client would follow:
- Go to your website’s client login page, for example from a protected gallery or from the cart, then enter your client’s e-mail address and register the new account in his name ;
- Your client will then receive an email with a link to activate his account ;
- Provide your client with the password in a secure way (remembering that plain email is not more secure than a postcard) and ask him to immediately change it.
NOTE: by creating yourself the account, you don’t get the client to accept your terms and conditions or validate his subscription to your newsletter, if you’ve enabled either of them, so your legal exposure might increase.
Galleries for private customers
Here is a recommended way of setting up private and protected galleries when working with private individuals (events, portraits, weddings…), where privacy and simplicity are key.
Once you have set up a first gallery, it will be easy to reuse the same settings for other clients.
- Create a new gallery, ideally nested under a common “Client Area” gallery. Use the Private gallery with general password preset. The gallery will use the Standard Display Style, which is a good balance between aesthetics and proofing functionality. The gallery will be hidden, i.e. not visible in the thumbnail navigation for maximum privacy.
- Click on the Authorizations link to open the access settings. Set a password to access the gallery. Setting a general password will not provide you with as much detail as to who exactly accesses the gallery, but it will be very simple for your clients. Save.
In this example, a general password is required to enter the gallery, and free high-res download is enabled. - Optionally, you can allow commenting on images and/or star-rating (More / Comments and star rating). Star-rating is useful in large galleries to help the customer filter and find the best images in several passes.
- Upload the images into the gallery.
- If the images are for sale, attach the proper pricing profile(s) to all images in the gallery. You can also do it from the Prices link above the gallery thumbnails.
- Done! All you now have to do is send the link to your clients, with the password. You can do that under the Send by email panel. Don’t forget to indicate the gallery password in the message!
Allowing free high-res downloads to consumers
You can easily sell downloads by attaching pricing profiles to the files. But in some cases, you might want to allow your clients to download high-res files freely. This can be done by adding new authorizations to the access options.
Note that instead of allowing free download to anyone who can access the gallery, you can also allow only specific clients, based on their email, to download the images. This has two benefits: you get a better control and view over who downloads what, and you can allow a wide group of people to purchase from the gallery (say wedding guests) while allowing a subset (e.g. groom and bride) to download high-res files for free. The drawback is that it requires your clients to create a login on your website in order to access the free downloads.
Alternatively, you can allow anybody with access to the gallery to download for free. This of course, will override any download pricing profile set for the individual images and won’t provide you information on who downloads images.
Please refer to the help on authorizations for further help!
Ordering files to edit/retouch and delivery
This section will show you how to let a client order (without payment) for retouching a selection of images or videos out of an unprocessed shoot, so you can process/retouch ordered images and deliver them, in a professional and integrated way.
- Create a new gallery, ideally nested under a common “Client Area” gallery. Use the Protected proof-retouch-deliver gallery preset. The gallery will use the Client gallery Display Style, which focuses on proofing functionality over aesthetics. The gallery will be hidden, i.e. not visible in the thumbnail navigation for maximum privacy. In addition, this preset allows immediate delivery only for files in Final state.
- Upload the “proof” images/videos into the gallery.
- Open the Authorizations panel and add your client(s) email addresses, without changing the download authorizations. Hit Send.
- Done! Your clients are now able to order a selection of images as downloads.
When your client has made a selection and placed an order, you will be notified by email. When you receive the order:
- If needed, reprocess/retouch the images/videos on your computer. Upload them into the gallery making sure you use the same filenames as for the proof images, and using the Replace existing files with same file name option. This will replace the proof images with the final ones. In the upload form, also set the status of the new uploads as Final, which indicates to the system that the files are ready for delivery.
You can also replace individual files via their Replace button, and change their state in their File state panel.Replaced images in Final state in the administration space - When all (or part of) the images have been replaced with their final version, open the order, and click on Recalc items shipping methods, then Ship PENDING downloadable items now. This will trigger the delivery of the Final images to the client.
Image delivery on the order page.
To go further:
- You can explicitly indicate on the gallery what files are not retouched/edited: put the files in question in Proof state, and make sure that the gallery style used by the gallery is set to display the file states on their thumbnails. The retouched (final) files will also be clearly indicated.
- This method makes edited files orderable again and directly downloadable. It is also possible (in the download options) to only offer ordering for files in state Proof or Undefined.
- To sell files to edit/retouch, use a pricing profile attached to the files instead of free downloads - the same options for processing and delivery are available. Similarly, it is also possible to sell whole galleries to retouch/edit, via the Prices option for the gallery in question.
- To collect retouching instructions or order notes from clients, use a pricing profile attached to the files instead of free downloads, and make sure that the Let clients add a comment to each item in the cart option is enabled in the pricing profile settings.
Galleries for professional clients
PhotoDeck is designed to let you work with professional clients in multiple ways. Here are some examples of what you can do:
- Send in a few clicks a link to download multiple files;
- Quickly create a secure gallery for proofing and 1-click download;
- Let the client choose and order images to edit/retouch, and then deliver them easily;
- Let the client save a selection and collaborate with others on it;
- Host client photos archives;
- …
Once you have set up a first gallery, it is easy to reuse the same settings for other clients.
Proofing gallery with immediate download
In this example, we create a hidden and protected gallery that lets the client view the images/videos and download them in a click, one by one or all at once.
- Create a new gallery, ideally nested under a common “Client Area” gallery. Use the Protected gallery for professional clients preset. The gallery will use the Client gallery Display Style, which focuses on proofing functionality. The gallery will be hidden, i.e. not visible in the thumbnail navigation for privacy.
- Upload images into the gallery.
- Open the Send by email panel and add your client(s) email addresses as well as the download authorizations. Hit Send.
- Done! You can always check/edit the client permissions under the authorization panel accessible via the Protected access link above the thumbnails.
To go further:
- For improved security, or if you wish to track who downloads, you can add authorizations based on individual emails, either to access the gallery or to download. It is then compulsory for the client to authenticate on your website. If you choose this option, don’t forget to deactivate the accesses for the line Anybody in the authorization table - please refer to the help on private galleries and authorizations for more details!
- You can create custom download products to automatically reprocess files before delivery to the client: resizing, renaming, metadata update, etc…
- You can show the download options for files in Final state only (e.g. retouched files).
To get familiar with the process from a client’s perspective, try it yourself with a “test client” email address! For clarity, make sure it is different from your PhotoDeck login, and test with a different browser (or in a private/anonymous window in your browser).
Review and collaborative tools
Depending on the cases, some additional features can be enabled to help your client and your workflows:
- Selections / lightboxes allow clients to save a selection, to share it and collaborate with others, to download (or purchase) at once a series of selected files, etc…
- Star rating helps clients filter and identify the best images/videos in several steps;
- Comments allow clients to comment on individual files, which is especially useful in a collaborative scenario.
Star rating and comments can be enabled via the gallery settings. The Selection feature is enabled site-wise. Please refer to the help page on each feature for more details!
Ordering files to edit/retouch and delivery
This section will show you how to let a client order (without payment) for retouching a selection of images or videos out of an unprocessed shoot, so you can process/retouch ordered images and deliver them, in a professional and integrated way.
- Create a new gallery, ideally nested under a common “Client Area” gallery. Use the Protected proof-retouch-deliver gallery preset. The gallery will use the Client gallery Display Style, which focuses on proofing functionality over aesthetics. The gallery will be hidden, i.e. not visible in the thumbnail navigation for maximum privacy. In addition, this preset allows immediate delivery only for files in Final state.
- Upload the “proof” images/videos into the gallery.
- Open the Authorizations panel and add your client(s) email addresses, without changing the download authorizations. Hit Send.
- Done! Your clients are now able to order a selection of images as downloads.
When your client has made a selection and placed an order, you will be notified by email. When you receive the order:
- If needed, reprocess/retouch the images/videos on your computer. Upload them into the gallery making sure you use the same filenames as for the proof images, and using the Replace existing files with same file name option. This will replace the proof images with the final ones. In the upload form, also set the status of the new uploads as Final, which indicates to the system that the files are ready for delivery.
You can also replace individual files via their Replace button, and change their state in their File state panel.Replaced images in Final state in the administration space - When all (or part of) the images have been replaced with their final version, open the order, and click on Recalc items shipping methods, then Ship PENDING downloadable items now. This will trigger the delivery of the Final images to the client.
Image delivery on the order page.
To go further:
- You can explicitly indicate on the gallery what files are not retouched/edited: put the files in question in Proof state, and make sure that the gallery style used by the gallery is set to display the file states on their thumbnails. The retouched (final) files will also be clearly indicated.
- This method makes edited files orderable again and directly downloadable. It is also possible (in the download options) to only offer ordering for files in state Proof or Undefined.
- To sell files to edit/retouch, use a pricing profile attached to the files instead of free downloads - the same options for processing and delivery are available. Similarly, it is also possible to sell whole galleries to retouch/edit, via the Prices option for the gallery in question.
- To collect retouching instructions or order notes from clients, use a pricing profile attached to the files instead of free downloads, and make sure that the Let clients add a comment to each item in the cart option is enabled in the pricing profile settings.
Hosting an image/video archive for a client
You can use subgalleries for a client and host a small archive, for example mixing both already retouched/paid downloadable images as well as files to order.
To allow a client to download immediately certain images (or video clips) and purchase editing for others, you can mix the use of free downloads and pricing profiles:
- Assign files the state Proof or Final based on whether they are edited/retouched or not;
- Activate free downloads, offering them (via the download options) only for files in state Final;
- Attach to all images a download pricing profile, offering it (via the profile’s options) only for images in state Proof.
Differentiating files by “PROOF” / “FINAL” state
Metadata for each image or video file include its state: Undefined by default, it can be changed into Proof or Final.
This lets you offer downloads only for certain files, or automatically deliver only files in state Final.
The same options are available for free downloads, for purchased downloads of individual files (via pricing profiles) as well as for the sale of whole galleries.
The file states can also be used for example for internal approval purposes.
Assign / change a file’s state
Files’ state can be assigned upon upload, in the upload window options. The automation feature for galleries and collections can also assign or change the state.
The state can also be changed via the files’ File state panel, either for individual files or a number of selected files.
You can search for files by state in your admin space, and create corresponding smart collections.
Offer download only for files in a given state
For free downloads, download pricing profiles as well as whole gallery sales, when activating the Offer only for files in specific state option download/ordering is only offered for images/videos in a specific state. Files that are in another state will not be offered to the client.
This setting can be found under Custom downloads for free downloads, and under the Presentation and Settings tab for pricing profiles. It is available for any download option.
Automatically deliver only files in state “Final”
In a similar way, for free downloads, download pricing profiles as well as whole gallery sales, activating the Immediately deliver only files in Final state option restricts immediate delivery of files to those in Final state. Files in other states might be orderable, but they will be delivered only when their state becomes Final.
This setting can be found under Custom downloads for free downloads, and under the Presentation and Settings tab for pricing profiles. It is available for any download option.
This allows for example to offer a client to choose and order images to edit/retouch, and to deliver them after retouching. Please refer to the help on galleries for professional clients for more details!
Displaying the files’ state in a gallery on the website
Your can customize gallery display styles to show or hide the state of each file in a gallery on your site.
To display the state as a badge on thumbnails: under the Thumbnails pages tab in the gallery style editor, open the Gallery content element and see the settings under Image/video thumbnails.
To display the state as a badge on file detail pages, see the setting in the gallery display style editor in the Detail pages / Enlarged media element.
Newsletters and the mailing facility
PhotoDeck allows you to collect email addresses, and includes a simple mailing facility that allows you to send newsletters.
Newsletter signup and consent modes
By default, clients placing an order or creating an account on your website are invited to join your mailing list. You can control how people subscribe to your newsletter via My business / Legal / Mailings consent. For example, to disable and remove the newletter subscription checkbox, use the Don’t ask, don’t subscribe option.
In addition, you can also easily add a mailing subscription form on any gallery or custom page on your website, using the newsletter form element in the content editor. This allows you to add a newsletter signup form for example on your home page, or on a dedicated page linked from your navigation menu.
You can easily view and manage clients’ subscription to your mailings under My business / Clients.
Creating and sending a mailing / newsletter
Sending unsollicited email is not allowed on PhotoDeck.
To start, you’ll need to access the mailing facility via the My business / Mailings tab. Use the Create a new mailing button: the rich text editor allows you to beautifully format your mailing, including images, tables, and more. When you’re ready, use the Save Draft button and double check everything before you send. It’s a good idea to try sending the email just to yourself at first to make sure it looks fine on different devices.
Email software vary in their ability to display complex pages, and recipients are likely to read the message on mobile. We recommend you keep your mailing layout as simple as possible!
When your message is ready, you can send it to all of your mailing list’s subscribers, to a preset client group, or proceed to manually add email addresses.
Letting visitors view or download PDF files on your website
There are three different ways you can add PDF files to your website, and optionally let visitors download them.
Distributing and/or selling e-books and other publications
You can upload PDF files just like images and videos, in a gallery. This is best when your intent is to distribute or sell the files, for example ebooks. Only the cover page will be shown, as an image, but you can use the free download or ecommerce features to let clients download or purchase the full files.
Letting visitors quickly view and download a file
For files that are related to your website or your business, for example price lists or contract templates, you can include a link in a custom page that lets the visitor open the file:
- In a custom page (or gallery text), type the link text, select it, and click on the link icon
- In the link settings, under Document, select a previously imported file, or import a new one.
Adding a PDF to emails
You can also use the URL of a file previously uploaded to My website / Setup / Visuals & assets to “attach” the PDF to email as a link. The file will not be actually attached, but recipients will be able to download it in a click.
Using a custom PDF file as your website terms and conditions
Instead of entering your terms and conditions text, you can also use a custom PDF file. Optionally, that PDF file can also be automatically added to the files sent to the clients. Please refer to the help on terms and conditions.
Emails sent to clients
Customizing emails sent to client
You can customize the automated emails sent by your website to your clients, to add some information and/or to further strengthen your brand and your professional image.
Not only can you customize your global email template, but the content for individual email types (e.g. payment receipts) can also be adjusted. Here are a few examples of what is possible:
- Align the colors used in the emails with your website’s
- Add your logo in the header or footer for all emails at once
- Change how you great clients to align with your own tone
- Add delivery information on payment receipts
By default, you are sent a copy of each email sent to your clients. This helps you know what happens on your site and assist clients if they lose (or don’t receive) emails. You can stop receiving copies of individual emails by removing yourself from the CC line on the email customization page.
You will find this customization module under My website / Setup / Emails.
Client not receiving emails?
If a client has not received an email, check if you have received it yourself - unless you have disabled that feature, you are sent copy (as CC) of each email sent to your clients.
If you have received an email but your client has not, double-check that there is no problem with their email address, then ask them to check their Spam folder. Note that some email providers delete emails they consider Spam without showing them to their users.
If you use your own domain for your website, to reduce the risk that your website’s emails are categorized as Spam by mistake, we strongly recommend you also use an email address under that domain and configure your domain to explicitely allow PhotoDeck to send emails for your domain (see domain configuration guide). You can change the email address associated to your account under your personal preferences.
The easiest solution is to forward to the client the email you have received yourself. If it is a regular occurence that clients with valid email addresses do not receive your website’s emails, please contact support and indicate the clients’ email addresses.
Emails sent from my website are considered Spam
There can be many reasons why some messages sent from your website, like order deliveries or mailings, end up in a client’s Spam folder. While we strive to follow best practises regarding email sending, we do not control individual organizations’ Spam filters.
Here are a few recommendations to help with email deliverability:
- If you use your own domain for your website, make sure to also use a contact email address under the same domain. If you wish to use a different email as the one you use to log into your admin space, you can set it at My website / Setup / Name & URL.
- Additionally, set up your domain to explicitely indicate that you allow PhotoDeck servers to send emails on your behalf. Please refer to our domain configuration guide below.
- When sending mailings or newsletters, make absolutely sure that your recipients are OK with receiving them. If recipients mark your messages as Spam, it will affect the delivery of all your emails, even to other persons. Also make sure that the content of your mailings is not overly “commercial”.
Selections / Lightboxes
Selections / Lightboxes / Favorites
You can enable/disable the selections feature under My website /Setup /Visibility & features. PhotoDeck enables you to choose the most appropriate term for your clients: you might use Selection, Lightbox or even Favorites. Technically, this is the same feature, but some would prefer a different wording.
It is a selection of files (images, videos, documents…) from your website, independent from the ordering cart.
Selections are a powerful feature that complements the ordering cart. It is very useful in specific cases, but not necessarily in simple ones, for example when delivering images to private customers.
This feature allows your clients to select files, save that selection, and share it with others, along with comments.
Selections also make it easy for the client to download or buy the selected files at once, i.e. to add the selected files to the order cart, depending on what you allow for the files.

Logged-in clients can create and save multiple selections, and give them names for easier retrieval.
When this feature is enabled, you will find the selections created on your site under My images & videos / (your website) / Selections (or Lightboxes or Favorites, depending how they are called for your website.)
Make sure that a link to the Selection / Lightbox / Favorites is present in your website’s navigation menu so that your clients can access their selection, or add the link to the menu!
Purchasing a selection
A Buy all button is displayed in the selection when it contains files for sale (associated to a pricing profile), and the pricing profile has the setting Offer to add many files to the cart in one go activated.
Note that if you sell packs (a given number of images/videos in various formats at a given price), a selection cannot be transformed into a pack. Using selections to sell packs is not useful, as packs are themselves a kind of selection.
Selections for new / anonymous visitors
A new selection is created as soon as a visitor clicks for the first time on an Add to selection (or, depending on selected term, Add to lightbox or Add to favorites) button. To be able to access the selection later on, a client must save it to their account (they will be invited to create an account if needed).
Once a selection is saved, it receives a unique URL and can be shared.
Selections for logged-in clients
Clients with a PhotoDeck Client account can save and manage multiple selections. From the selection page on your website, they can switch easily between selections they have created, and selections that you (or other visitors) have shared with them by email.
When a logged-in client shares a selection, the recipient must log in to edit it (everyone with the link can view the selection).
Read-only selections
When sharing a selection, a logged-in client can choose to keep the selection “read-only”. This way, the person with whom the selection is shared can view but not modify the selection.
Controlling the selection access
Click on Authorizations to open the access control panel. You can add new clients to the access list, and indicate whether they are allowed to modify the selection.
Note that providing access to a selection does not circumvent the access rights given in galleries. For private galleries, the recipient of a selection must also have access to the gallery/galleries the selection’s images are taken from.
FAQ
How do I change the name of the selection feature to Lightbox?
You can customize the terminology in your website settings under the visibility and features section. You can choose between Selection, Lightbox, or Favorites to match your clients’ expectations.
Where can I see the lists my clients have created?
All selections created by your visitors and clients are visible in your dashboard under the My Media menu, within the specific website section.
Can I share a selection I created with a client?
Yes, as the site owner, you can create a selection and share it with a client. You can also control their permissions to decide if they can edit the list or only view it.
Does a visitor need an account to use this?
A visitor can start a selection immediately without an account. However, to save the selection for later or share it with others, they will be prompted to create a free client account on your site.
Sending a selection to clients
- Create the selection in your administration space under My images & videos ;
- Choose files from your galleries, and drag-drop them into the selection, or use the Add to selection button in the right-hand side column. For private galleries, make sure the clients have access to the gallery ;
- Open the Send by email panel, add your client(s) email address(es) ;
- Choose whether you want to send a link to the selection on your website, or to send directly a link to download the files ;
- Add a message, and send.
An email will be sent to all selected clients, guiding them through the account creation process when needed.
If you don’t want clients to have to log in, you can also leave the selection in public access, and email separately the direct link to the selection on your website. You can edit the selection access rights at any time via the selection authorization panel.
For files taken from private galleries, access to the galleries must also be given to the clients.
If the images are not in any gallery, or if you want the client to be able to make his own sub-selections, it is preferable to create a client gallery instead of a selection.
Website Activity tracking
Understanding the Statistics
Your own visits to your website are included in the stats.
Latest Visitors and Latest Searches
The Date is displayed in your local timezone (adjustable via ME / My Profile).
Origin is the estimated location of the visitor. It is based on the IP address. Note that advanced Internet users can easily spoof their location.
Pages is the number of pages viewed during that visit.
Latest Price Views
Views is the number of time the pricing page was accessed or refreshed. If the pricing profile is a multi-option profile (with drop-downs), every change in selection in a drop-down triggers a new calculation and adds to this number.
Why do I get different results with external trackers like Google Analytics?
It is normal to see significantly less visits reported via Google Analytics or StatCounter, for example.
If your website is set up to require user consent before setting tracking cookies (as required for example by the European GDPR), only users that accept cookies will be tracked.
In addition, it is easy for users to disable tracking via plugins in their browser.
Finally, external tracking tools use Javascript for tracking, so visitors need to have Javascript enabled for their visits to be recorded.
On the other hand, PhotoDeck stats are based on server-side access logs, in which all visits are recorded, and that may include visits by automated robots (although we don’t include in the stats the robots we know about).
Suspicious-looking activity
I noticed a large number of pageviews from China / Russia / another location. Should I be worried?
PhotoDeck logs include these automated robots we don’t know about. Having one’s site crawled by automated robots is normal and is not necessarily an indicator of suspicious activity -- after all, the Internet is public. If image theft is a concern, make sure you have an adequate watermark on your images. Your private galleries and high-res files are always protected.
Can I block visits from country X?
No. It is not possible to reliably know where a visitor is located, and IP-address based filters only give a false sense of security. It is easy to spoof one’s IP address / location, for example using a virtual private network (VPN), which is nowadays commonplace.
Teams and multiple users
Adding and managing team members
Team members are additional users who operate your account in your name and under your responsibility. They are managed from Avatar / My team.
Team members’ access can be restricted to specific parts of your account. Note that these rights are permissive, with the objective of allowing team members to work effectively with as little friction as possible, and it is essential that access is provided only to trusted persons.
The account holder can do everything allowed by the subscription. Only he/she is able to add and manage team members, manage the account subscriptions, accept the Terms and Conditions, create/delete media libraries and websites.

Media libraries access rights
This set of access rights allows the team member to access your media library (or libraries) to the extent you determine.
Like a virtual hard disk, a media library is the repository where files are uploaded (and from there, optionally published to your website).
The rights apply equally to all files in the media library. If further segregation is required, for example if some team members should not see all files, you can create different media libraries.
For example, photo agencies might create a media library per photographer, while brands might create a media library per department and creative agencies one per project. Please refer to the documentation on media libraries for further details!
A team member can be given access to several media libraries, with different access rights for each of them.

The following rights are available:
Base
Allows read-only view on all media in the library, downloading of originals, read-only view on all collections and smart collections.
Allows access to the files of an order which ID or link is known (for example if the order notification email is shared).
Write
Allows uploading media (including replacing existing media if the team member also has the Delete right), updating metadata of existing media and (un)assigning to/from collections.
Delete
Allows deletion of media.
Collections administration
Allows managing collections and smart collections (create, delete, change settings…).
General administration
Allows management of FTP inbox, watermarks, integrations with third-parties.
Website access rights
The following rights are available for every website on your account.
Website media
Allows access to all files on the website, including (un)publishing in existing galleries, assigning pricing, sending originals.
- View all media published on the website. If multiple media libraries are present on the account and the team member is given right to a media library, only media from that library are visible.
- For all accessible media: set pricing profile(s), publish/unpublish in galleries, download original, send by email.
- List all galleries on the website
- View and pick website’s visuals & assets
Galleries
Allows for example to create / delete galleries and to set their authorizations and prices.
- List all galleries on the website
- View all media from all media libraries in all galleries
- Galleries: create, delete, change settings, additional content, slideshow, reorder, set cover, set authorizations, set prices, set expiry, send by email, share on social networks, etc…
- Manage gallery/media comments
- View and pick website’s visuals & assets
Users and orders
Allows for example access to orders and their related media files, as well as to clients/stakeholder accounts and data.
- Manage orders, lab orders, quotations, selections, carts
- Manage clients, website users, client groups
- View all media in all orders, quotations and selections
- For all accessible media: download original, send by email, add to/remove from selections
- List all galleries on the website
- View and pick website’s visuals & assets
Business administration
Allows access for example to the stats, e-commerce setup, legal setup (terms, cookies policy, mailings acceptance) and mailings.
- View stats and timeline
- Manage e-commerce setup (pricing profiles, coupons, shipping profiles, tax profiles, labs, currency, payment processors, cart and checkout settings, etc…)
- Manage website terms, mailing acceptance policy, cookies policy
- List all galleries on the website
- View and pick website’s visuals & assets
Custom pages
Allows to create / delete custom pages, edit the website navigation menu and access the website visuals & assets
- Manage custom pages and their slideshows
- Upload and manage website’s visuals & assets
- Manage the website navigation menus
- Manage page comments
- List all galleries on the website
Website customization
Allows access for example to all design customization, website visuals & assets, analytics and SEO setup, redirections. Does NOT allow to create or delete websites.
- Manage website general setup
- Customize theme
- List all galleries on the website
- Upload and manage website’s visuals & assets
- Manage and customize display styles
- Manage code-based integrations (analytics)
- Manage social network links
- Manage front page
- Manage SEO settings
- Manage redirections
Creating and using multiple media libraries
When media files within an account must internally be split into different “buckets”, new media libraries should be created.
Media libraries are primarily silos with their own access rights. A team member’s rights on a media library apply to all files in that library.
This allows for example:
- to provide different team members access to different sets of media, i.e. when team members should be able to access some but not all of the media in the account.
Photo agencies might create a media library per photographer, while brands might create a media library per department and creative agencies one per client. - to organize the media in a clearer and more advance way than what Collections can offer. For example, an organization with two sets of media that are fully independent might want to create two media libraries, each with its own collections and watermark settings.
All media libraries share your account’s storage quota. Team members can be given access to multiple media libraries.

What is proper to a media library?
Each media library has its own:
- Media files and metadata
- Collections and smart collections
- Watermark settings
- FTP ingest folder
- File export settings
Creating media libraries in a way that properly matches your workflow and business model will help you benefit most from PhotoDeck. Feel free to contact support for any question, or to inquire about our consulting services.
Publishing to a website gallery from multiple media libraries
Websites and media libraries are fully independent. It is possible to publish to the same website gallery from multiple media libraries.

On the gallery’s admin page:
- the colored tag on each media indicates what libraries it is stored in ;
- if his rights on the website allow it, a team member can see the media from media libraries he/she doesn’t have access to.
Setting up a multi-photographer agency or a creative agency
The advanced proofing, delivery and e-commerce features are available to photo agencies and collectives in the same way as for individual photographers.
In this section, we focus on how to use PhotoDeck’s multi-user features in the context of multiple photographers uploading images and video clips to a single agency account and working as a team with the agency’s collaborators. Access to these features requires a subscription plan that includes them.
Team members’ access rights
Access to a PhotoDeck account can be given to team members. Each contributing photographer should therefore be added as a team member to be able to access the agency account with his/her own PhotoDeck credentials.
In the same way, team member account can be created for producers, assistants and other agency collaborator.
Each team member has a set of personal user rights, as defined by the account holder, that can allow him/her for example to publish images to the agency website(s), manage orders and clients, access the website(s) administrative features, etc…
By default, an account has a single media library. A media library is like a virtual hard disk, it is the repository where files are uploaded (and from there, optionally published to a website). The team member access rights settings include rights on the media library, and it is for example possible to restrict actions to seeing the files in the media library and to uploading new files, but without allowing deletion.
The team member’s rights on a media library apply to all the media library’s files. In the case of agencies and collectives with independent photographers, it can be beneficial to have a stronger segregation between the files from different photographers. This segregation is achieved by creating multiple media libraries.
Files from multiple media libraries can be published onto the same website and into the same gallery.
- For creative / production agencies which work is organized around clients, we recommend creating a media library for each client.
- For stock agencies and event agencies distributing the work of multiple photographers, create a media library for each photographer.
Please refer to the documentation on team members and to the documentation on multiple media libraries for further details!
Orders reporting
If you distribute, sell or license files via your PhotoDeck website, the order history’s CSV export includes for each ordered file the name of its media library, as well as its Author and Copyright metadata, in addition to its price. This can be used for example to easily allocate sales to photographers or contributors.
How to setup an agency or collective account
- As the account holder, upload initial images / videos to the default media library, and build the agency website. The website’s gallery structure should be set up to best serve navigation for your customers and not reflect your internal organization. If you have been using PhotoDeck as a single photographer until now, this step is most likely complete.
- Determine if you need full segregation between the different photographers’ or different client’s content, or if simply giving them access to the same media library is enough.
- Create a test photographer’s credentials by adding a new team member (Avatar / My team): use a different email address than the one you use as main PhotoDeck login. If photographers will have their own media library, create a new test library for your test photographer at the same time.
- Log in to PhotoDeck with a different browser using the test photographer credentials and verify the photographer’s access rights in practice. For example, upload a new image from that account and try publishing it to the website.
- You can now add actual team members and create new media libraries for them if required!
Creative production agency example
Let’s imagine an agency that starts working with a new client. One or several photographer(s) create images and videos, but their distribution and everything that relates to the client relationship is handled by an agency producer. Files are retouched before delivery. The process could be as follows:
- The producer:
- Creates a new media library dedicated to the new client ;
- Creates a new website for the client, or a gallery within the existing agency’s website ;
- Creates with the PhotoDeck administrator the photographer’s team-member account if they don’t have one already, and provides them with the BASE, WRITE and DELETE rights to the media library (no rights on the website).
- After a shoot, the photographer uploads preview images and videos directly to the media library via their PhotoDeck account, makes sure that their Author metadata field is correctly set, and puts them in PROOF state ;
- The producer checks the new files and publishes them to the corresponding client gallery, organizing them if needed into sub-galleries. He/she then authorizes and invites the client to the gallery ;
- The client orders images or videos to be retouched ;
- The producer receives the order notification, and gives to the photographer the link indicated in the notification email along with additional instructions ;
- The photographer opens the link to see in the library the ordered files, then replaces the initial versions in the library by new, retouched versions, putting them in state Final. Once all files are processed, he/she informs the producer ;
- From the client order page, the producer checks that all files are correctly processed, and when appropriate, hits the button to deliver all files to the client.
This is an example and many variations are possible!
Stock agency / Event agency example
Let’s consider an agency that sells images or videos from multiple contributors, and which website is managed by an administrator. The process for each new contributor could be:
- The administrator creates the contributor’s team member account as well as a dedicated media library, providing them at least the BASE, WRITE and DELETE rights (no rights on the agency’s website) ;
- The contributor imports their images and videos, making sure the Author medadata field is correctly set with their name ;
- The administrator checks the new files, and publishes them for sale on the agency’s website ;
- When a customer places an order that includes the contributor’s images, the order report will include the information that will for example allow allocating a share of the sale to the contributor.
Account and billing
Managing your PhotoDeck account and subscription
Access your account and billing preferences via the Avatar / Subscription & add-ons menu. From these pages you can renew, upgrade or close your account, purchase additional options such as expanded storage or microjobs, as well as manage auto-renewal and update your payment card details.
Renewing your account
From the Avatar / Subscription & add-ons page, you can easily renew your subscription in 1, 3, and 12 month intervals (3 and 12 months for some plans and add-ons). If you have purchased optional add-ons, the system will also renew them if possible.
Managing auto-renewal
You can make your life a little easier by setting up auto-renewal. When auto-renewal is enabled under Avatar / Subscription & add-ons / Automatic renewal preferences, a payment debit is made 1 week before the expiry of your last subscription, and it also includes other subscriptions (e.g. add-ons) set to expire before the end of the new subscription. You can cancel auto-renewal at any time from this section as well.

Please note that the automated renewal period is independent of manual renewals and of your plan. For example, if you renew for a year and your automated renewal period is the month, you will be renewed for a month when the year-long subscription expires.
Change payment method
You can save a new payment card from Avatar / Subscription & add-ons.
Invoices
You will receive a simple payment receipt by email for every purchase. For proper book-keeping purposes, invoices in PDF format can be found under Avatar / My orders.
Purchasing Add-ons
Use the Buy / terminate add-ons button to add additional features to your cart. These include for example expanded storage and the multi-language option.
Note that the same add-on cannot be purchased multiple times. For example, if you already have subscribed to a 40GB extension add-on, you cannot purchase a second one, you must pick the 100GB add-on instead (and let the 40GB add-on expire).
Upgrading/downgrading your subscription
You can upgrade/downgrade your subscription at any time using the Renew / change plan button. Please see separate help page below.
Closing / terminating a PhotoDeck account
You can close your account at any time via the subscription management page in your admin space. Once the account is effectively terminated, your data will be deleted from our servers in accordance with our data protection policy and privacy laws.
Changing plan: Three things to know
PhotoDeck allows you to change plan at any time to upgrade or downgrade your subscription in just a few clicks under Avatar / Subscription & add-ons / Renew / change plan. Credit remaining from paid subscriptions is used during the plan conversion.
Changing plan is immediate
Once you validate your order for a plan change, your new plan will start immediately and continue until the date shown in the cart.
No credit from previous conversions
The credit reported to your new subscription is based on the purchased subscriptions at the time of conversion. No credit is carried over for subscriptions resulting from previous plan changes or add-on termination. In other words, credit from purchased subscriptions can only be applied once towards a plan change.
You should therefore ensure that the duration of the new subscription is consistent with the duration you’re planning to use it for. In doubt, choose the shortest possible duration for the new subscription.
If you wish to downgrade for a few months of “off-season” and then upgrade again, keep subscriptions of low duration (month-to-month).
Choose a new 12-month subscription to benefit from a lower price
The remaining credit used towards to the new subscription is based on the amount paid for the initial subscription. Even if the initial subscription was for a 12-month duration, you should therefore chose a 12-month duration for the new subscription to benefit from the yearly discount - unless you are not sure to stay with the new plan for a year (see above).
Storage space and quota
Your PhotoDeck subscription includes a certain storage quota. If it is not enough, note that some offers allow you to extend it. You can compare plans and their available options via the Avatar / Subscription & add-ons tab. If your plans allows it, you can also subscribe to a storage extension from this same page via Buy / terminate add-ons.
File deletion
To free up storage space, you can also delete files. Please note:
- The used storage space displayed on the dashboard is refreshed only periodically. For immediately updated information, please consult the import new files window.
- To delete a gallery, open it under My images & videos and go to More / Delete. When deleting a gallery be sure to also confirm the deletion of the files themselves. If you don’t confirm it, the files are not deleted. You can view files present in your library but not published in any gallery from My images & videos / Media library / All files in library / Search using the Publication criterion.
What are microjobs?
Microjobs are small tasks which you can freely perform up to a monthly limit. These task units are used for example to submit images to AI engines for analysis and metadata generation, or to index images for face recognition.
Each subscription plan has a certain monthly limit of microjobs. Each “month” starts and ends on an fixed day of the month (the day your account was initially opened), and the quota is reset on that day each month (“unused microjobs” are not carried over to the following period).
The end date of the current monthly period is visible with the remaining microjobs counter in the AI assistants panel.
Raising the monthly microjob limit
You can add to your subscription options to raise your monthly microjob limit from Avatar / Subscription & add-ons / Buy / terminate add-ons. Note that the availability of the different microjob limits depends on your plan, please see the plans comparison table for details.
Each monthly period started is always considered fully used up. When changing plan or terminating a microjob quota add-on, no credit is given for the current monthly period.
When purchasing larger microjob limits, they will follow the same fixed monthly schedule. Therefore, keep in mind that the first period is generally shorter.
What if my needs fluctuate a lot?
Microjobs limits are designed to accommodate varying workloads and fluctuating needs. For example, event photographers may use more face recognition or bib number analysis during peak periods or for a single large event.
PhotoDeck lets you easily purchase add-ons to raise microjob limits to handle increased usage, and you are free to terminate add-on subscriptions when they are not required anymore. So you can for example purchase a higher limit the day you need it, and terminate it as soon as you’ve done what you needed with it, before the next monthly period starts. When terminating an add-on, any unused month is credited to your base plan as an extension to its duration.
Tell-your-Friends referral program
With the “Tell-your-Friends” program, you get rewarded for helping the PhotoDeck community grow, all while helping your friends save some money.
Here is what your coupon code is about:
- The code gives your friends a 50% discount on their first month with PhotoDeck!
- Every time a new member uses your code, we immediately add 1 full month to your own PhotoDeck subscription
(Your coupon code is displayed on your subscription page. You must have previously purchased a subscription to be eligible.)
How to promote your coupon
Here are a few ideas:
- email your photographer friends to tell them why you like PhotoDeck, and that with your coupon they get 50% off their first month
- put it on your blog or website
- share your coupon code on your social networks
- blog about it
- share with your local photographer community or camera club
Important notes
- Like you, we don’t like spam: please be considerate in how you promote your coupon
- The overall idea of the program is to reward members that actively promote PhotoDeck: your code must not appear on PhotoDeck pages or coupon-sharing sites… In case of abuse, your code will be de-activated without notice, and reward subscriptions will be canceled.
- Any aspect of this program, including rewards and discount, might change at any time
Adding, managing and deleting websites
PhotoDeck allows you to host multiple websites from within the same account, which is more pratical and less expensive than opening new PhotoDeck accounts.
With this feature, it is easy to add a new website for a different specialty or for a specific event. A dedicated website for a specific client, under their own branding, is something that can help you differentiate and significantly raise the value the client sees in working with you.
All the websites in an account are fully independent and do not share any setting. They can therefore have different designs, URLs, prices, etc… Images and videos are published from the account’s Media Library(ies), and the same files can be published on different websites.
Adding another website
To add a website to the account, make sure your quota for new websites has not been reached, and if needed, purchase an “Additional website” add-on to your subscription.
When your subscription allows it, you can add a new website under My website / + Additional website. The admin space interface will then show both websites wherever relevant, so you can easily work on either.
Copying elements from a website to another
The design and pricing profiles for a website can be exported via their Backup options, and reimported to a different website.
Pages and other content cannot be copied, but images and videos from a Media Library can be published on multiple websites at a time.
Deleting a website
All websites in the account are equal and can all be deleted, even the first website created with the account. To delete a website, first go to My website, make sure to select the correct website to remove, and open its Setup / Visibility & features menu. There, you will find an option to delete the website.
In a second step, you can terminate any unneeded subscription add-on you might have previously subscribed to.
Lastly, unless you want to keep them in your account, delete images and videos that are not published anymore, using the Search feature in the Media Library(ies).