Getting started: Setting up client galleries
In this section, we will see how to create your first client galleries for two common assignment cases: private consumers as clients (for social photographers), and editorial/commercial proofing with professional clients.
Galleries for private customers
Here is a recommended way of setting up galleries when working with private individuals (events, portraits, weddings…), where privacy and simplicity are key.
Once you have set up a first gallery, it will be easy to reuse the same settings for other clients.
- Create a new gallery, ideally nested under a common “Client Area” gallery. Use the Private gallery with general password preset. The gallery will use the standard Gallery Style, which is a good balance between aesthetics and proofing functionality. The gallery will be hidden, i.e. not visible in the thumbnail navigation for maximum privacy.
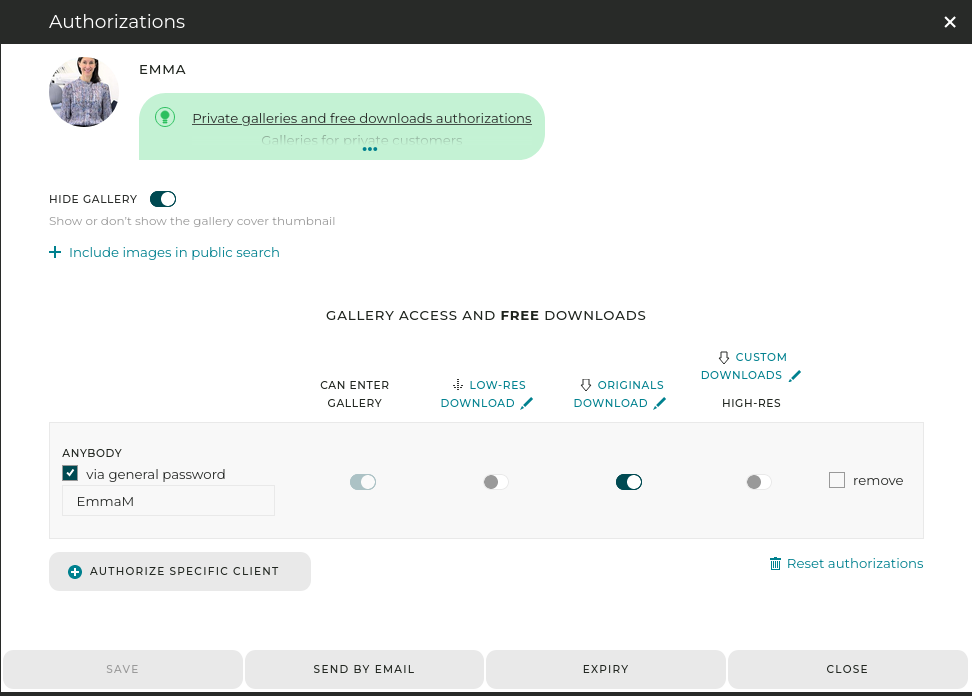
- Click on the Authorizations link to open the access settings. Set a password to access the gallery. Setting a general password will not provide you with as much detail as to who exactly accesses the gallery, but it will be very simple for your clients. Save.
- Optionally, you can allow commenting on images and/or star-rating (More / Comments and star rating).
- Upload the images into the gallery.
- If the images are for sale, attach the proper pricing profile(s) to all images in the gallery.
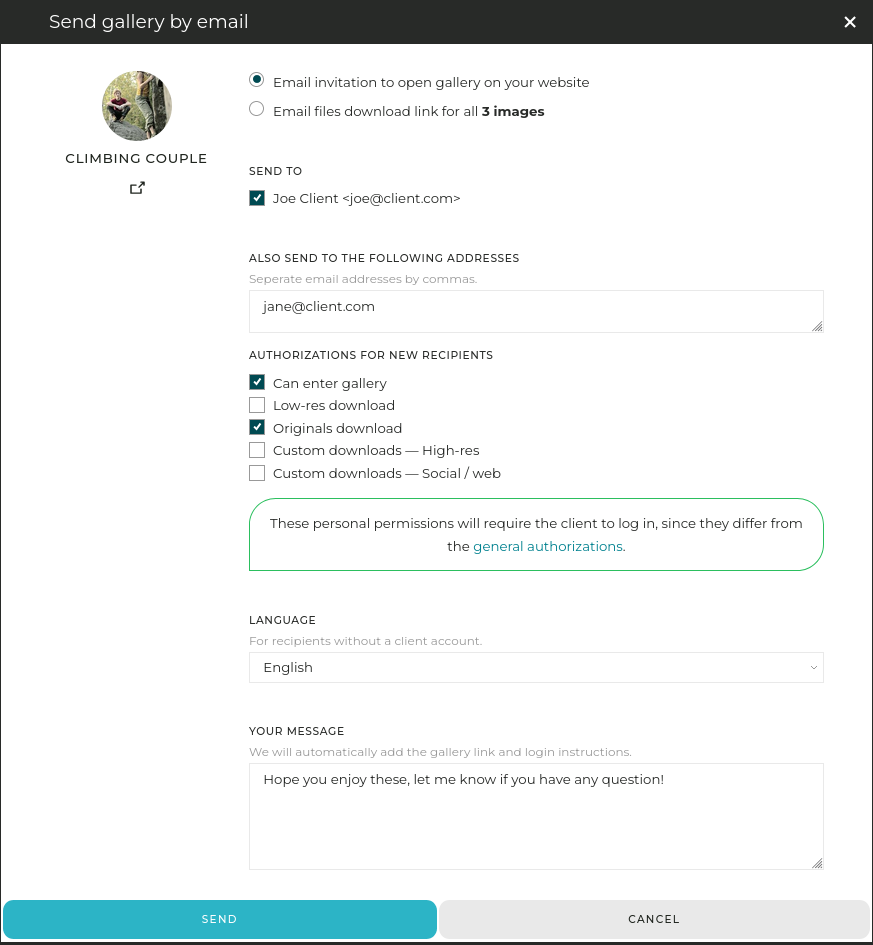
- Done! All you now have to do is send the link to your clients, with the password. You can do that under the Send by email panel. Don’t forget to indicate the gallery password in the message!

Allowing free high-res downloads to consumers
In some cases, you might want to allow your clients to download high-res files. This can be done by adding new authorizations to the access options.
Note that you can allow only specific clients, based on their email, to download the images. This has two benefits: you get a better control and view over who downloads what, and you can allow a wide group of people to purchase from the gallery (say wedding guests) while allowing a subset (e.g. groom and bride) to download high-res files for free. The drawback is that it requires your clients to create a login on your website in order to access the free downloads.
Alternatively, you can allow anybody with access to the gallery to download for free. This of course, will override any download pricing profile set for the individual images and won’t provide you information on who downloads images.
Please refer to the help on authorizations for further help!
Galleries for professional clients
PhotoDeck is designed to let you work with professional clients in multiple ways. Here are some examples of what you can do:
- Send in a few clicks a link to download multiple files;
- Quickly create a secure gallery for proofing and 1-click download;
- Let the client choose and order images to edit/retouch, and then deliver them easily;
- Host client photos archives;
- …
Once you have set up a first gallery, it is easy to reuse the same settings for other clients.
Proofing gallery with immediate download
In this example, we create a hidden gallery that lets the client view the images/videos and download them in a click, one by one or all at once.
- Create a new gallery, ideally nested under a common “Client Area” gallery. Use the Protected gallery for professional clients preset. The gallery will use the Proofing Gallery Style, which focuses on proofing functionality. The gallery will be hidden, i.e. not visible in the thumbnail navigation for privacy.
- Upload images into the gallery.
- Open the Send by email panel and add your client(s) email addresses as well as the download authorizations. Hit Send.
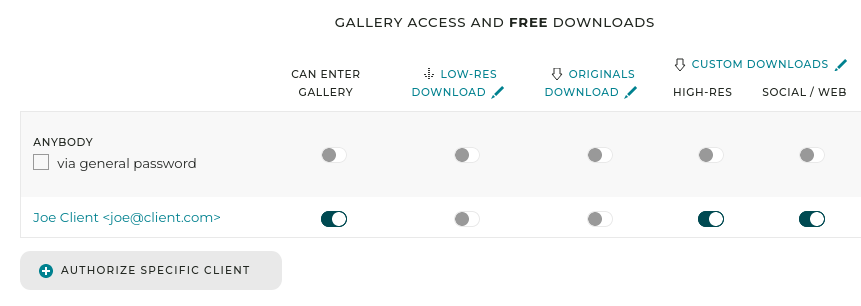
- Done! You can always check/edit the client permissions under the authorization panel accessible via the Protected access link above the thumbnails.
To go further:
- For improved security, or if you wish to track who downloads, you can add authorizations based on individual emails, either to access the gallery or to download. It is then compulsory for the client to authenticate on your website. If you choose this option, don’t forget to deactivate the accesses for the line Anybody in the authorization table - please refer to the help on private galleries and authorizations for more details!
- You can create custom download products to automatically reprocess files before delivery to the client: resizing, renaming, metadata update, etc…
- You can show the download options for files in Final state only (e.g. retouched files).
To get familiar with the process from a client’s perspective, try it yourself with a “test client” email address! For clarity, make sure it is different from your PhotoDeck login, and test with a different browser (or in a private/anonymous window in your browser).
Proofing and delivery of files to edit/retouch
This section will show you how to let a client order (without payment) for retouching a selection of images or videos out of an unprocessed shoot, so you can process/retouch ordered images and deliver them, in a professional and integrated way.
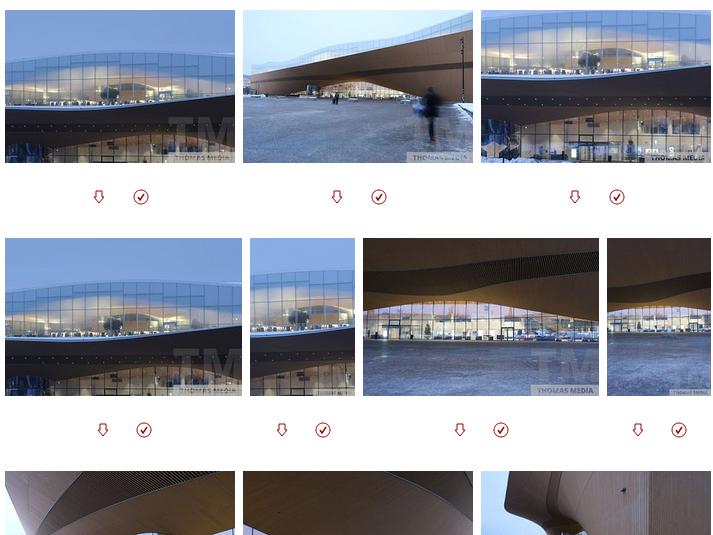
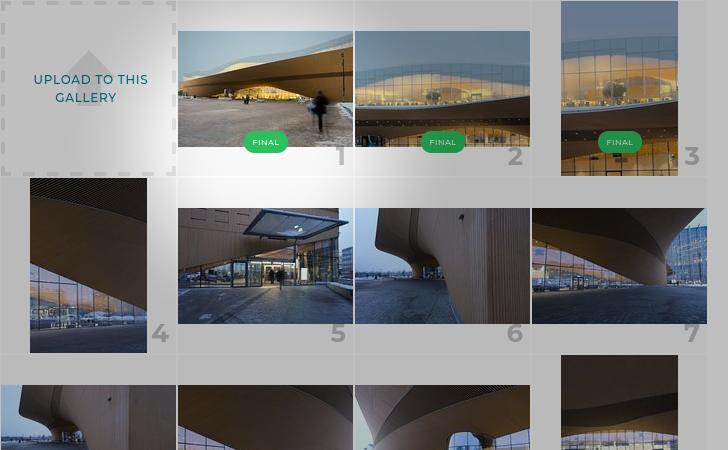
Gallery of out-of-camera, unedited images with download and selection features activated. Clicking on the download icon will add an image to the cart for ordering.
- Create a new gallery, ideally nested under a common “Client Area” gallery. Use the Protected proof-retouch-deliver gallery preset. The gallery will use the Proofing Gallery Style, which focuses on proofing functionality over aesthetics. The gallery will be hidden, i.e. not visible in the thumbnail navigation for maximum privacy. In addition, this preset allows immediate delivery only for files in Final state.
- Upload the “proof” images/videos into the gallery.
- Open the Authorizations panel and add your client(s) email addresses, without changing the download authorizations. Hit Send.
- Done! Your clients are now able to order a selection of images as downloads.
Typical settings for a full assignment proofing gallery.
When your client has made a selection and placed an order, you will be notified by email. When you receive the order:
- If needed, reprocess/retouch the images/videos on your computer. Upload them into the gallery making sure you use the same filenames as for the proof images, and using the Replace existing files with same file name option. This will replace the proof images with the final ones. In the upload form, also set the status of the new uploads as Final, which indicates to the system that the files are ready for delivery.
You can also replace individual files via their Replace button, and change their state in their Metadata panel.
Replaced images in Final state in the administration space - When all (or part of) the images have been replaced with their final version, open the order, and click on Recalc items shipping methods, then Ship PENDING downloadable items now. This will trigger the delivery of the Final images to the client.
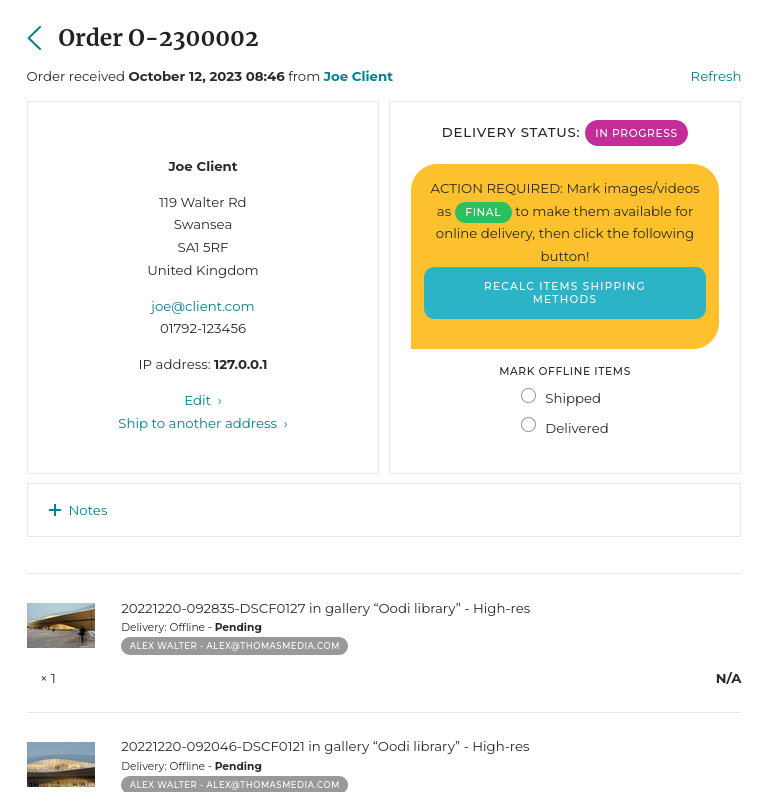
Image delivery on the order page.


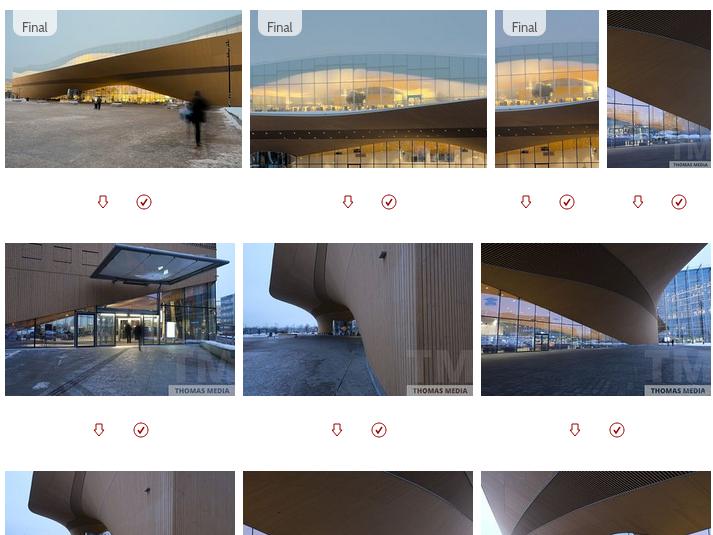
Replaced, Final images in the gallery. They can be re-downloaded from the gallery at a later stage, for example if the client loses the files that were automatically delivered to them.
To go further:
- You can explicitly indicate on the gallery what files are not retouched/edited: put the files in question in Proof state, and make sure that the gallery style used by the gallery is set to display the file states on their thumbnails. The retouched (final) files will also be clearly indicated.
- This method makes edited files orderable again and directly downloadable. It is also possible (in the download options) to only offer ordering for files in state Proof or Undefined.
- To sell files to edit/retouch, use a pricing profile attached to the files instead of free downloads - the same options for processing and delivery are available. Similarly, it is also possible to sell whole galleries to retouch/edit, via the Prices option for the gallery in question.
Hosting an image/video archive for a client
You can use subgalleries for a client and host a small archive, for example mixing both already retouched/paid downloadable images as well as files to order.

In this example gallery, Proof images can be purchased while Final images can be directly downloaded.
To allow a client to download immediately certain images (or video clips) and purchase editing for others, you can mix the use of free downloads and pricing profiles:
- Assign files the state Proof or Final based on whether they are edited/retouched or not;
- Activate free downloads, offering them (via the download options) only for files in state Final;
- Attach to all images a download pricing profile, offering it (via the profile’s options) only for images in state Proof.